Affiliate links may be included for your convenience. View our privacy and affiliates policy for details.
If you’re a geek or have a geek in the house you probably know all about Doctor Who and his faithful TARDIS. If you don’t have a geek in the house, you’ve probably still seen pictures of what looks like a blue telephone booth (it’s actually a time-traveling spaceship that happens to look like a police call box).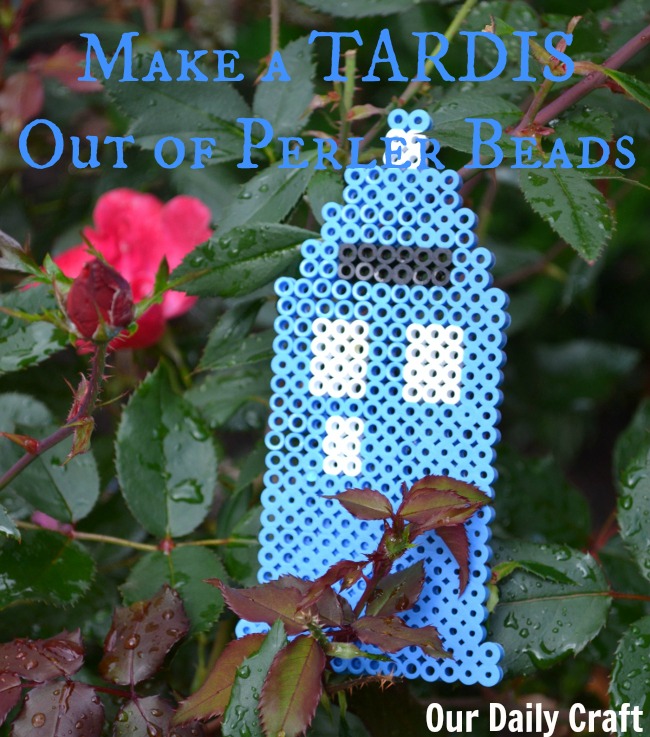
In celebration of the geek in my house and the 50th anniversary of the Doctor Who series this year, I thought I’d craft up a little TARDIS of my own from Perler beads (or melty beads, whatever you want to call them). It’s actually a pretty easy project, a lot of fun, and the perfect thing for geeky Halloween or other holiday decor (you can bet I’m finding a place for this on the Christmas tree, right alongside the “Star Wars” ornaments).
What You’ll Need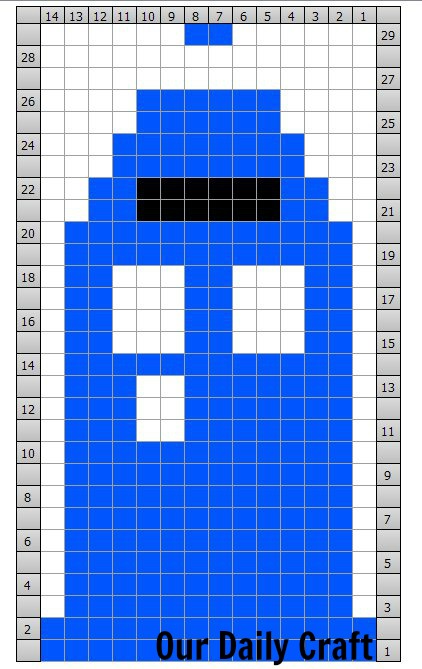
- blue, black and white Perler beads (I used 252 blue, 32 white and 12 black)
- square Perler peg board
- iron sheet and iron
- copy of TARDIS chart (optional)
What You’ll Do
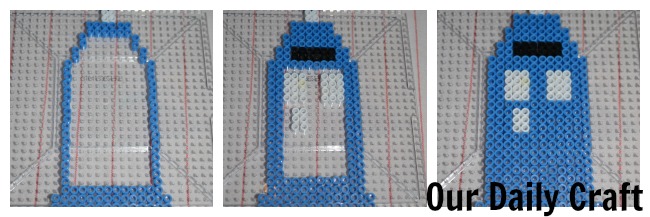
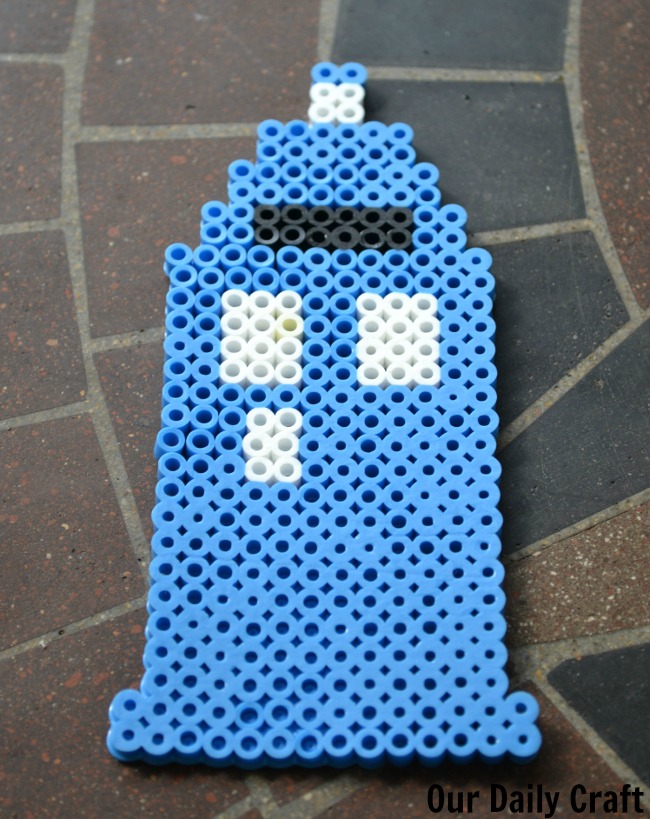
It’s really simple to make this on your own without the chart, but I wanted to include it just in case.Start at the bottom of the peg board with 14 blue beads and do that for 2 rows.
Then I did 12 beads across for 8 rows. The next 3 rows have a 2-bead section of white after 3 beads of blue on the left-hand side (that’s for the Police Call Box sign), then there’s one solid row and then 2 blue, 3 white, 2 blue, 3 white, 2 blue across for 4 rows for the windows.
Then 2 rows solid again, 2 rows that have 10 beads (2 blue, 6 black, 2 blue). Then 2 rows of blue with 8 beads and 2 with 6. The top is 2 beads each for 3 rows: 2 white and 1 blue at the top.
Follow the directions for melting your beads. Mine just use a warm iron, put the paper on top and go until they’re melty. Let cool a bit, remove the paper, flip and repeat.
I love this bit of geek craft! Have you ever made any geek-inspired crafts? I’d love to hear about them.
And if you happen to have a geek kid in your house, check out the activities for geek kids my friend Amanda highlights on her site.