Affiliate links may be included for your convenience. View our privacy and affiliates policy for details.
This cute cross stitch pencil bookmark is easy to stitch and a great project for back to school or to give as a teacher gift. Though it has a few colors, it’s very straightforward so this might be a good one to try if you’re somewhat new to cross stitch and haven’t done a project with multiple colors before.
Supplies

I happened to have a bit of 14-count cross stitch fabric that was folded, and when I cut it on the fold it was almost exactly this size, which looked like a perfect bookmark to me. The full piece is almost 2 inches/5 cm wide and just over 5.5 inches/almost 14 cm long. (The actual design area is 23 by 74 stitches, and you’ll want a couple extra stitches all around.)
I used six colors on mine, and I don’t have exact numbers or names for any of them because they came out of deep stash. But the colors I used are:
- black
- light brown
- yellow
- a darker orange-yellow
- a darker brown (this could also be gray if you have it)
- pink
You can use what colors you have on hand that look like a pencil to you, or change it up and make it a colored pencil cross stitch bookmark!
You’ll also need a needle, a small pair of scissors, a piece of felt the same size as your bookmark, and a larger pair of scissors for trimming the felt (and the cross stitch fabric if you want to give your pencil a point like I did).
A PDF of the chart in both color and black and white is available to download here: cross stitch pencil bookmark chart. The full PDF is 4 pages, but you won’t really need it if you read the description for how I approached the pattern below.
Stitching the Cross Stitch Pencil

I started at the black end with one stitch, and worked one more stitch on each side of each row until I’d worked 7 rows in black.
Then I switched to my lighter brown and continued to increase one stitch on each side of each row until I had 23 stitches (that’s 5 rows of brown).
For the body of the pencil there are 5 stitches on each side worked in yellow, and the middle is 1 orange, 3 yellow, 1 orange, 3 yellow, 1 orange, 3 yellow, 1 orange. You can also work the pencil all in one color if you’d rather.
This pattern fills up the rest of your bookmark except the “bottom” 8 rows. There are 3 rows worked with all 23 stitches in the darker brown/gray color, then 1 row of 23 stitches in pink. Work 1 fewer stitch on each side of each row until you’ve worked 5 rows in pink.
That’s really all there is to it, but you can also work from the chart if you’d rather.
Also my daughter thought the eraser looked small (and I’d originally planned to make it 2 rows longer) so if you agree, add a couple more rows worked in the same way if you have room.

Making the Cross Stitch Pencil Bookmark

Once the stitching of the bookmark is done, cut out a piece of felt the same size as your piece of cross stitch fabric. I used black because it was literally on my desk when I needed felt (left over from my cat bookmark) but you can use whatever color you like.
I also used black embroidery floss because it was already out, but you can coordinate or contrast with the thread if you want.

Cut the pencil point end of the fabric and felt to make it triangular if you want.

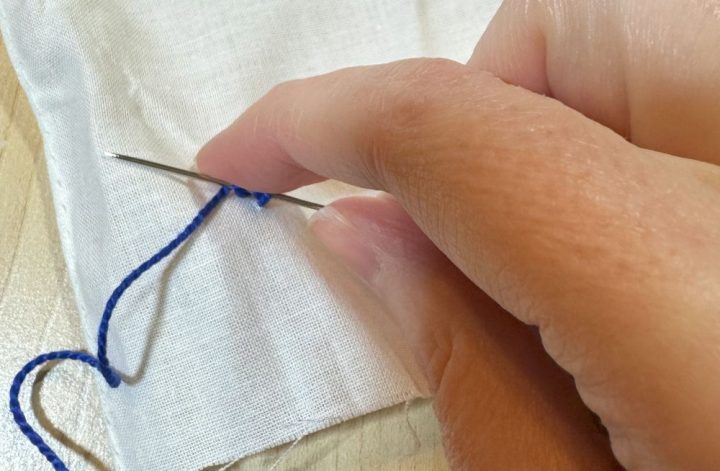
Use blanket stitch to sew the felt backing to your cross stitch pencil piece. This is the same process used in my cross stitch patch tutorial.
I should have left a little more space at the top because I ended up having to make my stitches there deeper, but I don’t mind.

Find a book to read and stick your cross stitch pencil bookmark inside!