
Affiliate links may be included for your convenience. View our privacy and affiliates policy for details.
This Santa hat beanie knitting pattern is a great way to subtly add some Christmas cheer to your outfit, and it’s worked on a circular knitting machine so you can finish it in an afternoon!
Materials

For this hat I used an Addi King circular knitting machine, which has 48 pins. You can also use a 46 pin Sentro if that’s what you have. The fit won’t be all that much different.
I used about 178 yards of Briggs and Little Regal 2 ply in Red and 38 yards of Briggs and Little Heritage 2 ply in Washed White. Any worsted weight yarn in red and white will work; this is just what I had handy.
You’ll also need a yarn needle and a pair of scissors.

Size
My hat is double thick and once finished is about 10 inches/25 cm long and almost 18 inches/45.72 cm around. This fits a teen or small adult. If you want a bigger hat, crank more rounds. I’ve seen 140 rounds advised for an adult male hat, and include math for that below.
Add this project to your Ravelry queue.
Knitting a Santa Hat Beanie

Because we’re making a double thick hat, the bottom of the hat as worn is actually in the middle of the project, so you’ll start by casting on with the red yarn.

Crank 50 rounds for the size shown, or 60 for a larger hat.

When you get to the end of that last round of red, take the red out of the tensioner and add the white, leaving a tail draped down the center of the machine. Hold both ends as you begin the next couple of rounds to help prevent dropped stitches.
Crank 20 rounds in white. Leave a tail and cut the yarn.

Pick the red yarn back up, leaving it somewhat loose. You can also cut the yarn and rejoin in you like.

You’ll crank another 50 (or 60) rounds in red, but once you’ve cranked a few you can go and tie the white yarns to the float of the red yarn, or just weave in the ends on the inside of the hat.
Cut the red yarn, leaving a long tail.
Finishing the Hat

Thread the red yarn onto your yarn needle and crank around once more, picking up each stitch on your sewing needle and threading them onto the yarn.
Pull tight to close up the top of the hat.

I like to go through the stitches again and pull tight again to get the hole as closed as I can. I pulled so tight I broke the yarn this time, so be careful when pulling the hole closed. Weave in the yarn end here.

You can also weave in the yarn ends from the white yarn now if you haven’t already.

Go back to the cast on yarn end and pull on it to close up the other end of the hat. Here again you can go through the stitches twice if you like to try to pull it tighter.

Use the center hole in the tops of each side to go in and out from the inside to the outside of the hat, taking the yarn under the leg of a stitch on each side each time to secure the layers.
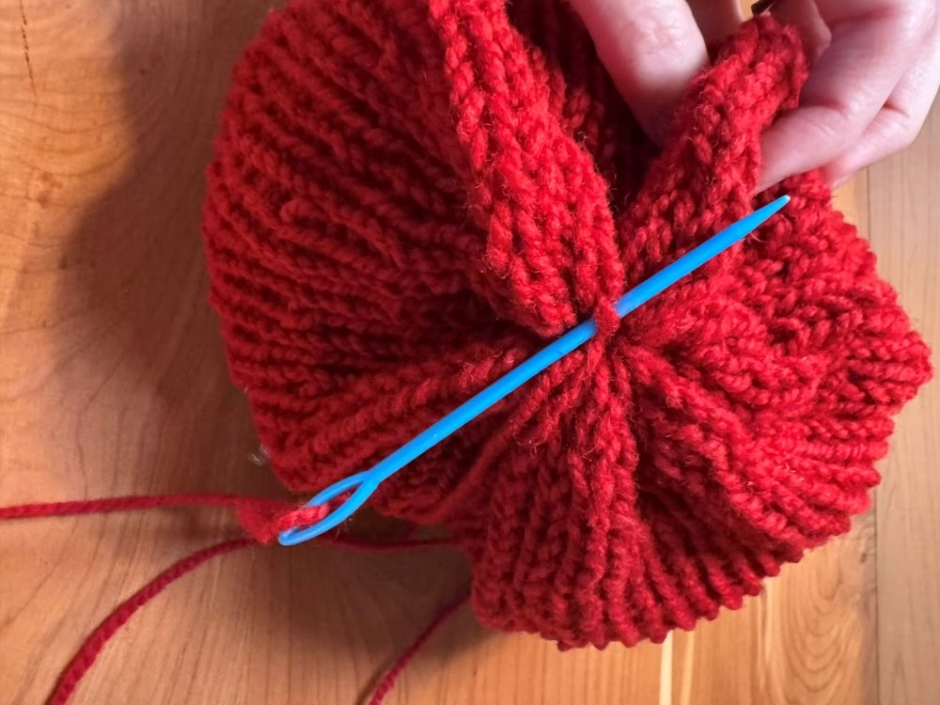
If desired you can use the yarn to close up the hole at the top a bit more when you’re done, and take the yarn into the hat between the layer and back out to hid the yarn end. Trim the excess yarn.

Stretch the hat to make the stitches more even and make sure it’s folded in half so you’ve got a white edge on both sides.

On me I feel like this Santa hat beanie is too tall to wear flat.

I like it better with the brim folded up, which I also think makes it look a little more Santa-y. You can decide what you like on you!
If you like this pattern, I’d appreciate it if you like this pattern on Ravelry!


