Affiliate links may be included for your convenience. View our privacy and affiliates policy for details.
The other day I was going through a box of clothes I’d saved for upcycling and I found a pair of jeans that almost fit, so I decided it was time to try this method to make a waistband bigger.
These jeans are from Old Navy (thanks to their tag codes I know I bought them in Q2 of 2001) and other than having holes at the bottom of the pockets they’re in pretty good shape. They seemed the perfect candidate for a simple but not very pretty way to make a waistband bigger.
This is not the method to use if your waistband tends to be visible when you wear clothes, but as long as you don’t wear these with your cropped shirts it’s totally serviceable.
Supplies

First you’ll need your jeans or other pants. I think these are about a size too small for me, or it may just be they’re 100 percent cotton so they don’t stretch and that’s why they don’t fit (see also: they are older than my teenager).
I feel like this method gets you an inch or two (2.5 to 5 cm) but it wouldn’t work if you’re trying to dramatically alter the size of your pants.
You’ll also need wide knit elastic. Mine is 2 inches/5 cm wide because that’s what I had in the house. It comes in white or black; I happened to have black.
A sewing machine with jeans colored thread (or thread that coordinates with your jeans) is essential. I used a regular needle but you can also use a denim needle on your machine if you need a little extra power.
You’ll also need scissors (for fabric and thread) and some Fray Check is super helpful for dealing with the raw denim bits.
How to Make a Waistband Bigger

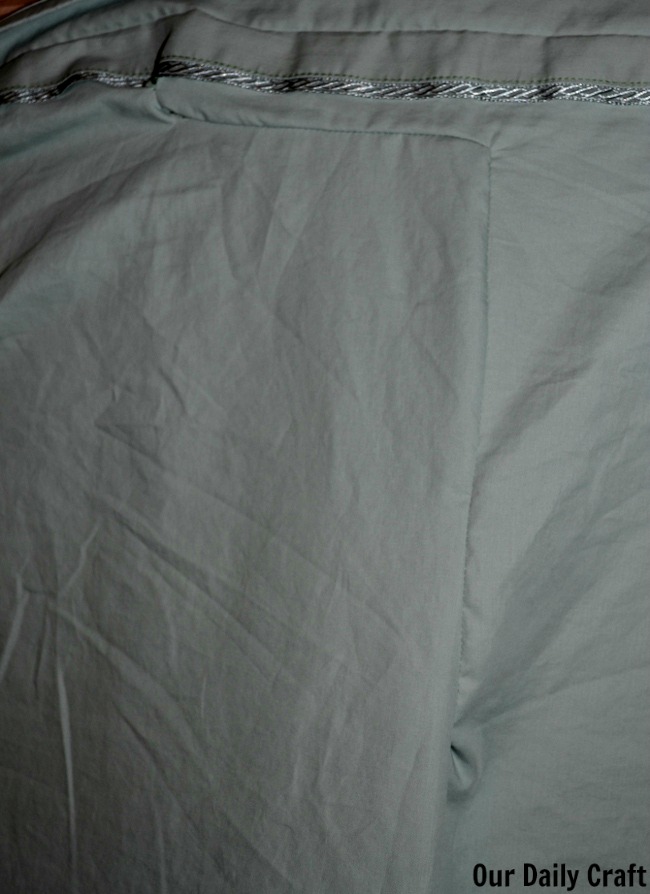
First you need to cut a couple of slits in the waistband of the jeans to give you a place to put your elastic. Position them somewhere you won’t be cutting through the belt loops or pockets. Mine are about an inch/2.5 cm back from the side seam on each side.
If you’re smarter than me you’ll cut these slits about the same length as your elastic is wide. I cut the first one and then tried the jeans on and it ripped a bit, so I ended up cutting the second one to that length, which was much longer than I needed. You can always sew it back up like I did but so much the better to just avoid all that extra space.

Cut your elastic. It should be a little bit longer than the width of the slit opened up to allow for seams. Mine is almost 3 inches/7.5 cm long.
Pin or clip the elastic to the pants, with the cut edges of the elastic on the inside of the pants. Line the top of the elastic up with the top of the waistband.

Sew the seam on each side. Align the stitching with the slit on the jeans so the seam runs a little diagonal.

Fold any remaining opening in the pants wrong sides together and sew that up. You’ll also sew the elastic closed at the bottom.

Use Fray Check on the raw edges of the denim to keep them from unraveling too much. You may need to use your sharp little scissors to trim away some threads before you do this.

Testing the Wider Waistband

I wasn’t sure this method to make a waistband bigger was going to work that well, but it did. These jeans are wearable again (or will be when I fix the holes) and that makes me feel good. Plus it was super easy to do with stuff I already had in the house. How great is that?

Clearly these raw edges need a little more cleaning up, but I was so excited to try them on I left it a little ragged. But you get the idea. And when my shirt is pulled down you can’t tell I mended them at all.

Do your jeans need more help than just a bigger waistband? Check out my tips on fixing a fresh hole with weaving, sewing a new hem on your jeans, and using an old T-shirt to mend a small hole.