Affiliate links may be included for your convenience. View our privacy and affiliates policy for details.
My teen has always been a maker, but I decided to make a STEM shelf to keep some of her (and my!) tools a little closer at hand.
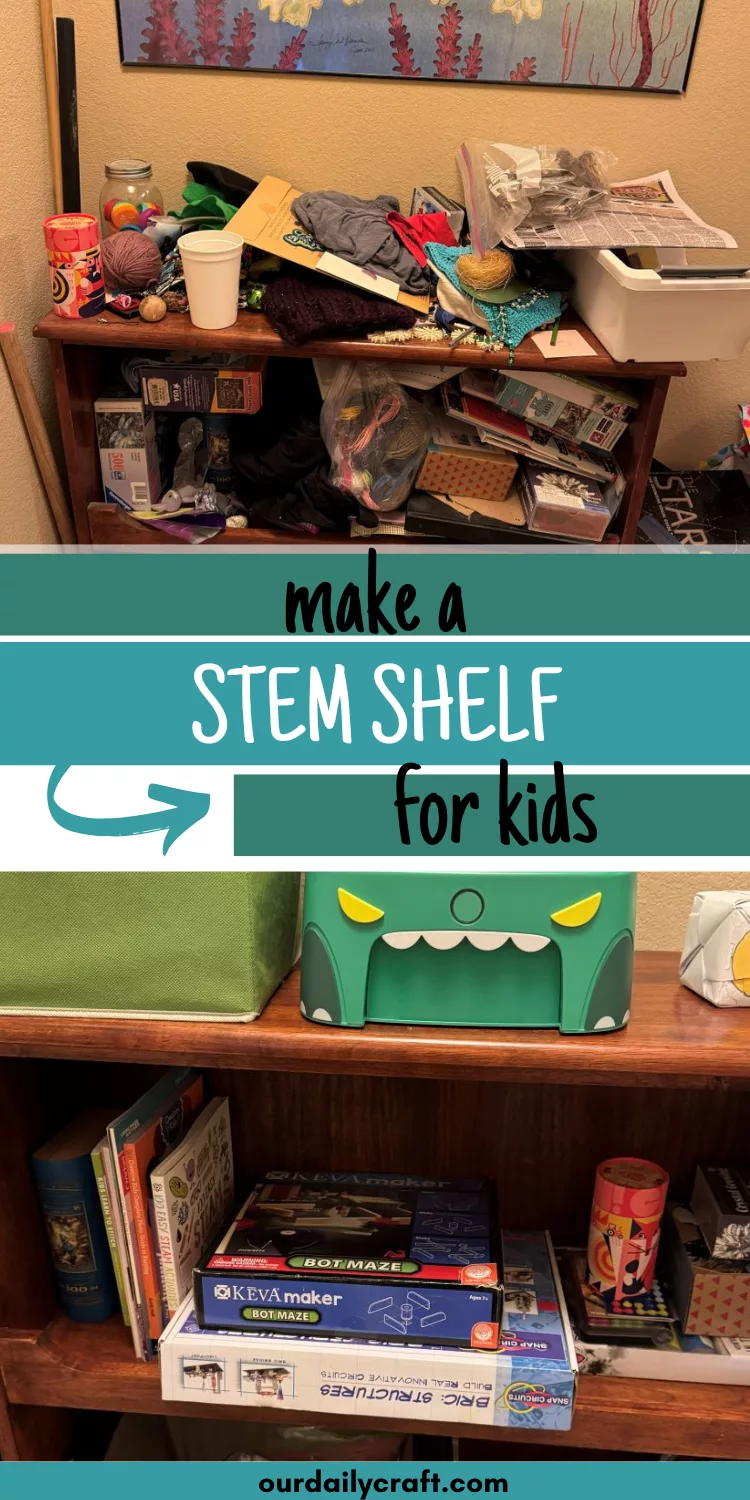
We have this shelf in the hallway upstairs, next to her bedroom and what we still call the playroom even though it’s mostly for art and storage these days, that’s also just down the hall from my office.
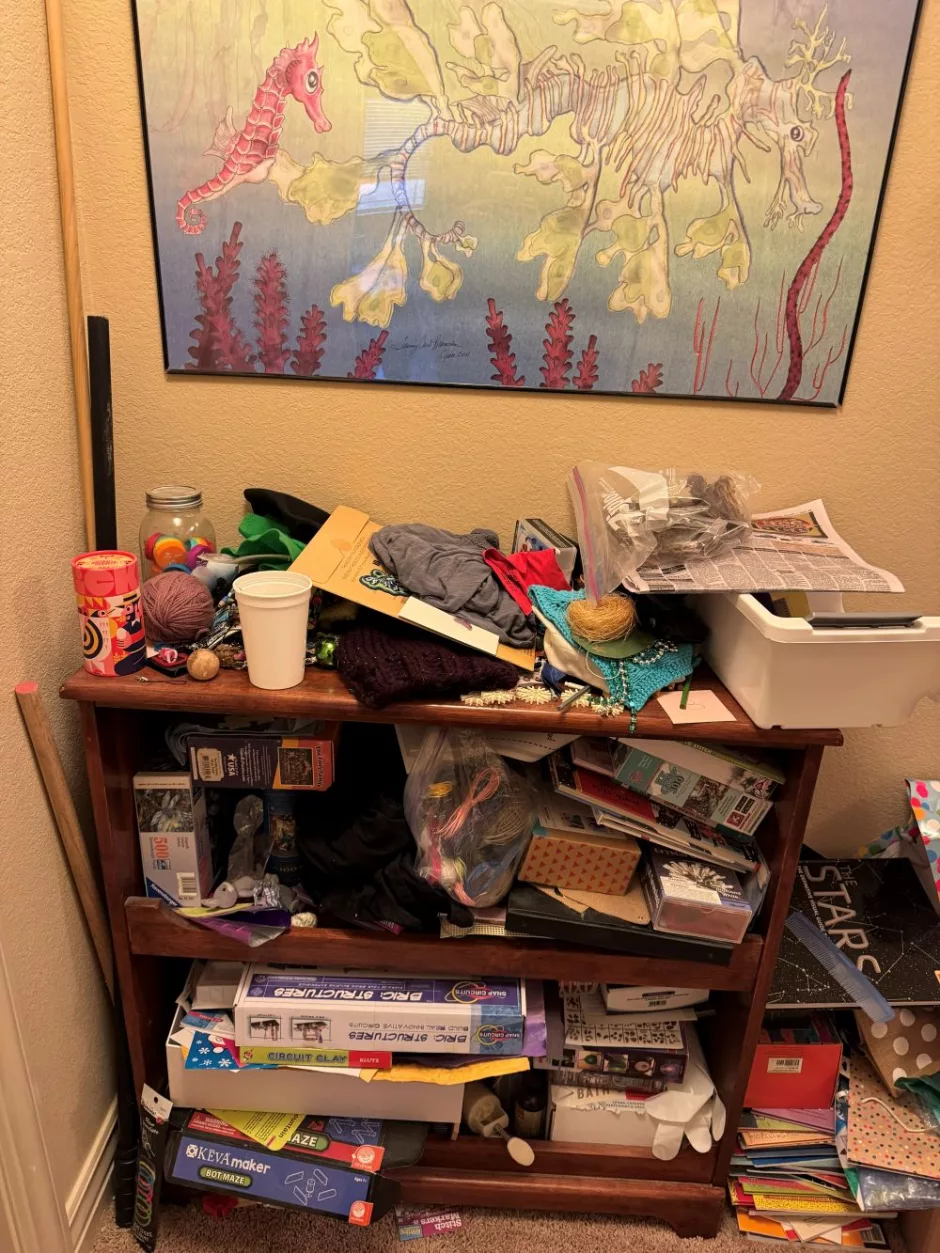
It’s the perfect place to put supplies we might both use for projects, but it’s pretty much always been a dumping ground for random stuff (and very few books).
I decided it was time to do something about it.
How to Designate a STEM Shelf or Other Area
Making your own tinkering area, no matter the age of your kids, is all about access. It needs to be somewhere that’s easily seen, easy to get to and hopefully easy to grab stuff from and also put it away easily.
No one is going to use even the best organized, most well curated space if it isn’t easy to do.
That’s why this shelf is perfect because she walks by it every time she leaves or enters her room, it’s steps from where she might use the materials (her desk in her bedroom or the floor of the “playroom,” where she does most of her projects) and I didn’t load it with all the things we own in the hope it can stay organized and inviting.
If you don’t have an obvious place, think of somewhere that doesn’t get a lot of use as is and see if you can repurpose that area (if the problem isn’t that it’s a hard to get to/uncomfortable/unpleasant space). Or pile up a cart full of goodies that you can keep near the dining room or kitchen table.
Our original art area was at the kitchen table and we had a shelf there that held supplies so they were easy to grab right where she could work on things.
Clearing Space
Like any kind of decluttering project, the first thing you’ll need to set up your STEM shelf or whatever area is a clear space.
I set a timer for 10 minutes a few times so I could get it done in a day but didn’t have to deal with it all at once.
Because this shelf had stuff of hers on it, I threw away what was obviously trash, gathered the things I wasn’t sure about for her to look at and collected things I wanted to put back on the shelves when I was done.
Make sure you dust or wipe down the space before you add anything else. These shelves were ridiculously dusty, which makes sense because I can’t remember having ever dusted them.
Making Your STEM Space
When you’re deciding what to put back on your STEM shelf or tinkering space, think about what your kid(s) already like to do and how you can reinforce that. More on this below, but if your kid already loves to draw but maybe has been doing a lot of digital art instead of paper and pen art, make those supplies more prominent.
If they love beading, or knitting, or fiber arts, or circuitry, or collecting random bits and putting them together, all of those things can be presented in this way.
It’s kind of like doing invitations to play with younger kids, where you just set out a few materials at a time in the hope they’ll catch the kid’s eye. You don’t load them up with four kinds of paper and three different kinds of markers in the hope of getting them to draw. Constraints help them (and you, by the way) focus and actually help you to be more creative.
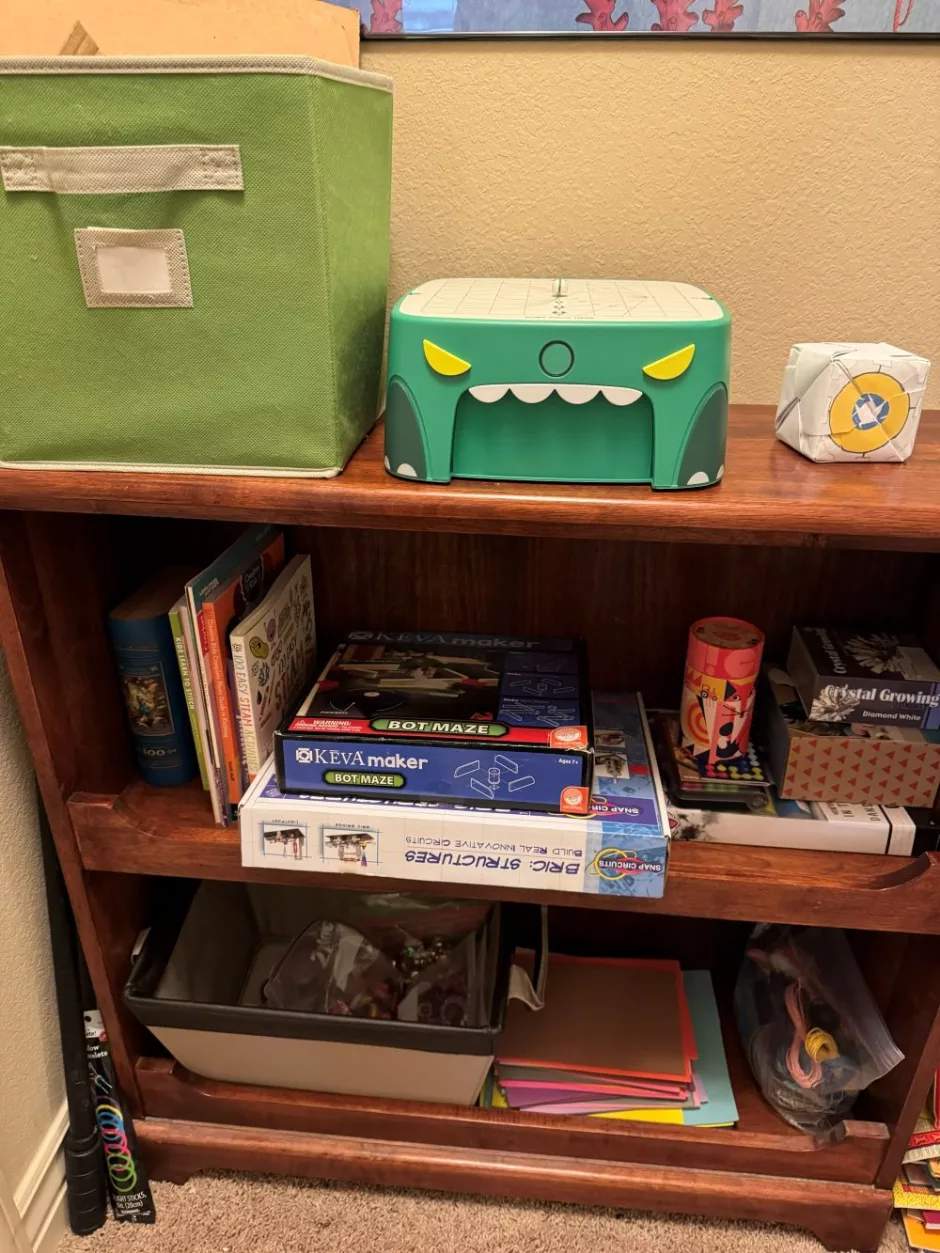
Here you can see a box of cardboard and a cutter on the top shelf (more on that in a second) and a cube she made a few years ago, because displaying their projects is always a good idea. There are a couple of puzzles, some project books, old STEM toys we already had like a KEVA Maker Bot Maze and BRIC Structures box (similar), some games, craft kits and a classic STEM crystal growing kit. On the bottom are craft supplies like paper and foam, some beading supplies and random crafty bits like jingle bells, buttons, pipe cleaners and the like.
We partnered with BeaverBot to try their BeaverBot Cutter 2 (which they sent us to try but we received no other compensation), and this is the perfect place for it to live (both because it’s accessible and because I’ll probably use it as much as she does).
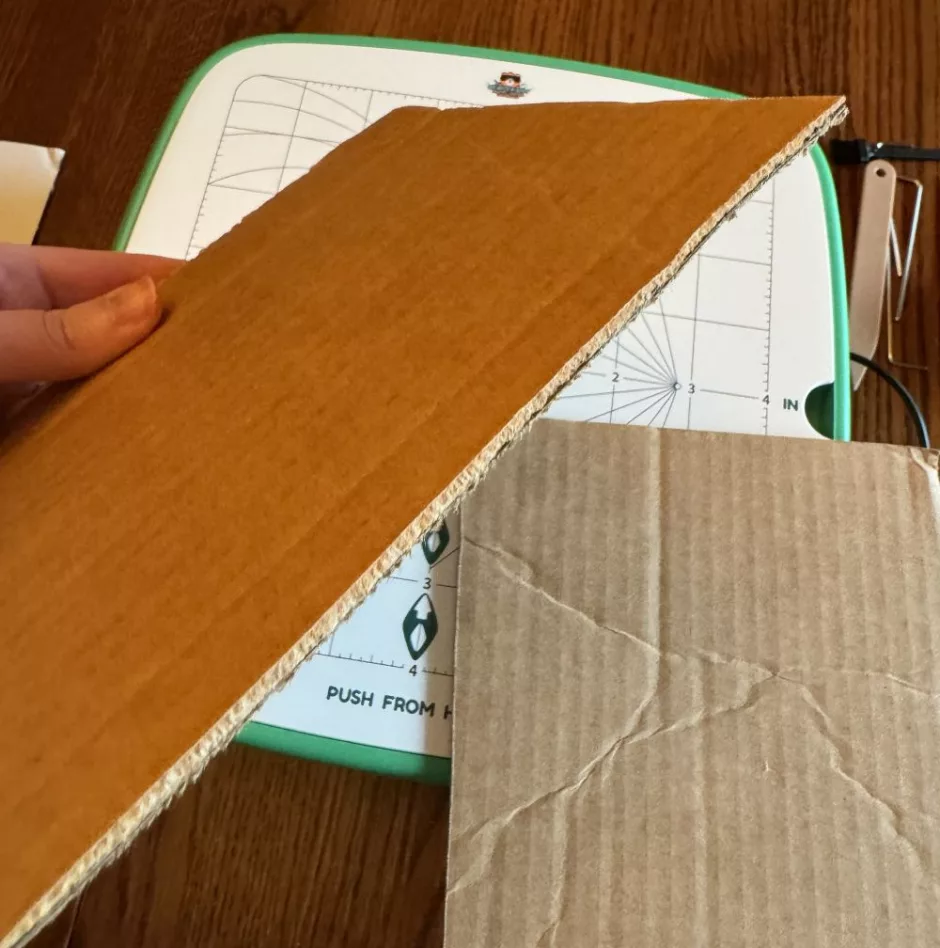
This cutting tool is like a table saw for little kids, allowing them to cut cardboard, paperboard, card stock and leather up to about 1/8 of an inch thick with no blade. It’s a heavy duty (and heavy; it weighs in at about 5.5 pounds or 2.45 kilograms) cutter that allows you to cut straight lines, wavy designs, poke holes and cut a shape out of the center of things and more. The cutting surface has angles and circles marked to help you make the shape you want.
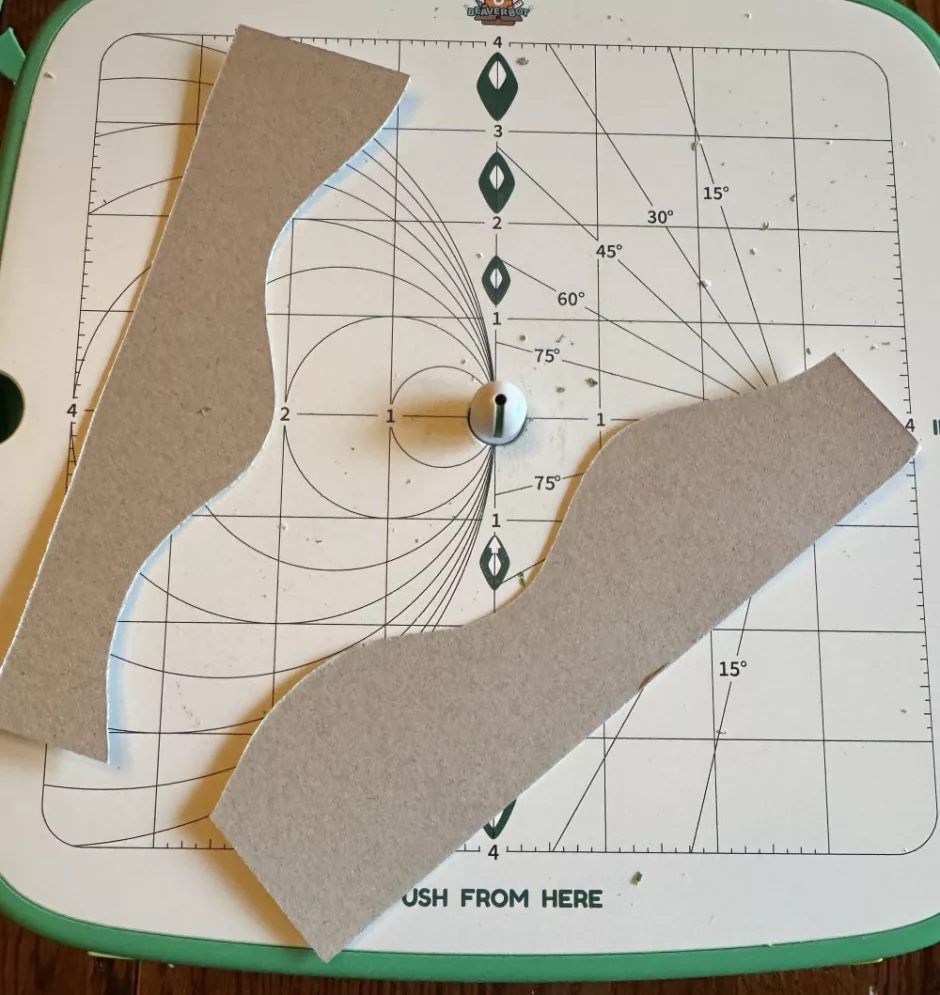
I’m sure I’ve only scratched the surface of what it can do — check out my full review over at Craft Gossip — but I love having this as a cutting option because the girl does a lot with cardboard and its a safer option even at her age than using a craft knife or box cutter.
How to Get (or Keep) Older Kids Interested in Tinkering
I know not every child stays interested in STEM and tinkering as they get older. I think it helps in our household that there is always crafting going on, that we often try to solve problems using what we have, and that tinkering was built into the curriculum at her school from a young age and hands on projects are still a thing even in high school.

She has taken Stagecraft three times, which has exposed her even more than I already did to sewing, painting, building and even getting to use some power tools.
If you don’t have that kind of history in your family, the analogy to invitations to play is a great one for getting started. I would also suggest trying to present things that they’ve liked in the past or that relate to something else they enjoy to try to pique their interest.
For example, a kid who loved when finger knitting was the trend in school (I feel like second grade was when this happened for us) might be interested in yarn crafts or cross stitch. If your kid loves Pokemon, search online for Pokemon STEM activities and grab the supplies for a couple of them. Offering a LEGO set rarely goes wrong, and that can be an entry point for other building and tinkering activities. And you can print out my LEGO challenge cards for them to try if you have lots of bricks already.
Most of all, though, try demonstrating that you are interested in these things, not just throwing them out there for them to explore on their own. Let your kids see you crafting or tinkering. Talk about what you’re making. Kids may want you to show them what’s there or have you offer to make something with them, or they may want you to be hands off. You probably know which one your kid is.
Do you have a STEM shelf or tinkering station in your house? Any tips for tinkering with older kids? I would love to hear them!