Affiliate links may be included for your convenience. View our privacy and affiliates policy for details.
Air dry clay is a fun medium for kids and adults alike, but it’s kind of plain on its own, so let’s look at some ways to finish air dry clay projects.
There are a lot of options including different kinds of paint, markers, even adding paper via decoupage. Let’s take a peek at some of my favorites, as well as the pros and cons.
Acrylic Paint
Acrylic paint is probably the most common of the ways to finish air dry clay. Acrylic paint is easy to use, can be inexpensive, comes in every color you could possibly want and generally provides good coverage.
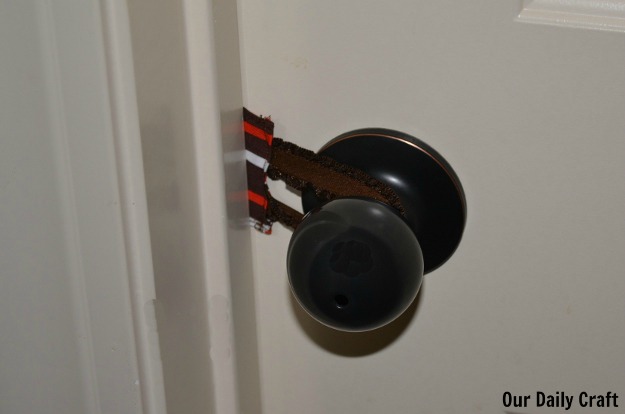
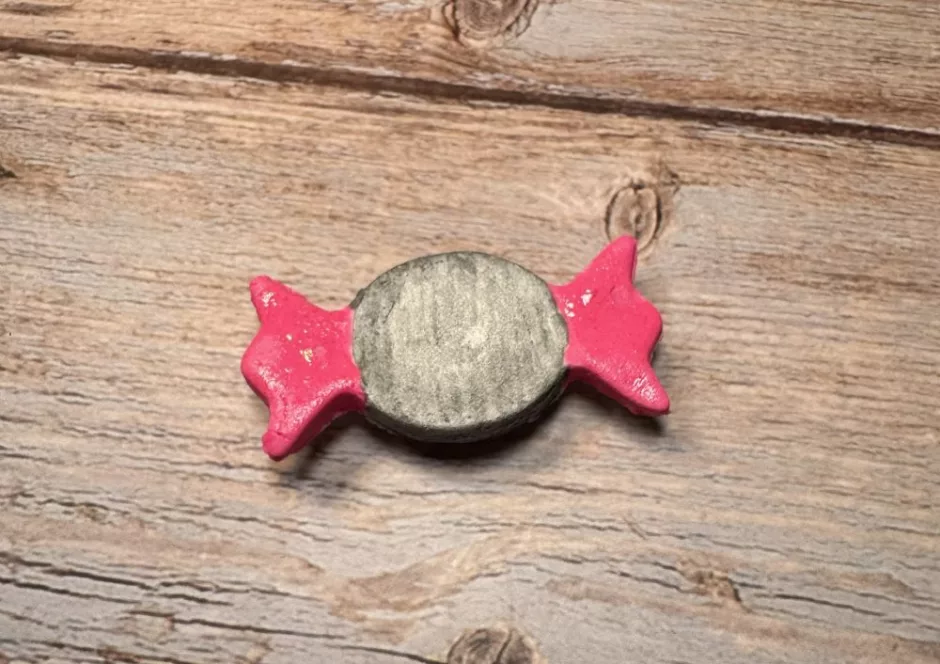
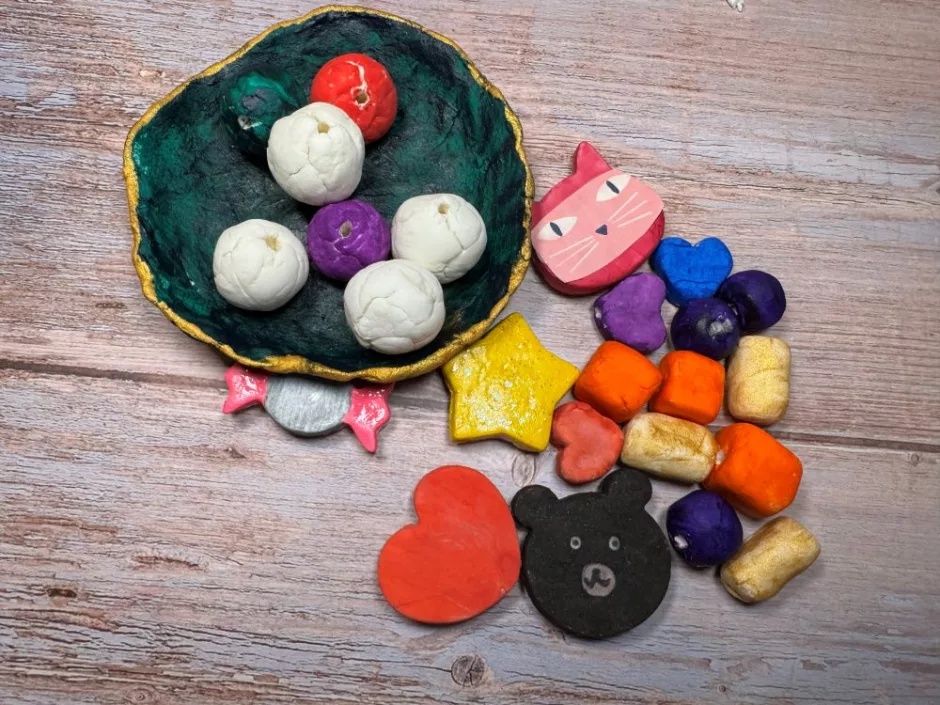
It’s slow drying and can show brushstrokes or unevenness in the color. I used acrylic paint on this ring holder, as well as the bead and magnet inside it.
If your piece has deep cracks it can be difficult to fill them with paint.
Watercolor Paint
Another option is to use watercolors instead of acrylic paint. You can buy a basic palette of watercolors at the grocery store, and these are totally fine for painting air dry clay.
Watercolor is easy to use and dries more quickly than acrylic paint.
It’s also watery, so you’ll need to build up multiple layers of paint, and it can be hard to get a consistent color. It also can show brush strokes. The color is not as vivid as acrylic (and a basic set of watercolors won’t give you a ton of color choices).
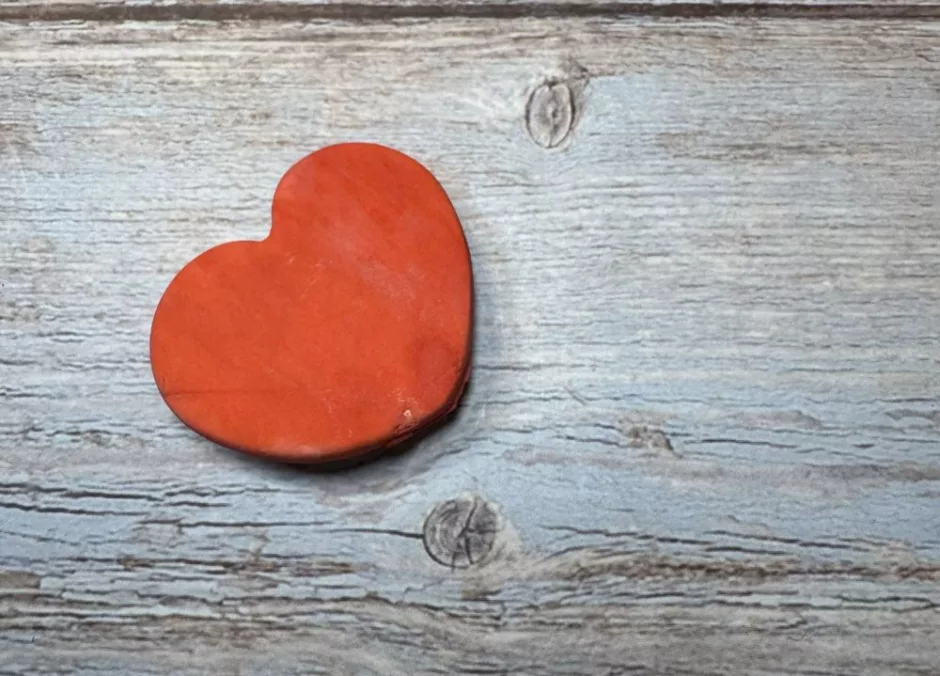
I’ve heard projects painted with watercolors are prone to fading but I haven’t experienced that yet. I used watercolor paint on this heart magnet. I love the look of it and how it gives a smooth, matte finish.
Markers
There are so many different kinds of markers (and different price points) that you can use to finish air dry clay, from the kids’ Crayola markers to Sharpies to artist quality products.
The general qualities of working with markers are the same, though: they’re easy to use, ideal for kids and dry super fast. Depending on the markers you have or purchase, you might have a wide variety of colors to choose from or just a few options.
Coloring an air dry clay piece with markers is going to take a lot longer than using paint. And when it’s done it kind of looks like you used markers in that the colors can be kind of streaky and inconsistent.
If your clay has cracks, it can be difficult to get a standard brush or chisel point marker into the crannies, which makes the cracks more prominent. (Learn how to avoid cracks in air dry clay projects.) Fine-tip markers can get into the cracks but it would take a long time to cover a whole piece using a fine-tip marker.
For that reason dual tip markers would be ideal for ways to finish air dry clay, but those are more expensive than your basic school markers.
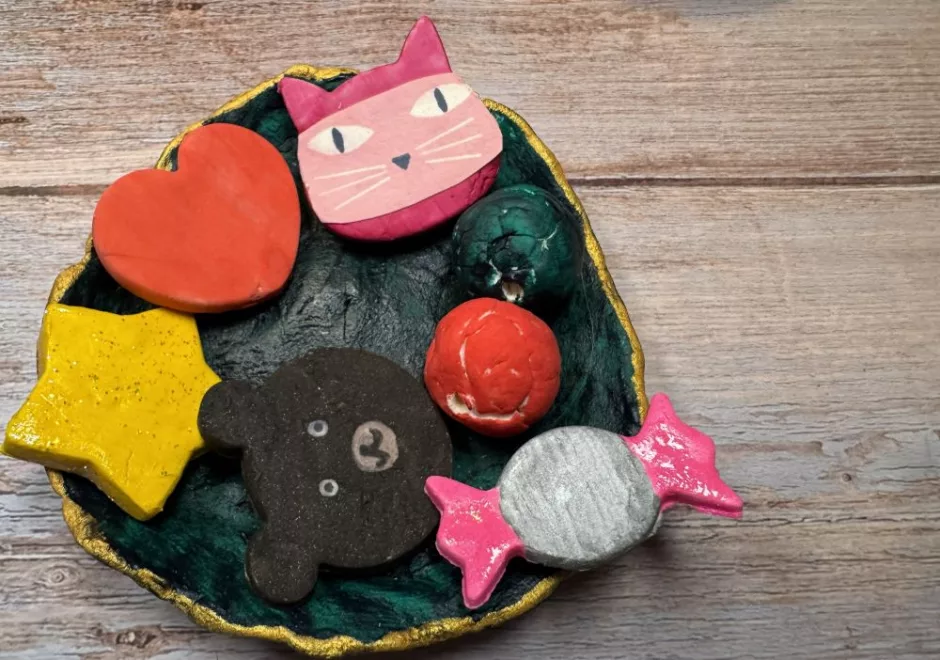
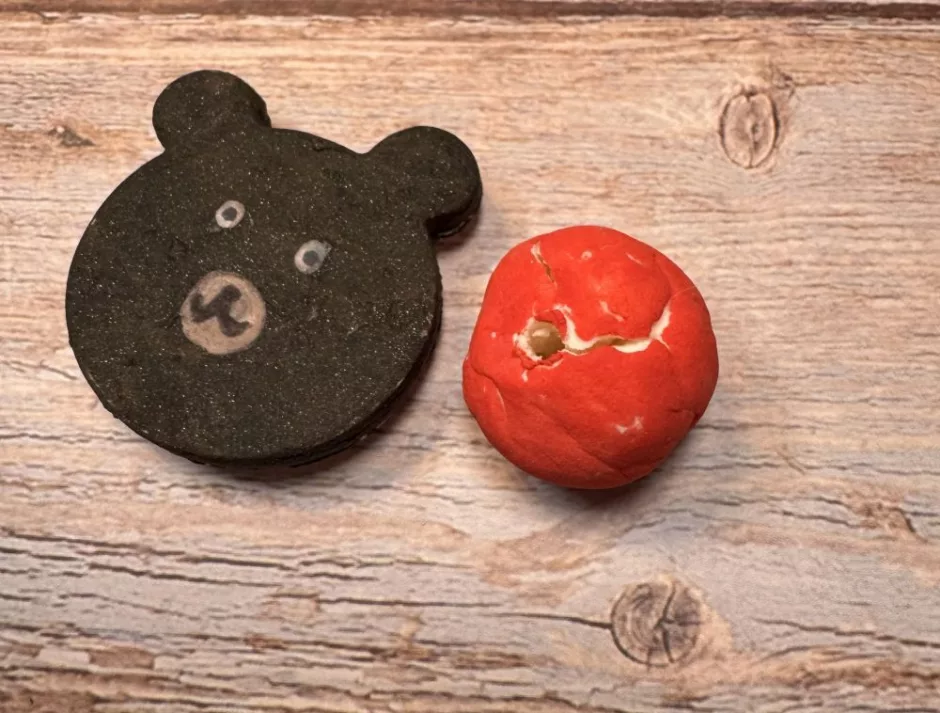
I used Artzea Art Markers to color this bear and bead. I love the colors but all the criticisms of markers still hold for these. These markers also smell bad, but that’s not the case with all markers.
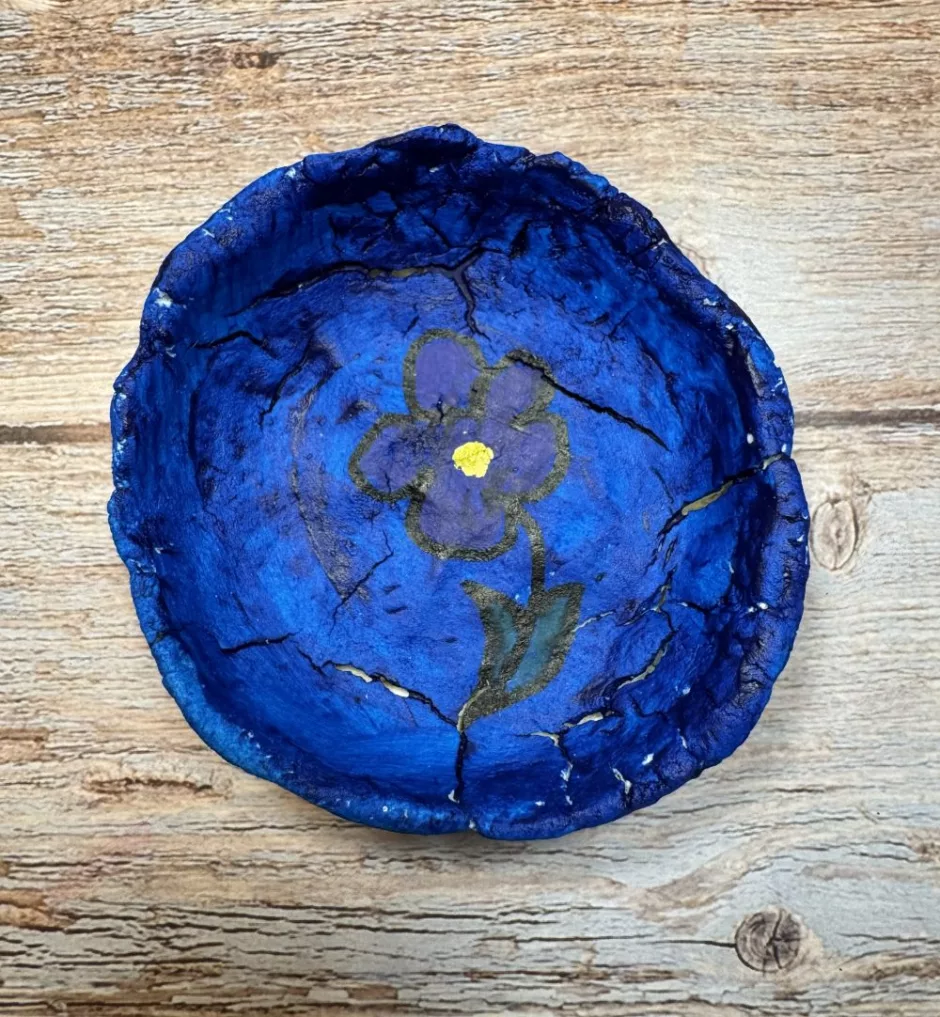
The flower in this pinch pot was also done with markers on top of acrylic paint. I like the idea of doing the base with paint and then adding details with markers or paint pens.
Paint Pens
Speaking of paint pens, they are sort of a combination of paint and markers. They come in tubes that look like markers, but the pigment is a little more liquid so they act a bit like paint and take longer to try than markers.
They often have vibrant colors, but generally less selection than paint or markers, and they can be expensive and dry out quickly.
They’re easy to use, but sometimes smelly. Because you have to shake them and press down hard to get the paint to flow, they’re not as good for kids. But the coverage once you get going is generally better than with regular markers.
Here I used paint pen for the pink, and I love how glossy and wet looking it is. The center is a silver Sharpie.
I also did details on the bear’s face with paint pens after covering most of it with marker.
Decoupage
Adding fun papers to the surface of air dry clay gives it a different look and adds an element of mixed media/collage to your project.
It’s easy to do, especially if your project doesn’t have cracks, but you could also try it as a way to cover cracks in a project.
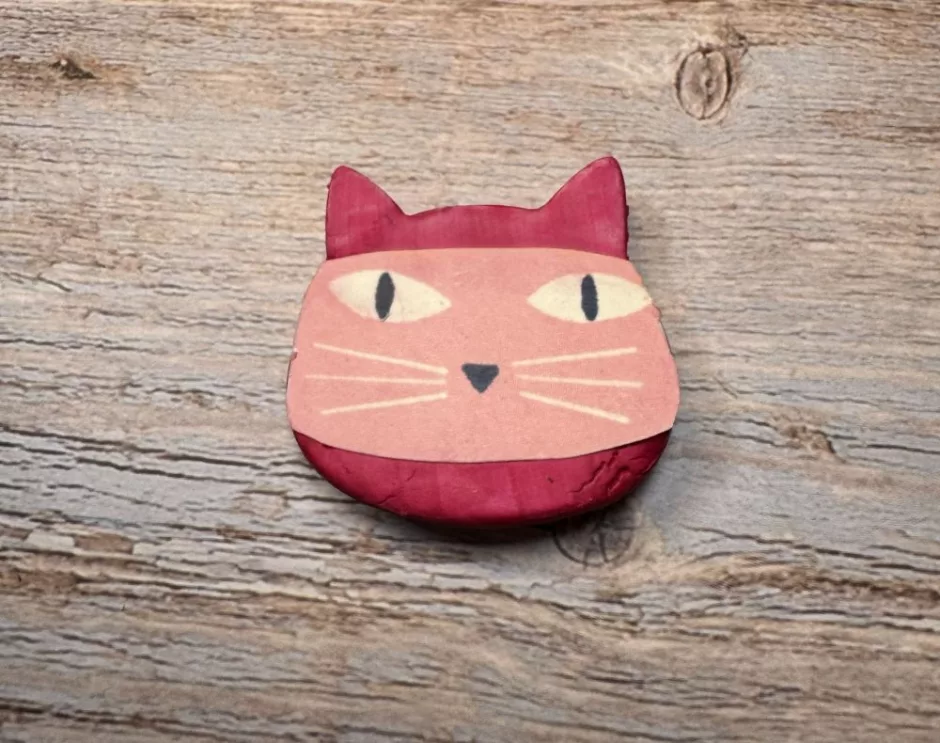
Here I painted the cat first with acrylic paint.
Then I happened to have this little face that was just the right size to cover it, so I decoupaged it using DIY Mod Podge.
Then I trimmed the edges that hung over the sides with an X-ACTO knife and added a second layer of Mod Podge to seal those edges and give it a uniform look.
I love the way this turned out and will definitely try it again.
More Ways to Finish Air Dry Clay Projects
Speaking of Mod Podge, purchased or otherwise, it’s a great last step to finishing air dry clay projects, regardless of how you decorated them.
Mod Podge acts as a sealant and varnish (as well as glue, as above) so it gives your projects a little bit more strength and durability. I’m curious to see if it helps with the watercolor fading issue.
Depending on the variety you choose it can also add shine, sparkle or an antique or crackled look to your projects. How fun is that?
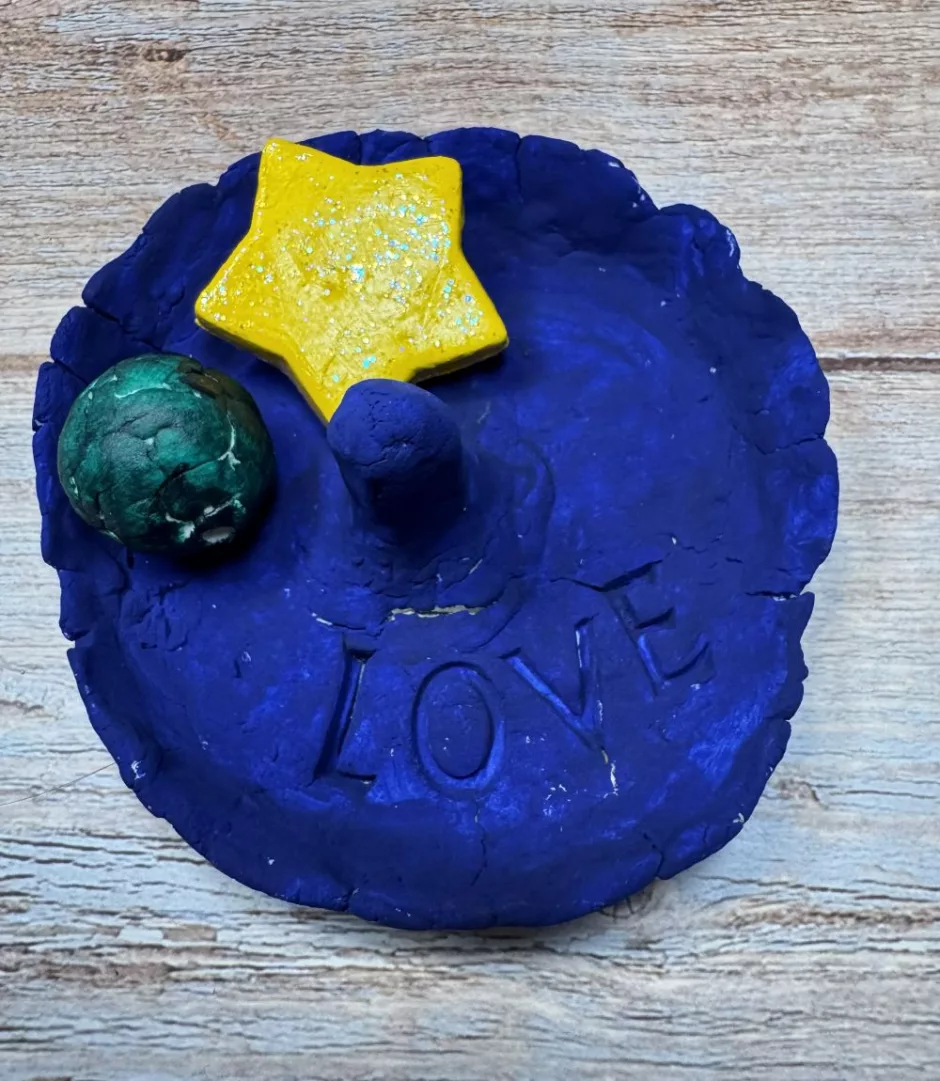
The star above has sparkle Mod Podge and I just love it so much.
And if you want to keep a project plain clay, finishing with Mod Podge is a great way to give it a little more durability and a finished look if you use a finish other than matte. You can also use clear varnish if you have some of that handy.