Affiliate links may be included for your convenience. View our privacy and affiliates policy for details.
One of the biggest problems with making air dry clay projects is how to avoid cracks in air dry clay. I generally accept the cracks as a fact of crafty life, but I also wanted to experiment with how to minimize cracking in my air dry clay projects.
Why Does Air Dry Clay Crack?
The first step in figuring out how to avoid cracks in air dry clay is to figure out why it cracks in the first place.
Generally speaking, from what I have read and my own experience, cracks happen because the project is drying unevenly. Project that vary in thickness will commonly crack because the thinner parts dry faster than the thicker parts.
For instance my ghosts have more pronounced cracks than my pinch pots, probably because of the inconsistency in thickness and the fact that the ghosts were dried on forms that made the interior dry much more slowly.
And in general thick pieces will crack more than thin pieces because it takes longer for them to dry all the way through.
If your project sticks to whatever it is drying on, that can also cause cracks because it will dry more slowly where it is stuck.
How to Avoid Cracks in Air Dry Clay Experiments
I decided I wanted to play around with different methods for drying projects to see if any of them would work to keep air dry clay from cracking.
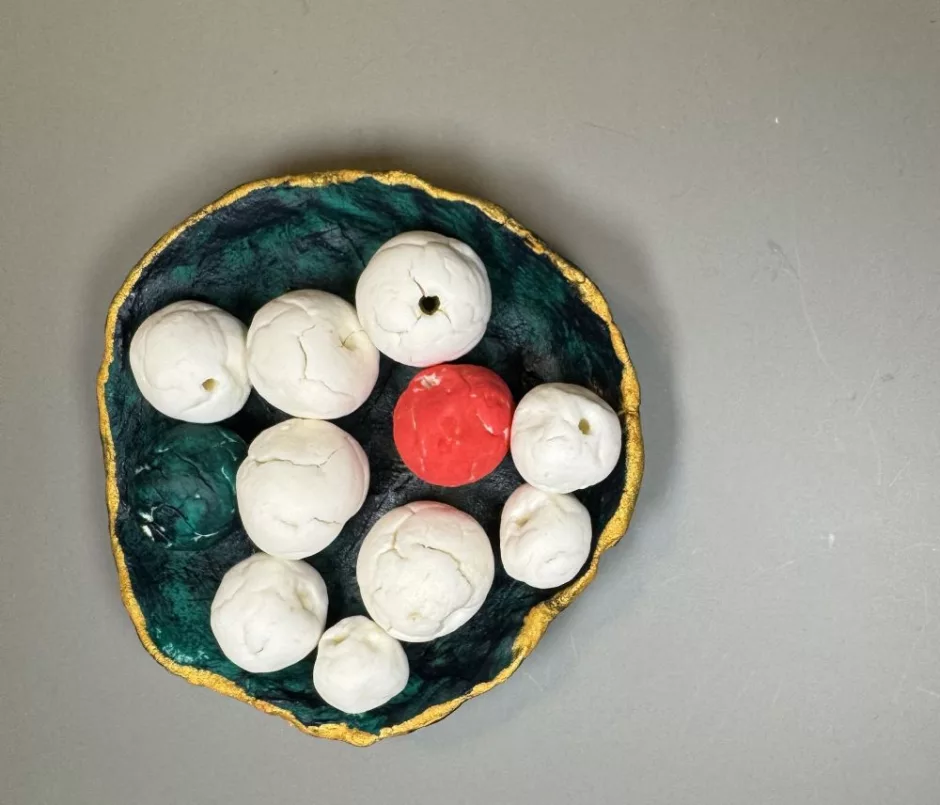
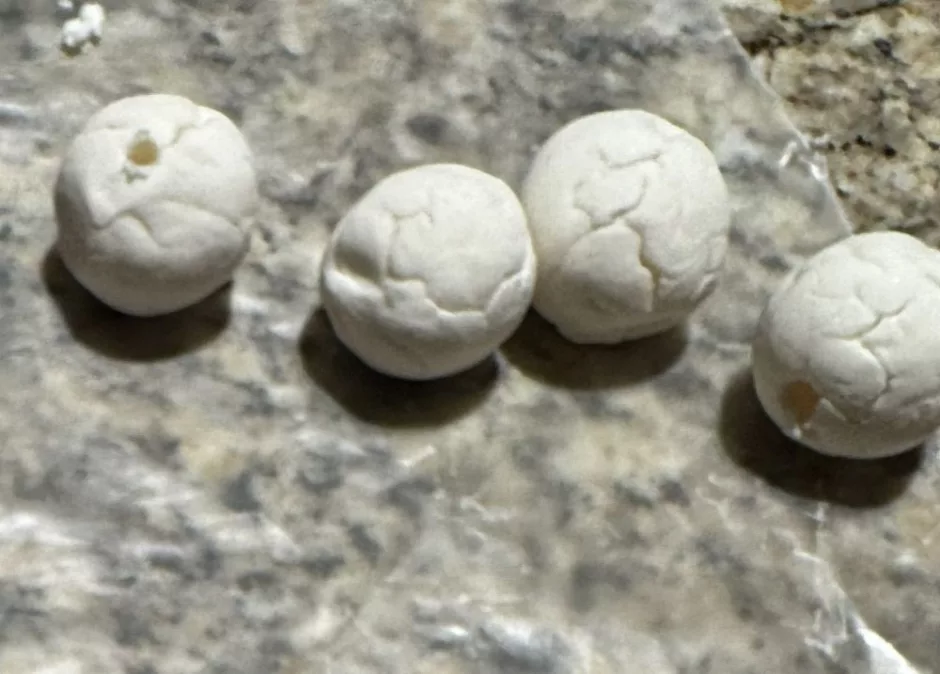
I used clay beads as my project and dried them in different ways. These were all made with the same batch of air dry clay over the course of a week or so. I don’t think the clay itself was significantly more dry later in the experiment.
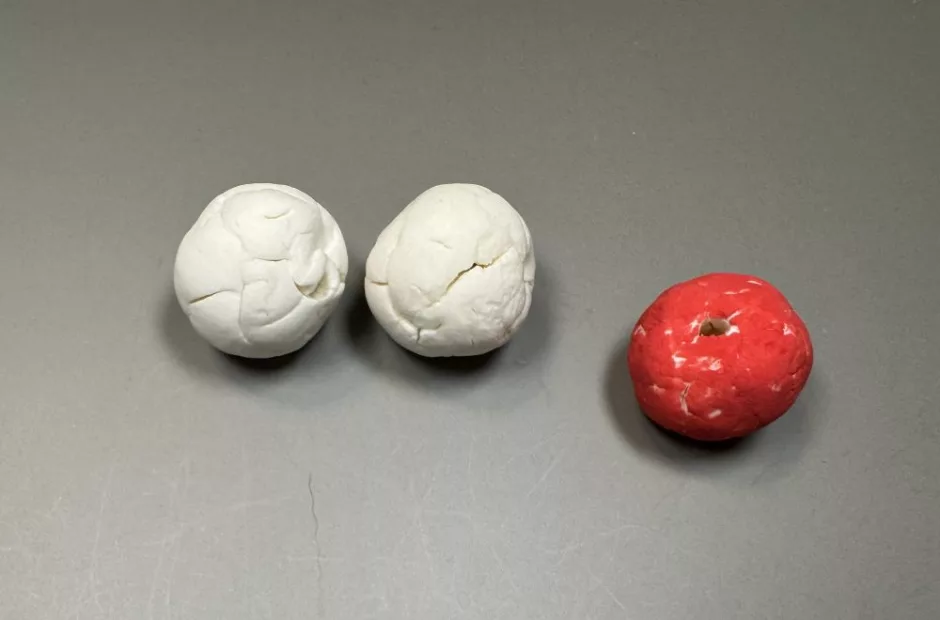
First up: drying normally on the counter. These dried in a day and they cracked dramatically. Here I painted one with regular acrylic paint to show what a “finished” bead might look like.
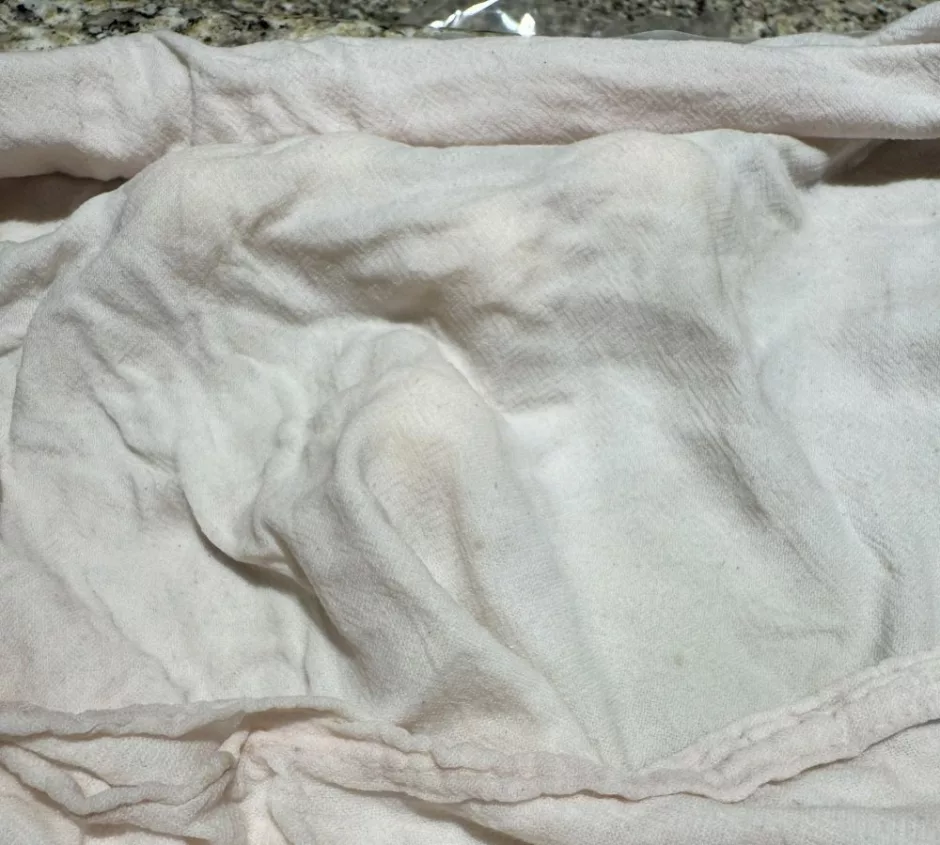
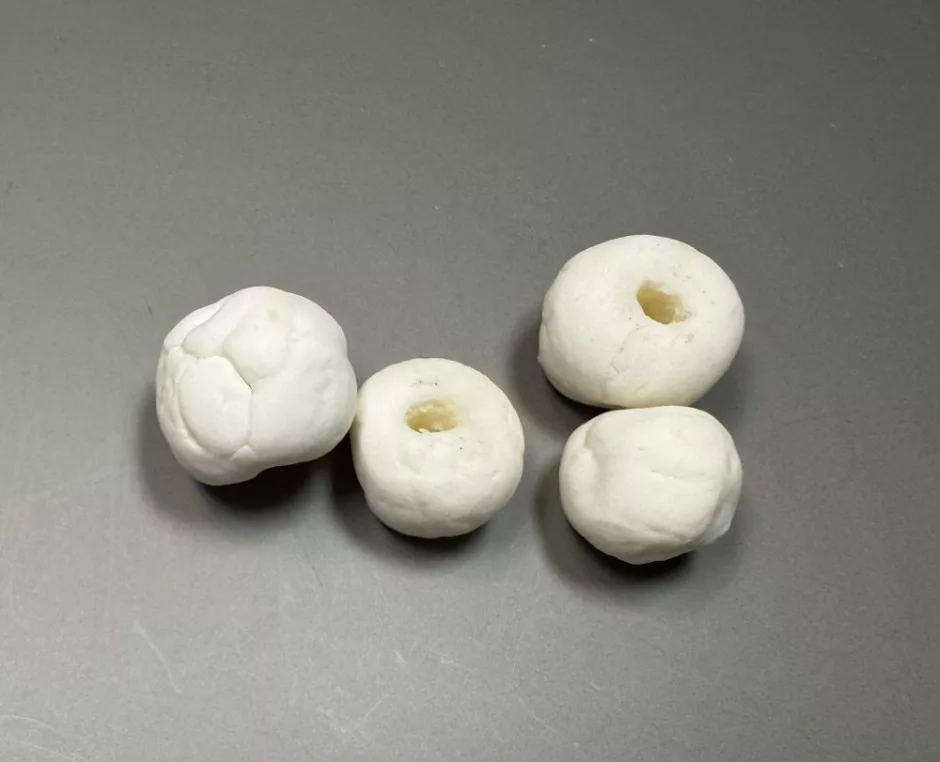
Next I made more beads and left them to dry under a damp cloth. I used a light weight cloth that was damp and kept the beads covered until they were dry.
This took twice as long and I think the cracks may be even more dramatic. They seem deeper, anyway. The colored one here is done with pigment marker.
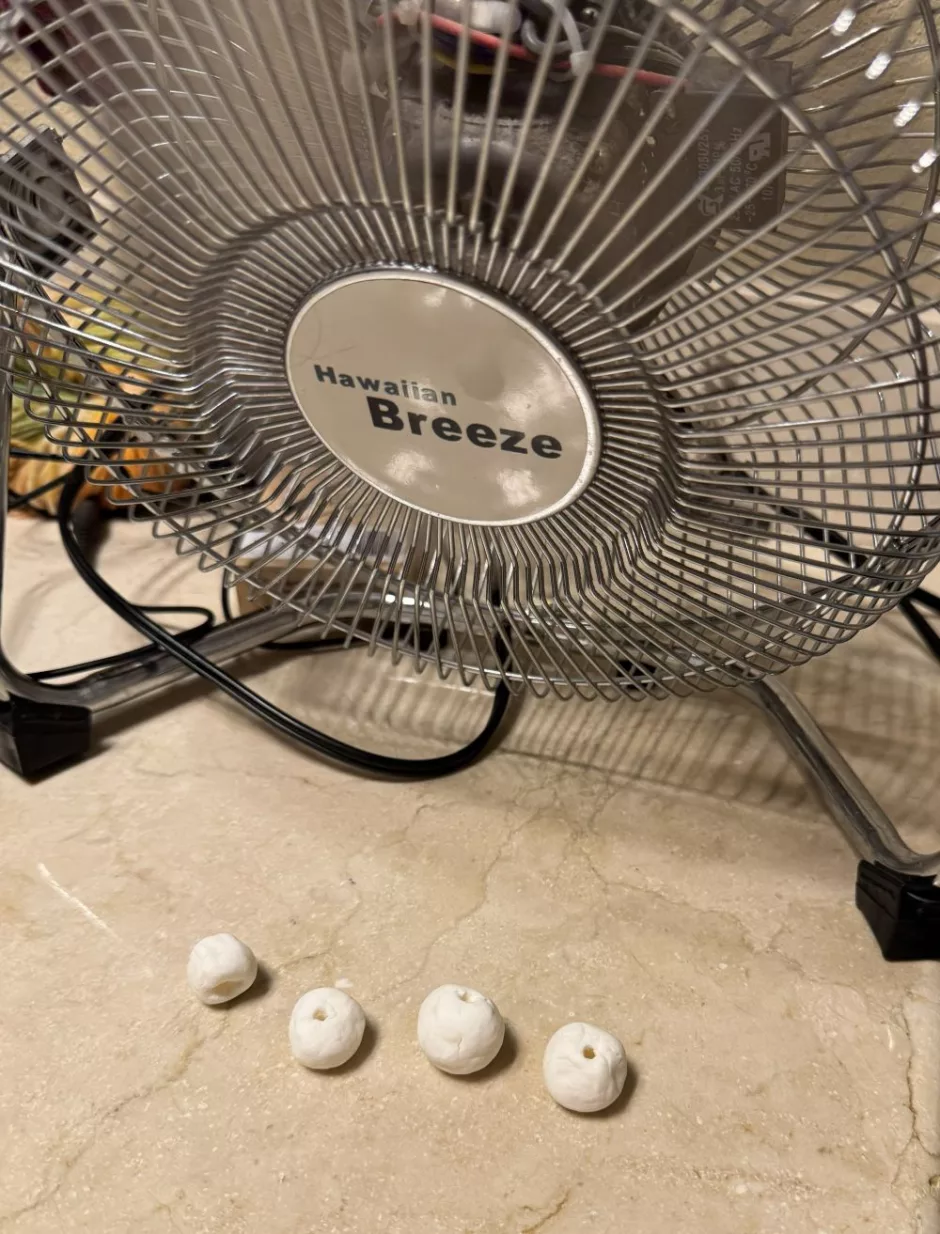
I decided the best option might be to dry the beads in front of a fan. This was super fast: it only took a few hours for them to dry pretty completely.
The beads looked great when I turned the fan off, but a few hours later (when they were really, really dry I assume) they did show some small cracks.
Another option might be to place the project on a cooling rack and use the fan to give even more air circulation. I did turn the beads a few times while they were drying so I’m not sure this would make a huge difference.
Is It Possible to Have Air Dry Clay Projects without Cracks?
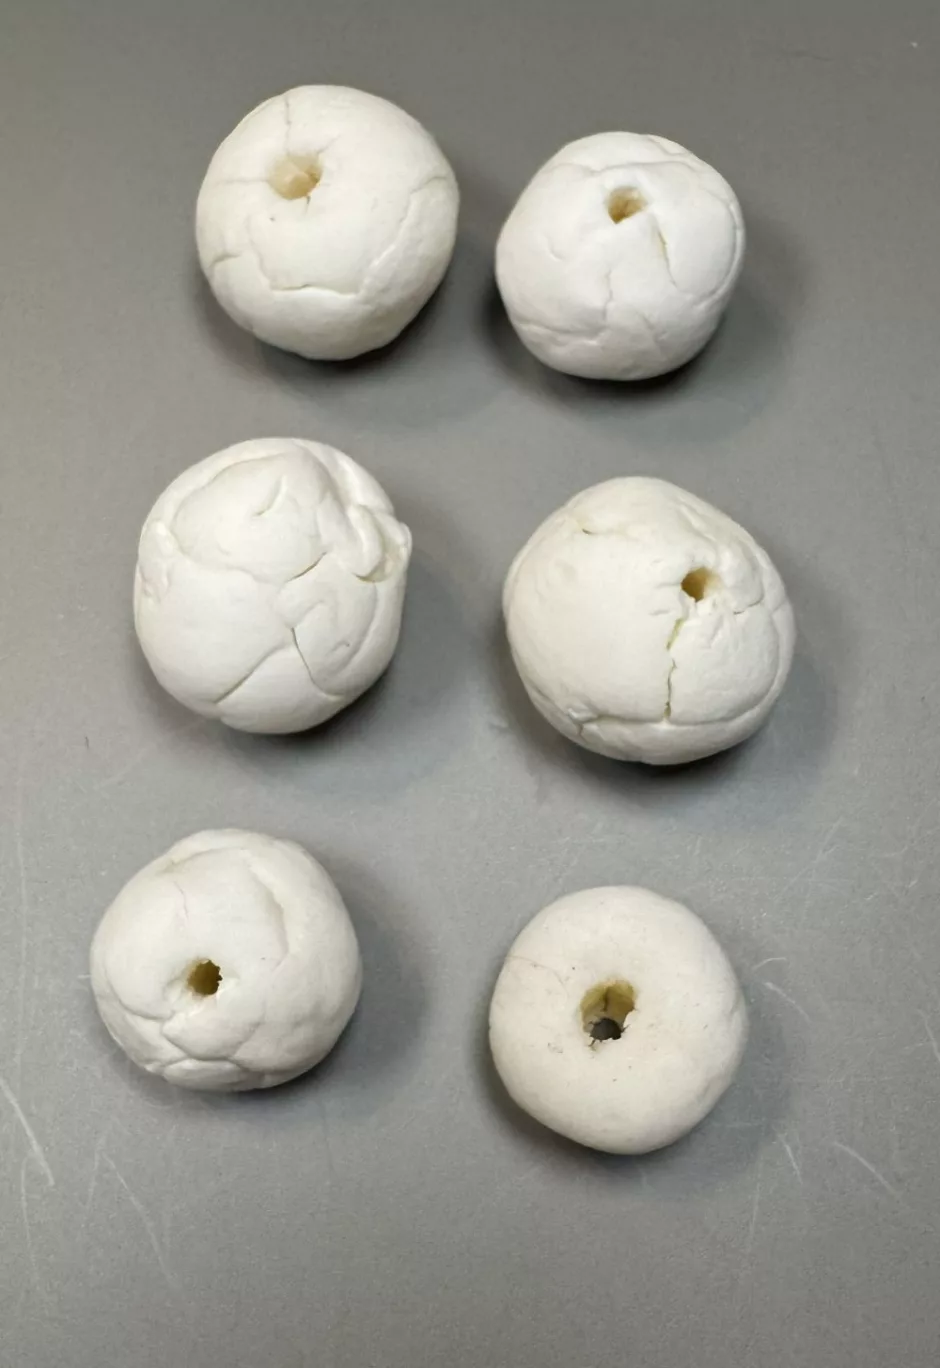
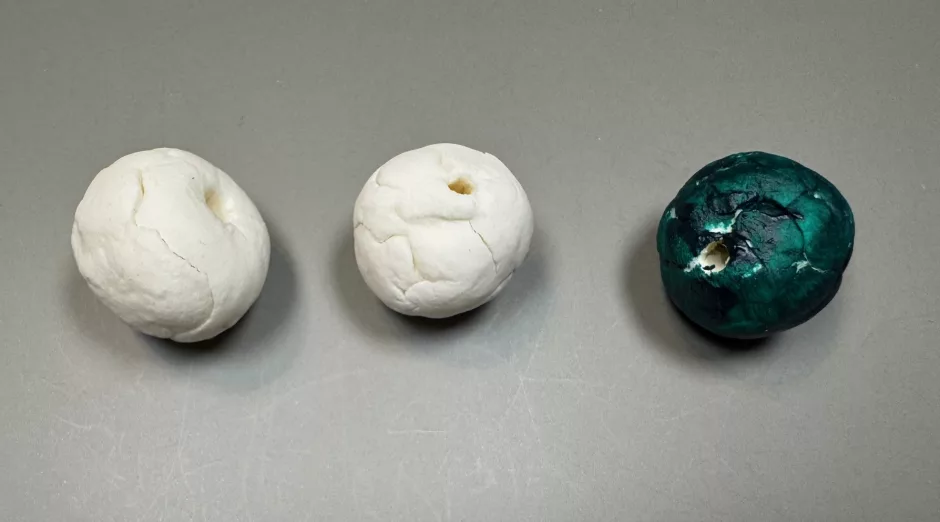
As a final reference here are all the different versions, with plain air drying at the top, drying under a wet towel in the middle and drying in front of a fan at the bottom.
I’ve yet to make a project with air dry clay that has no cracks, but I think in the future I will try to dry my projects with a fan and turn them more often or use a drying rack to provide more air circulation.
I also wonder about the size of the project in general because my smaller beads dried with the fan have fewer cracks than the larger ones, which makes sense because they probably dried faster.
Do you have any tricks for how to avoid cracks in air dry clay? I’d love to try them out and add the results to this post!