Affiliate links may be included for your convenience. View our privacy and affiliates policy for details.
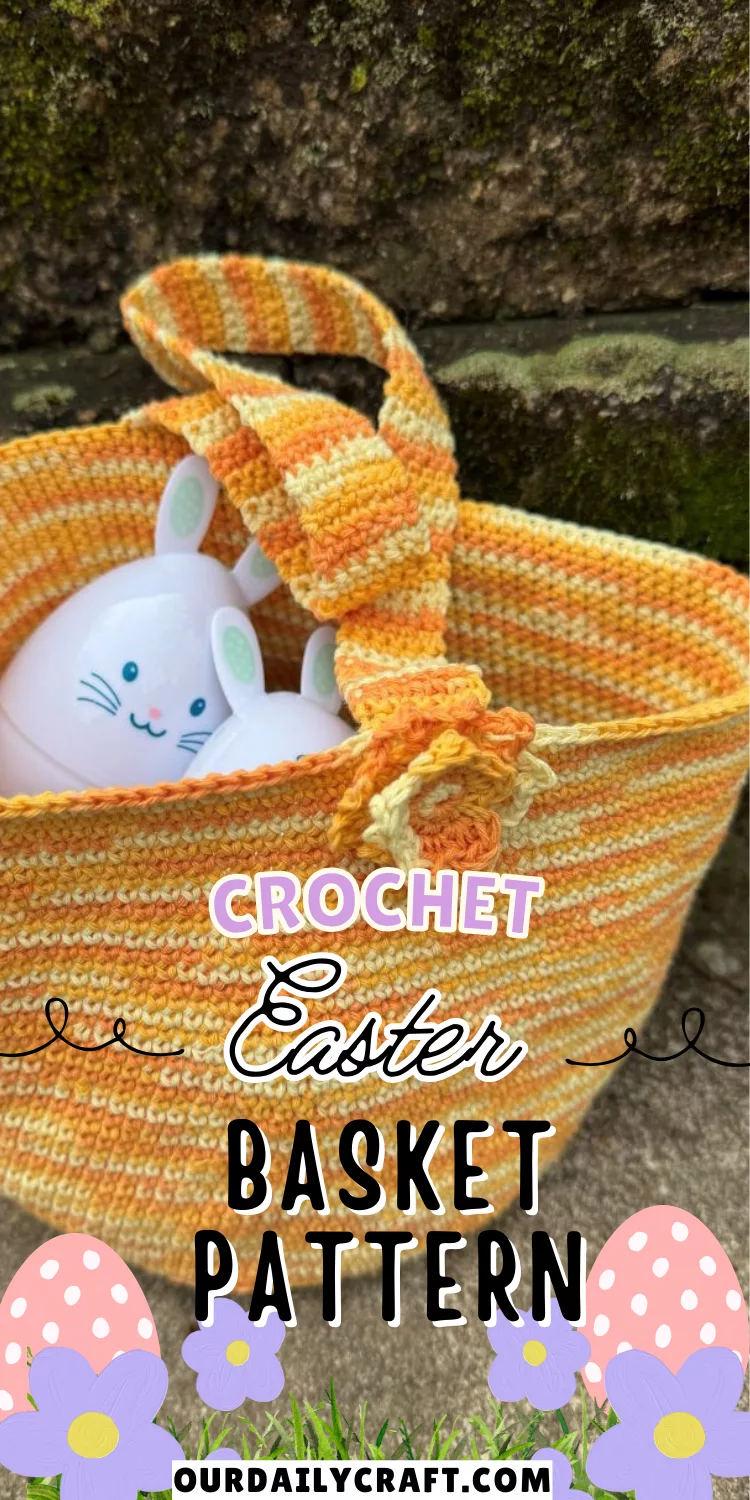
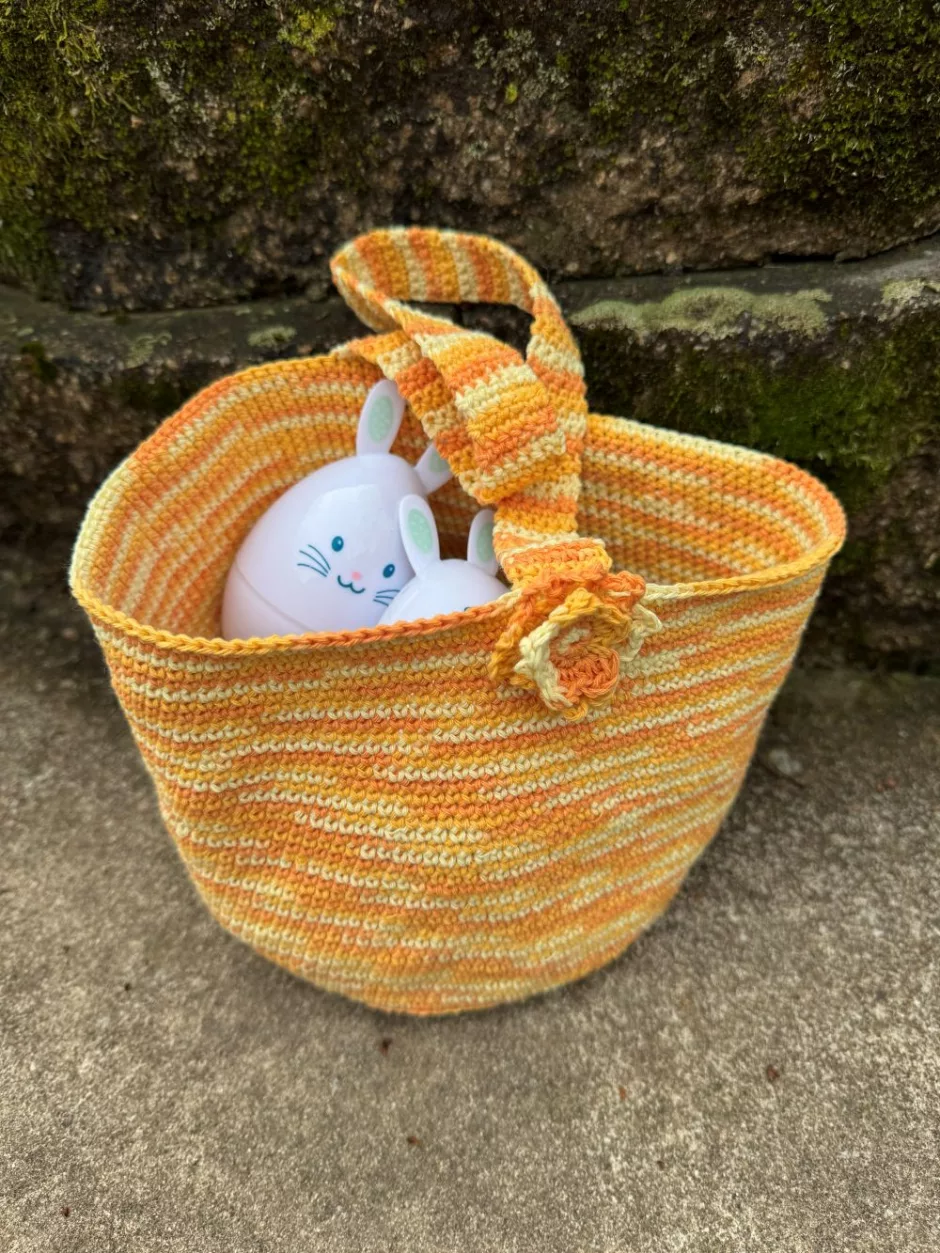
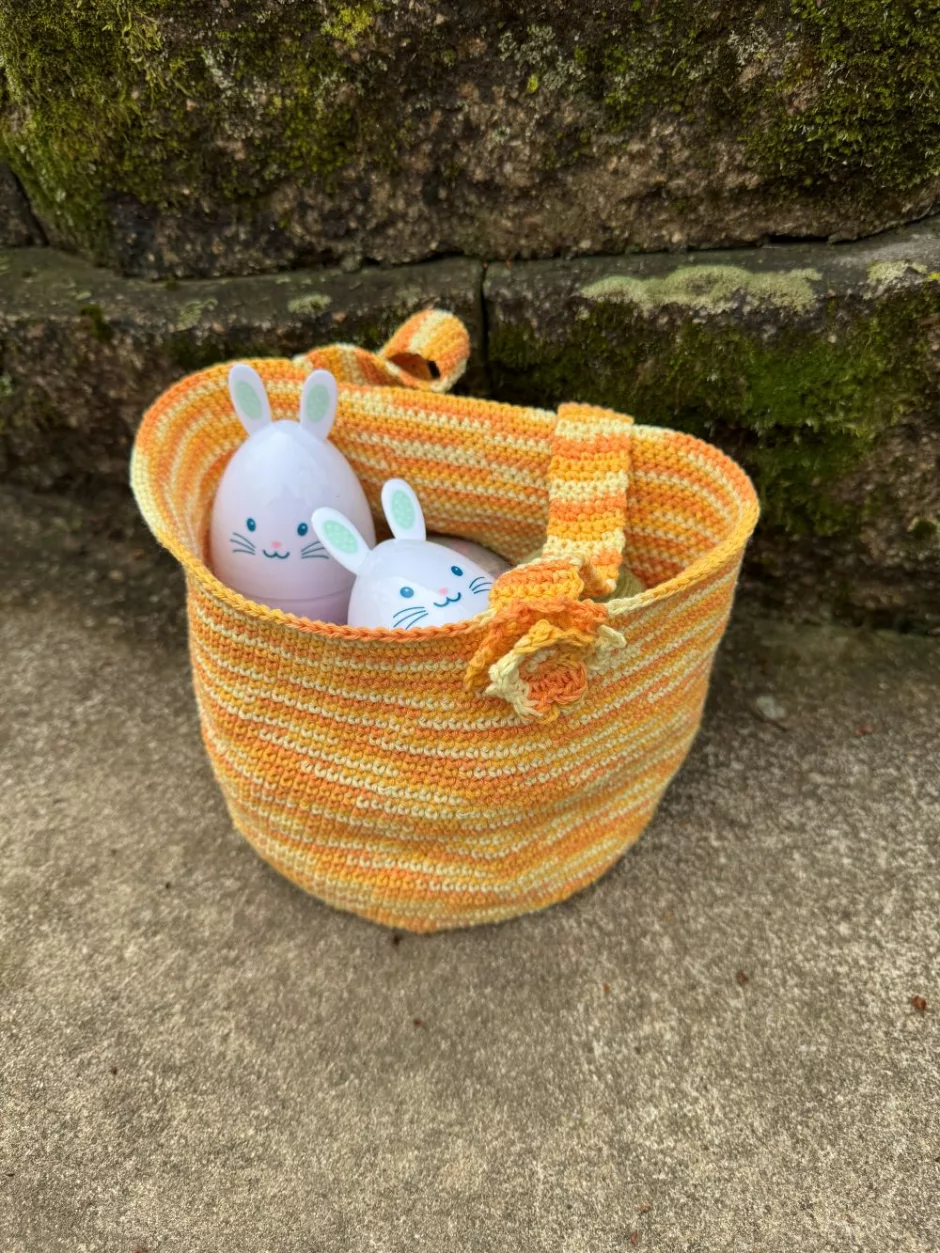
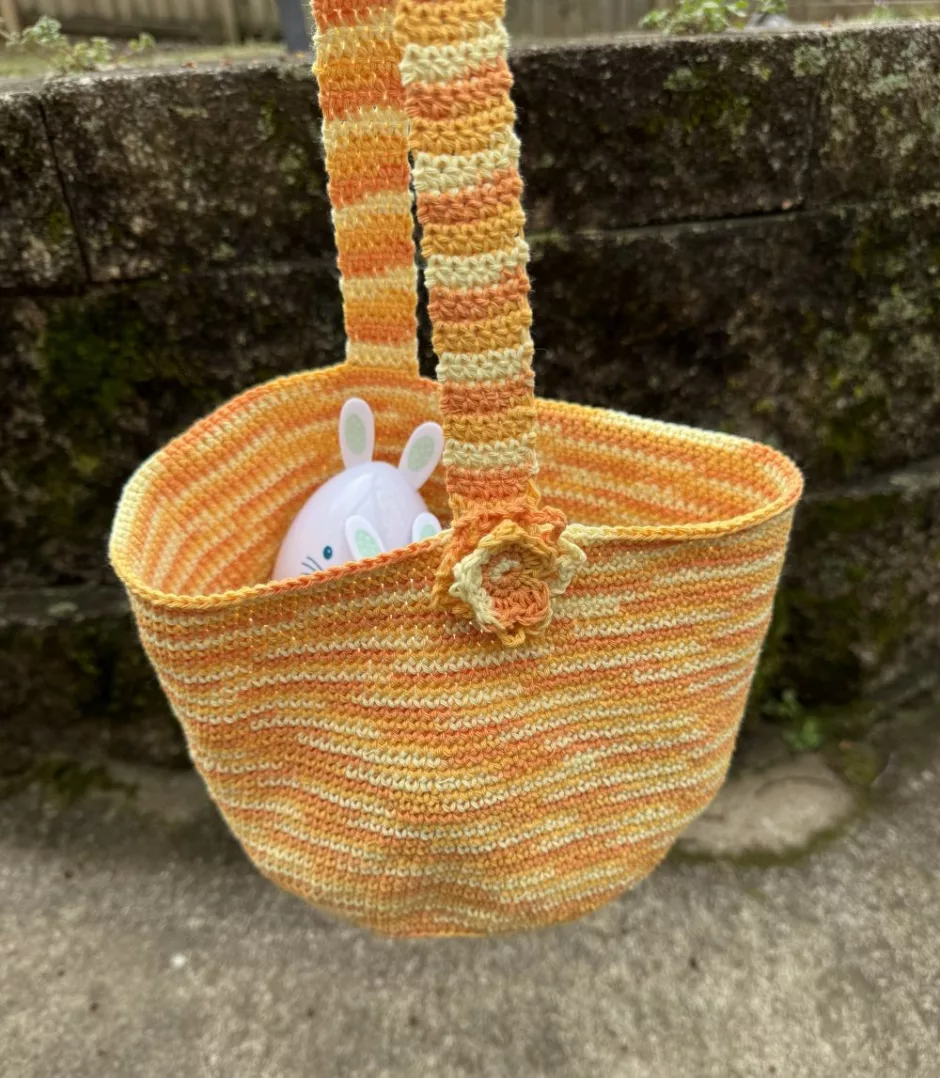
This east crochet Easter basket uses single crochet to make a simple and solid basket that you can decorate to make more Easter if you like, or keep it plain and you can use it all year long.
Materials
I used almost all of 4 balls of what’s just called Multi Color Yarn from Daiso in color Honey Lemon. That’s about 285 yards of fine/sport/yarn weight 2 yarn. The yarn I used is a cotton/polyester blend, but cotton or acrylic yarn would be fine for this project. You could also use heavier weight yarn and a corresponding crochet hook and just work to the measurements suggested or your desired size.
There were 12 yards left over when the basket was done and I used about 6 yards on the flower.
I used a size C/2.75 mm crochet hook. You’ll also need a yarn needle and scissors, and a locking stitch marker.
Gauge
Gauge is not critical but I got 23 stitches and 27 rounds per 4 inches/10 in single crochet in the round.
Size
My crochet Easter basket is a little more than 6 inches/15.24 cm across the base, 6 inches/15.24 cm tall and has a strap that’s an inch/2.5 cm wide and 18 inches/45.72 cm long.
Add this project to your Ravelry queue.
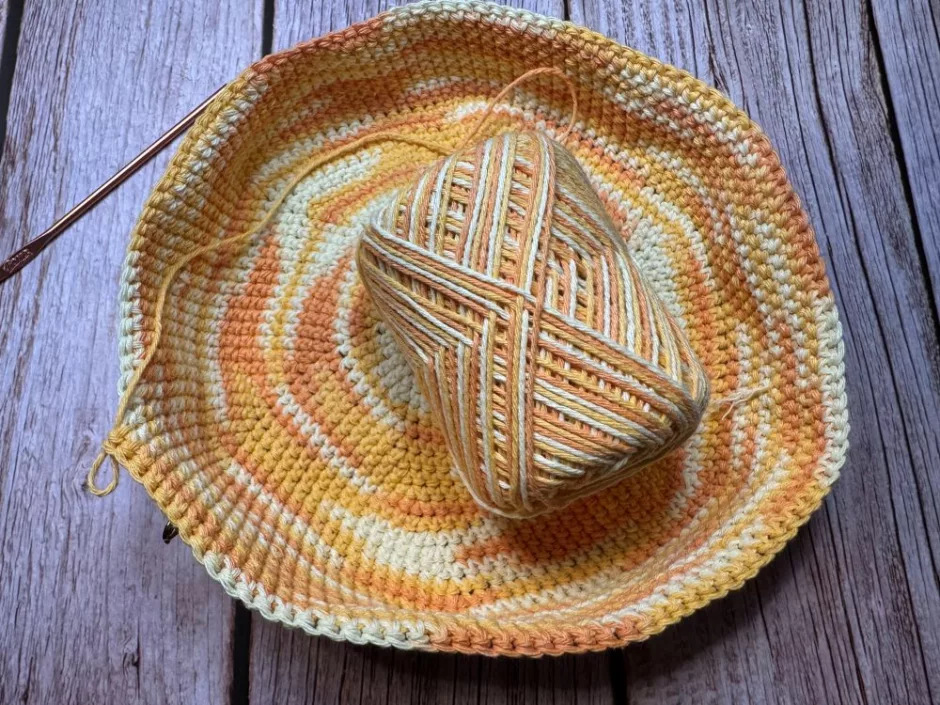
Crochet Easter Basket Base
I used a chain to start the base of my crochet Easter basket, but you can work a magic loop if you’d rather.
Chain 5. Join the chain into a circle with a slip stitch.
Work 6 single crochets into the circle. Put a locking stitch marker in the last stitch of the round and move it up each round as you go.
Work 2 single crochets in each stitch. You now have 12 stitches.
*Work 2 single crochet in this stitch, then 1 single crochet in the next stitch. Repeat from * around, 18 stitches.
*Work 2 single crochet in this stitch, then 1 single crochet in the next 2 stitches. Repeat from * around, 24 stitches.
*Work 2 single crochet in this stitch, then 1 single crochet in the next 3 stitches. Repeat from * around, 30 stitches.
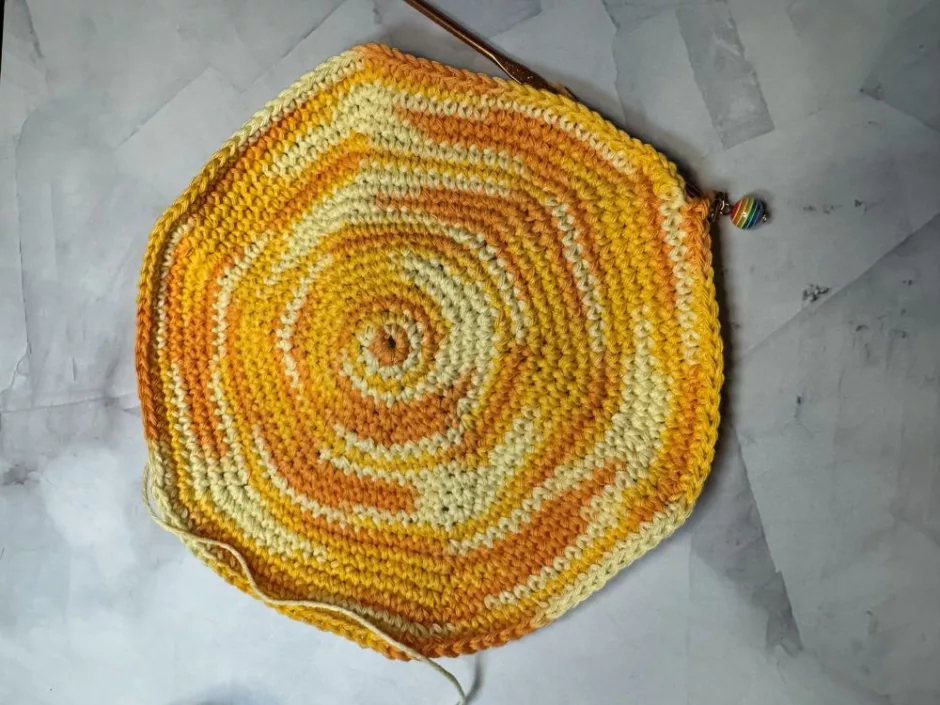
Continue to work in this manner, with one additional stitch between each increase on each round, to the desired size of the base. Mine is 6 inches across and I had 120 stitches when I got there.
Crocheting the Basket Body and Strap
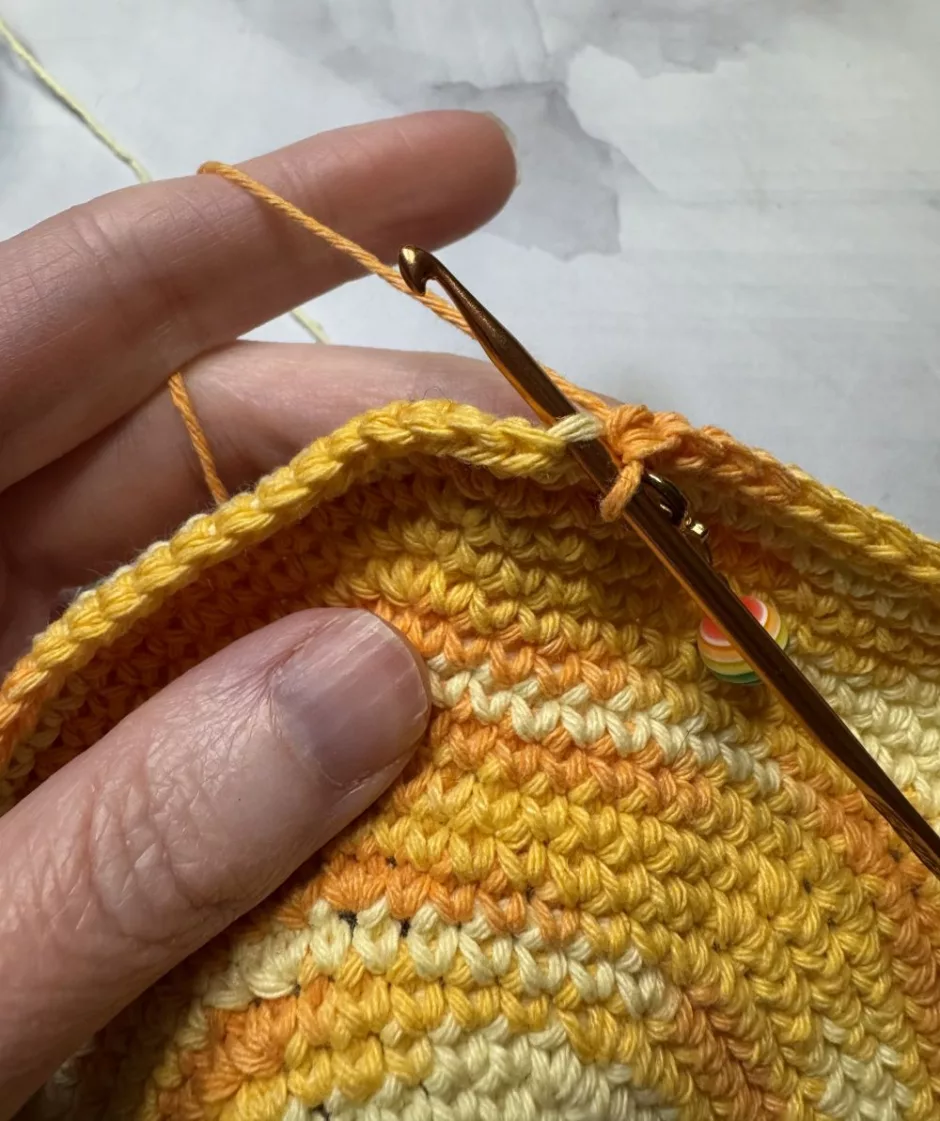
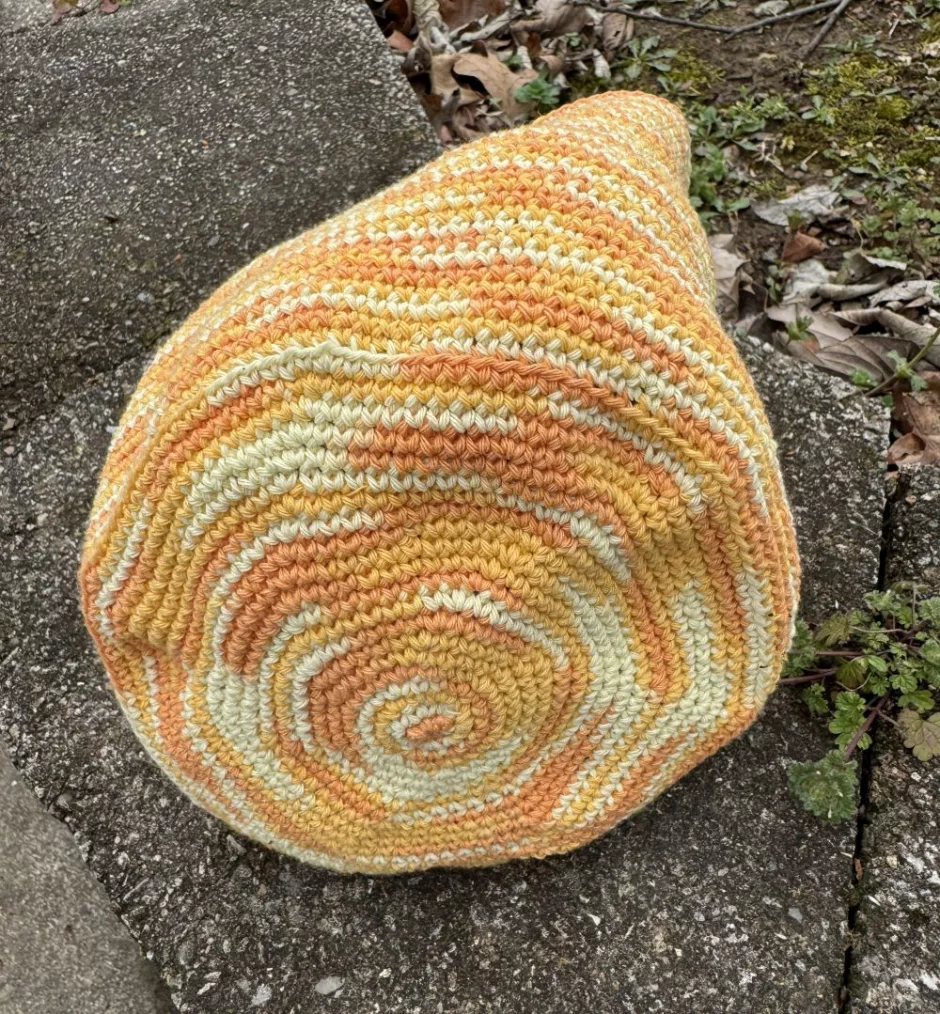
When your base is the size you want, work a round of single crochet in the back loop only.
Then single crochet every stitch until the sides of your crochet Easter basket are as long as you would like. Mine are 6 inches/15.24 cm.

When the sides are the size you would like, crochet the strap. Work across 6 stitches in single crochet, turn the work and work 6 stitches again. Continue working these 6 stitches until strap is desired length. Mine is 18 inches/45.72 cm.
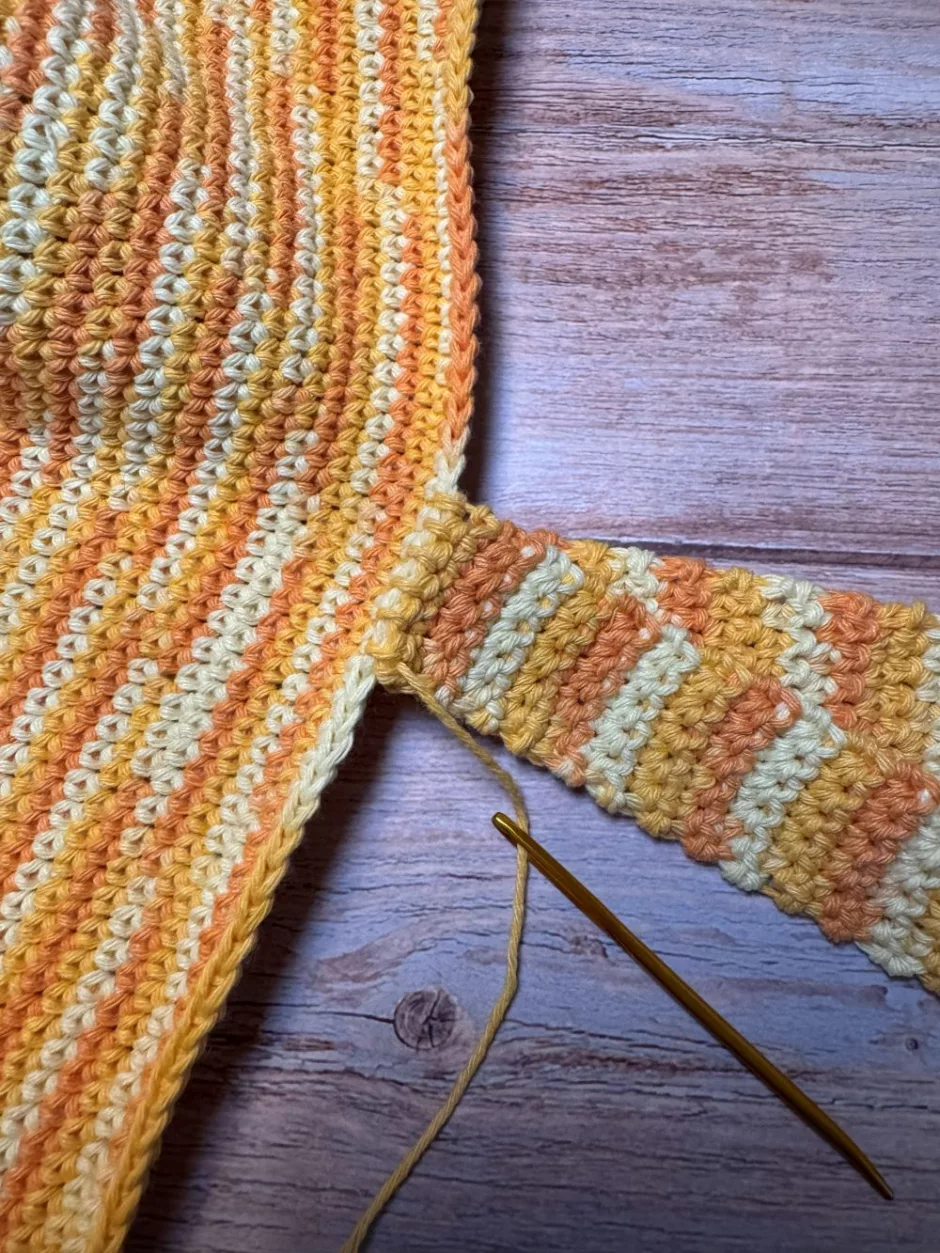
Cut a long tail and fasten off the last stitch, then sew the strap to the opposite side of the basket.
Crochet Flower (Optional)
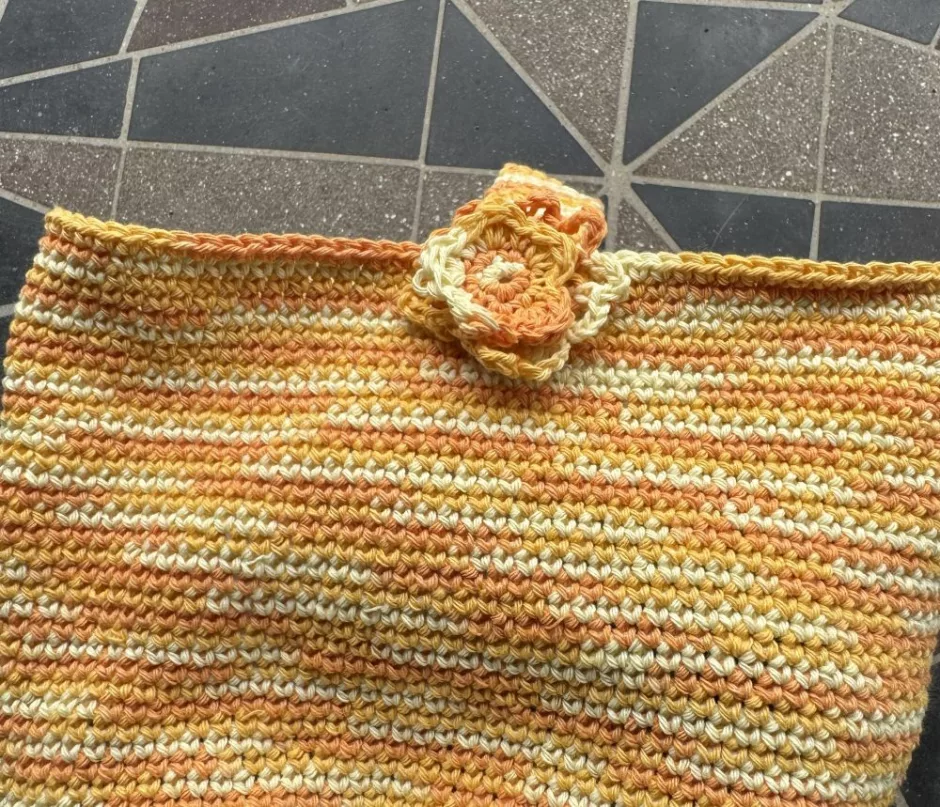
I’ve been challenging myself to use as much yarn as I can on projects so that I don’t have any leftovers. I decided to jazz my crochet Easter basket up a bit by adding a little flower.
I could make another one and I’d be completely our of yarn. These would be cute as hair clips or pins, too.
The crochet flower is made in two layers. The base is a chain 5, slip stitch into the first chain to make a loop. Single crochet 5 in the loop, then single crochet 2 stitches in each stitch for a total of 10 stitches.
*Work a single crochet, double crochet and single crochet in the next stitch, then a slip stitch in the following stitch. Repeat from * around.
For the next round, *chain 5 and work a single crochet in the top of the double crochet from the previous round. Chain 5 and work a single crochet in the slip stitch from the previous round. Repeat from * around, except for the last stitch I just did a slip stitch instead of a single crochet. Cut yarn and fasten off.
The second layer starts the same as the first but for the petal round I worked a double, treble, double in one stitch and a single crochet in the stitch after around (again just doing a slip stitch in the last stitch). Cut yarn, fasten off and sew the two layers together.
I have the flower on a safety pin so I can move it around, wear it, add it to my crochet bunny, etc.
Looking for more ideas? check out this collection of crochet Easter basket patterns.
Like this project on Ravelry.