Affiliate links may be included for your convenience. View our privacy and affiliates policy for details.
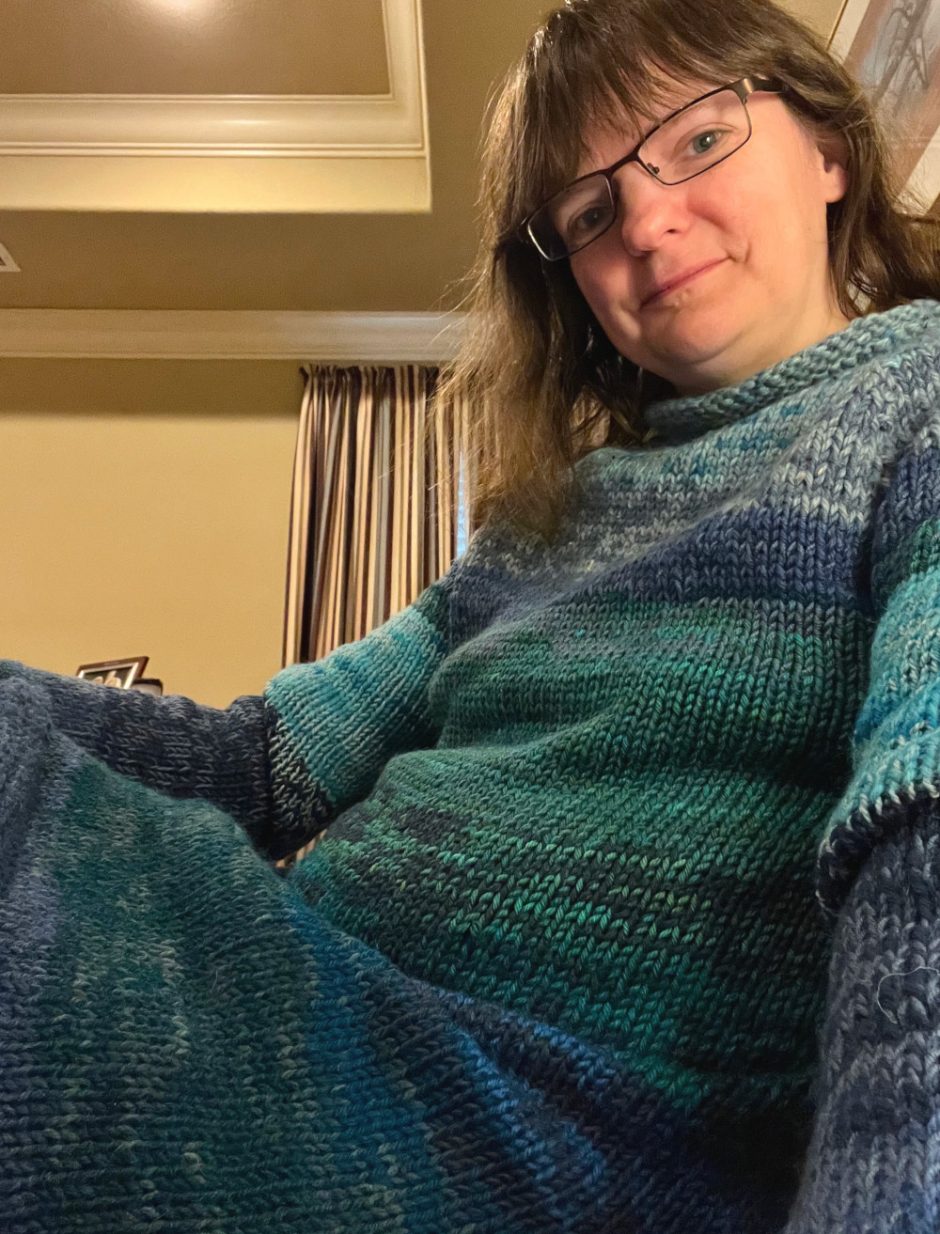
I have a lot of stash yarn, and a lot of odd balls I like to try to use in projects. Recently I was making a sweater with blue and green yarn and decided while I was knitting it that I wanted to make it into a tunic/dress length sweater.
It occurred to me someone else might be interested in how to turn a sweater knitting pattern into a tunic, so I thought I’d share the process.
How I Made My Sweater
I started with a knitting pattern that I have made before, Nutmeg by Jenifer Stark (available on Ravelry). I knit this super simple top down bulky sweater years ago, and while I was trying to decide what to knit with my random collection of blue and green yarn I was reminded of how fast and easy this sweater was.
Mostly because I was wearing it at the time.
I decided to work with a strand of worsted weight yarn and a strand of something lighter held together. I used a size 10 US knitting needle out of instinct and knowing that I could adjust my stitch count as needed (it worked out fine).
As I was knitting along and could clearly see that I had a lot more yarn than I was likely to use knitting a standard-length sweater, visions of a tunic-length sweater dress I could wear with leggings danced in my head.
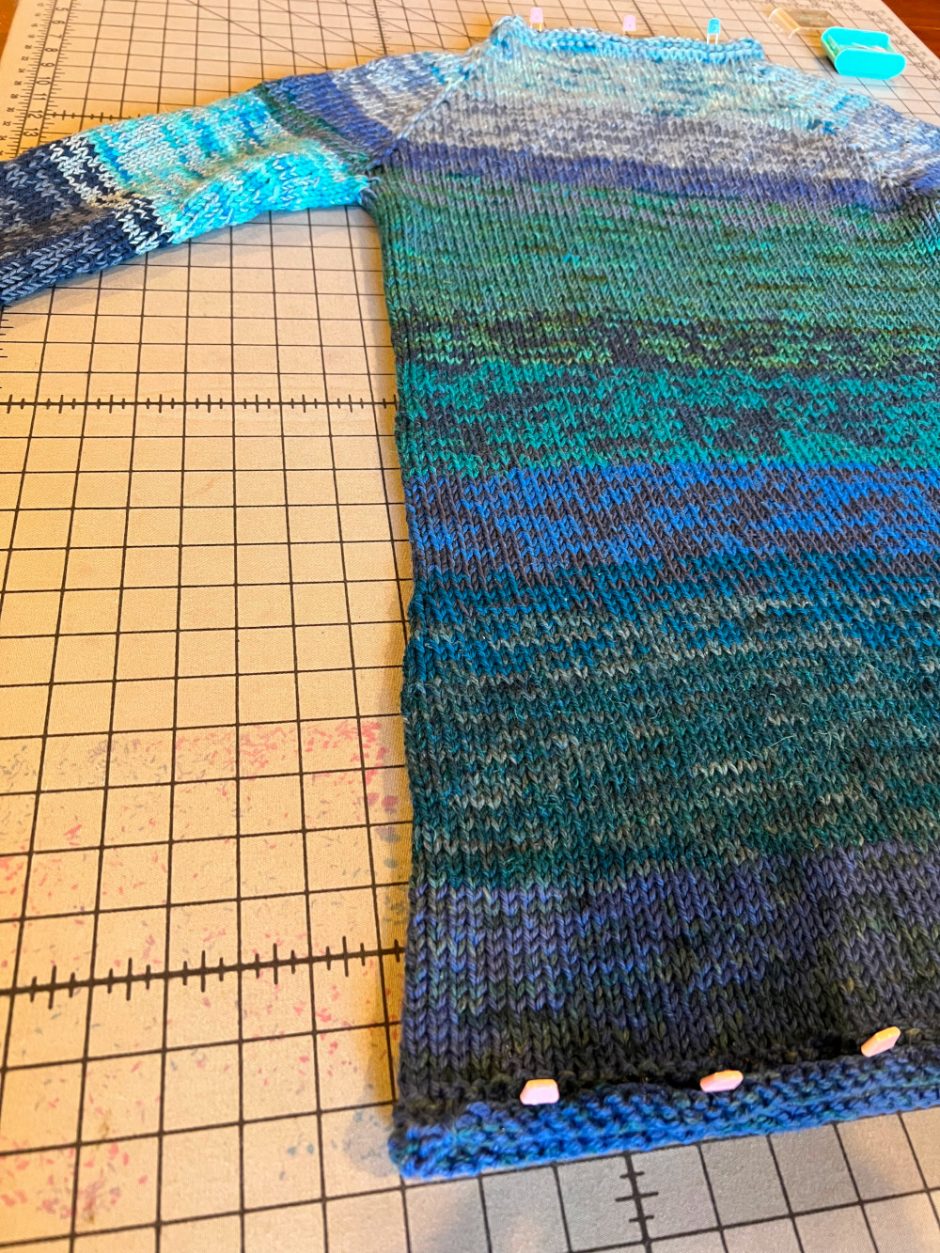
I decided rather arbitrarily to increase on each side of the side “seams” so that each increase round would add 4 stitches, or about an inch in the gauge I was getting.
I did one set of increases after knitting 9 inches after the sleeve separation, then I did 3 more increase rounds every fifth round stating at 14 inches. Then I just knit to my desired length.
How to Alter a Sweater Knitting Pattern into a Tunic
The great thing about knitting from the top down in the round is that you can alter patterns on the fly like that, but if you want to be more deliberate about it, here’s the longer version.

First, you need to know your stitch and round gauge, the chest measurement of the sweater you are knitting, how long you want it to be and the measurement around the largest part of your body that will be covered by the sweater at that length.
For example my gauge was 14 stitches and 20 rounds per 4 inches, or 3.5 stitches and 5 rounds per inch. I increased about 4.5 inches around over the course of about 7 inches.
If I had wanted to spread those increases out evenly over 7 inches, that would be 35 rounds over which to make 4 sets of increases. That would mean I’d need to increase every 8.75 rounds, so I would do my increases every eighth round and that would be close enough.
Different Ways to Add More Stitches
Of course if you need to add a lot more stitches over a shorter period you can increase more than 4 times in a single round. I just chose to do it that way so I could increase at the center sides where those increases wouldn’t be that visible.
But say your gauge is 5 stitches per inch and you need to increase 10 inches in width over 5 inches in length (these numbers are all completely made up). Say you’re getting 8 rounds per inch. That gives you 40 rounds to increase 50 stitches.
If you wanted to increase 4 stitches each time, you’d need to do it 12.5 times, or about every 3 rounds, plus sneaking in a couple more somewhere.
But if you increased 10 stitches in a single round, you’d only have to do it 5 times, or every 8 rounds again. It will depend on how many stitches you have each round how many stitches you need to work between your increases (the calculator at WorldKnits is super helpful for doing the math).
The stitch pattern or any other design elements in your project might also play a role in exactly when, where and how often you want to work increases.
It just depends on how often you want to work your increases and if you care how visible they are. But I hope this illustrates that it’s pretty easy to alter a sweater knitting pattern to make a tunic that fits.
Have you ever altered a sweater knitting pattern like this? I’d love to hear how it went!


