Affiliate links may be included for your convenience. View our privacy and affiliates policy for details.
This year is just not going the way I’d hoped. Circumstances beyond my control have meant that I’d had just one full, normal day of work all year, which means both the working and the crafting parts of my job have gotten a little off kilter.
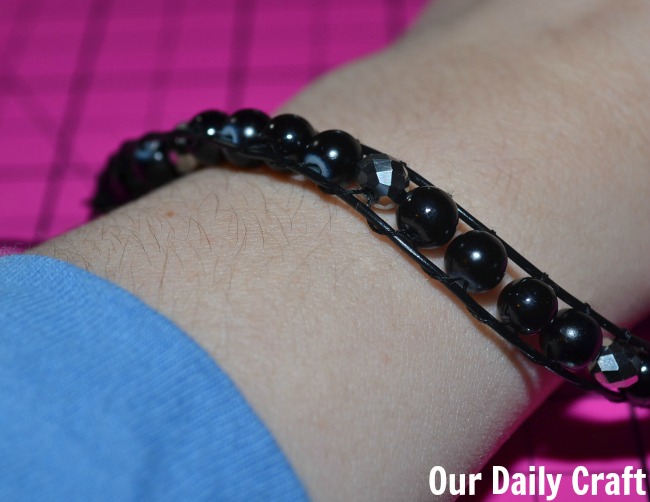
And so it was with this week’s Iron Craft challenge, too. When it was announced — the idea was to use leather and/or crystals, or some variation of leather-like and sparkly things, in honor of Iron Craft’s third anniversary — I knew I wanted to make a wrap bracelet. And while I probably could have cobbled together something from home (and that would have suited my mantra for the year a bit better), I didn’t really have the cording I needed, so a trip to the craft store was in order.
But it was winter break, and I didn’t want to take the girl, and then it snowed and there were two snow days on the end of winter break, and then another one, and then some other stuff, and I didn’t make it to the store until yesterday. Which would have been fine, except my daughter’s home again today so I’m in a bit of a rush.
I did manage to get started, at least, and I can probably finish it this evening and will update with a finished product picture when I’m done.
The good news is, this is super easy and a great entry-level beading project if you want something a little more complex than stringing beads but still requiring minimal materials.
Materials
- 1mm cord — leather or otherwise — in black or color of your choice
- a couple of strands of beads of your choice (I bought two 12-inch strings of black beads, one shiny and one a little more matte, as well as a 7-inch strand of silver beads)
- coordinating sewing thread
- beading needle
- button of your choice (I’m using a kind of flat, slightly shiny gray one from my stash)
- clipboard or something else to hold the bracelet while you work
Instructions
I’m not going to go into great detail here because these aren’t my instructions at all. I followed the Beaded DIY Wrap Bracelet tutorial at Crafts Unleashed.
But basically you determine how many wraps you want and measure about 18 inches for each. The tutorial and I both are going for three wraps, so that’s 54 inches. Cut your cord, fold it in half and tie a knot with a loop big enough for the button to go through.
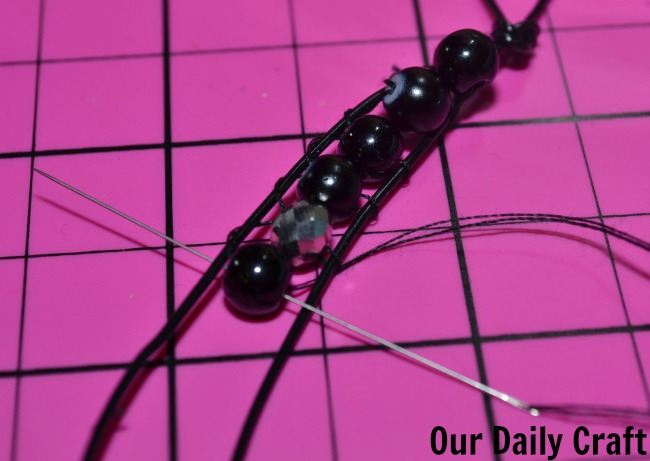
Secure the bracelet on your clipboard or another surface (I actually just used my button jar), thread your needle with a double-loop of yarn, tie it to the left-hand side of the bracelet and begin stringing beads, using a figure 8 pattern to weave the thread up, over and around the cord. Check the tutorial for a step-by-step on that.
Since I have more black beads than shiny beads, I did shiny black-matte black-shiny black-matte black-shiny silver repeating. After you do a couple of beads you’ll get the rhythm and it will actually go really fast.
Not fast enough for me today, but I made good progress in not a lot of time. Just a couple more wraps to go! I love it already!
It’s not too late to join Iron Craft if you’re interested in crafty challenges! Go check it out!
4 Comments
Everyone got a little off schedule with the weather it seems! This will be lovely when it is finished.
It looks great so far! Make sure you tie the end really well and glue it! Mine actually ended up coming out and was out of commission for over a year!
Oooh, good tip! Thanks!
This looks like something my daughter and her friends would love to do – I’m going to send it to her.