Affiliate links may be included for your convenience. View our privacy and affiliates policy for details.
The knit cast on is my favorite cast on to teach new knitters because you’re basically learning how to knit right there in the cast on, so it makes starting to knit that much easier.
And if you’re working with someone who has knit before but someone cast on for them, this cast on will come very easily to them.
What is the Knit Cast On?
The knit cast on is exactly what it sounds like. You start with a slip knot, then work as if you were making a knit stitch. Instead of finishing the stitch as you would if you were knitting, you slip it back onto the needle with the slip knot.
Each cast on stitch is formed from the stitch immediately proceeding it.
This might sound a little confusing if you’ve never knit before, but I’ve taught so many people this way — from adults to my 7-year-old daughter — I really think it’s the best cast on to learn first.
It’s maybe not the easiest, though; if you’re looking for the easiest cast on, try the wrap cast on first.
What Advantages are There to Using Knit Cast On?

As mentioned above, I think this cast on method is ideal for teaching people how to knit because you take care of learning to cast on and learning to make knit stitches all at once.
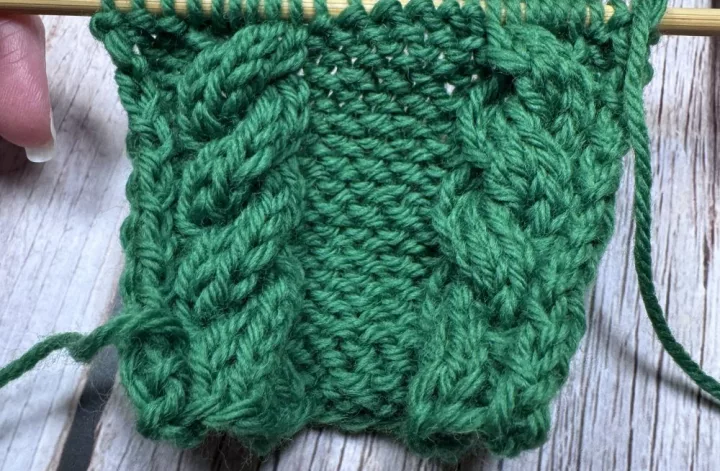
It has an interesting look thanks to how the stitches are formed, almost like little chains at the bottom. This is a cast on that can be worked from a short tail so you don’t have to worry about running out of yarn. It’s relatively stretchy and can be used to add stitches at the beginning of a row.
Disadvantages to This Cast On Method
The strands or chains at the bottom of the cast on can snag when you wear or use a project made with the knit cast on. It’s also one of the slower ways to cast on, so I don’t like to use it when I have to cast on a lot of stitches for a project.
It can be difficult to make your stitches a consistent size, especially for new knitters, so you’ll need to take your time to ensure the cast on looks good and is easy to work with.
How to Work the Knit Cast On
Start with a slip knot and hold the needle with the slip knot in your left hand and the empty needle in your right. (For reference here I’m using Clover needles and Lion Brand Basic Stitch, both of which are great for beginners.)

Insert the right hand needle into the slip knot from front to back as if to knit it.

Loop the working yarn around the right hand needle.
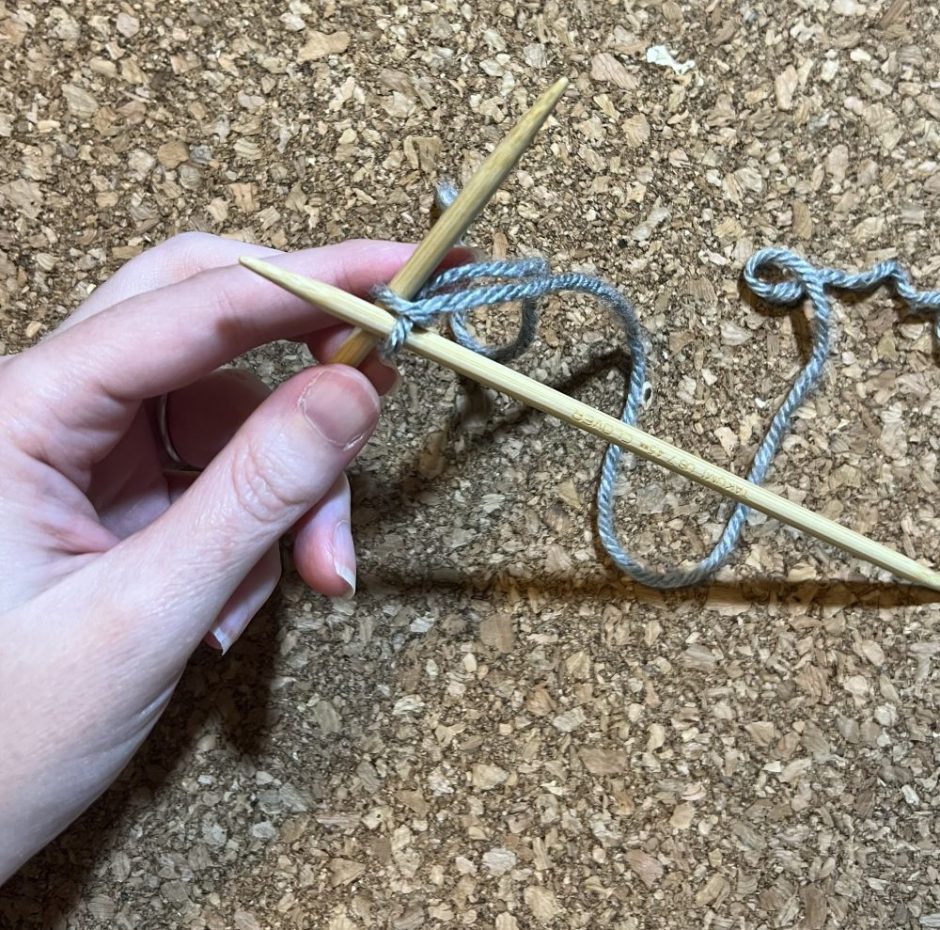
Push the right hand needle back to the front, coming underneath the slip knot and keeping the new loop on the right hand needle.

Make the loop big enough so that you can slide it onto the left hand needle, then pull the yarn gently to tighten.
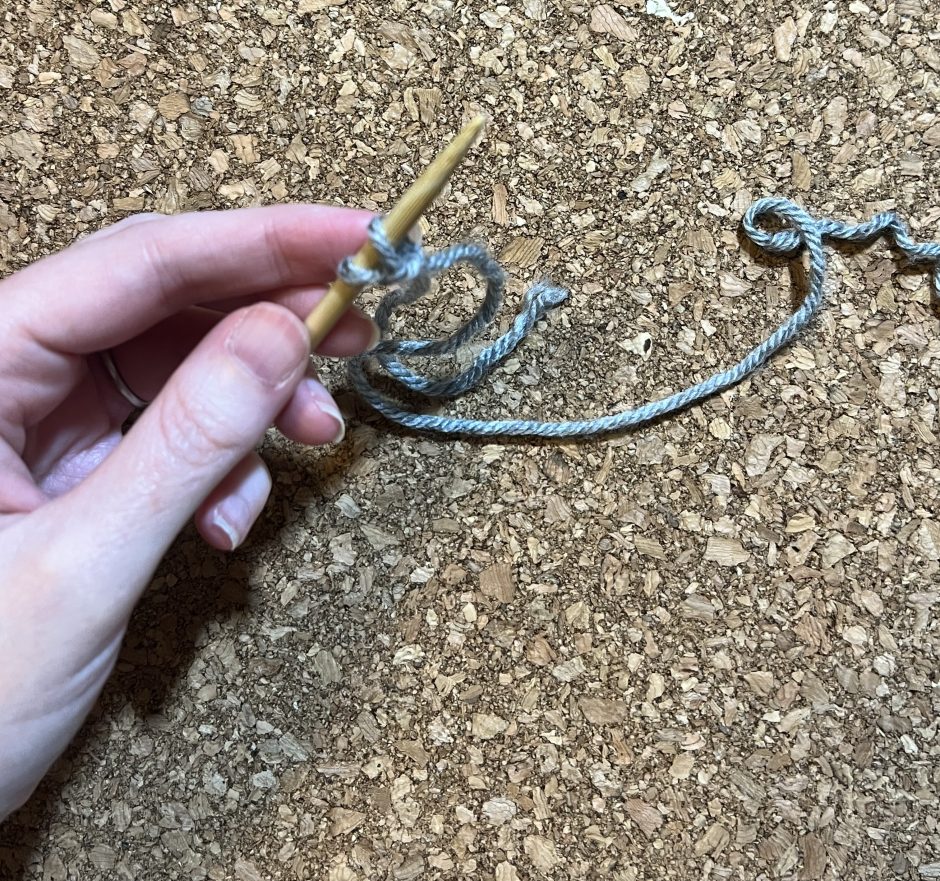
Repeat this series of steps, each time working into the last stitch you made, until you have the required number of stitches.
Note: this method is the same regardless of whether you knit holding the yarn in your left hand or your right hand. The only difference is in how you manage the yarn.
Working without a Slip Knot

You can make the knit cast on without a slip knot if you prefer; just make a loop around the needle and hold the yarn in place while you work the first stitch.
The loop will hold once you have the first stitch cast on. You can keep the loop as a stitch or drop if off the needle when you come back to it.
Knitting with the Knit Cast On

One interesting thing about the knit cast on is that both sides look different and you can decide which side you want to be the “front.”
But when you are finished casting on stitches, you work back across them without turning your work. If you don’t want that side to be the front, work it as a “wrong side” row (for instance, purling if you’re working in stockinette stitch).
Variation: The Purl Cast On

I don’t know why it never occurred to me that if you can knit cast on you can also purl cast on. It’s done the same way except you work it as a purl stitch instead of a knit stitch: with yarn in front insert needle from back to front, wrap the yarn around the needle, push the needle to the back going under the loop of the previous stitch, then bring the loop up onto the left hand needle.
Except here you don’t even have to slide the right hand needle out of the stitch because you’re in the perfect position to purl the next stitch. It’s so much faster and actually pretty fun. Watch your tension as you gain speed, though, so your stitches aren’t too tight or too loose to work with.