Affiliate links may be included for your convenience. View our privacy and affiliates policy for details.
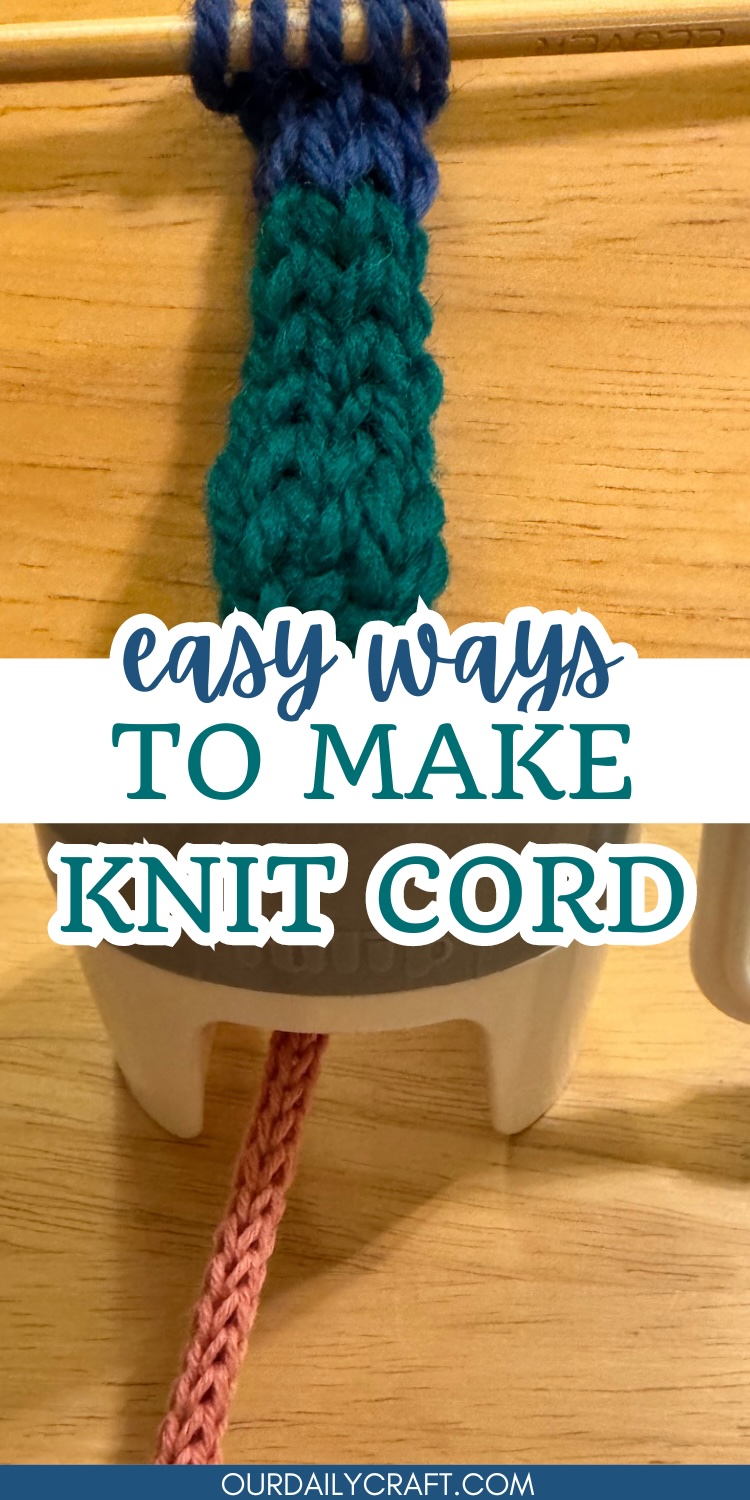
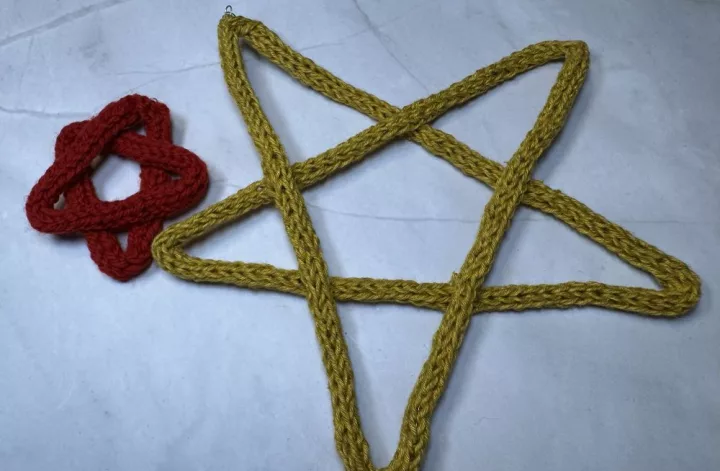
There are all sorts of reasons you might want to make knit cord (also known in the knitting world as I-cord). It’s a great drawstring for bags and other projects. You can use it to make lettering or surface designs on projects. You can coil it to make coasters, baskets and more.
And the good news is you can make knit cord even if you don’t knit. But we are going to start there.
Make Knit Cord with Knitting Needles, aka I-cord
I-cord got its name from the grandmother of modern knitting, Elizabeth Zimmermann, who called this simple knit tube I-cord because even an idiot could make it. That’s not a nice way to put it, but it is very easy and if you know how to knit and own double pointed needles you can make knit cord this way.
Technically you could do it with circular knitting needles as well, you just need to be able to get to both ends of the needle. But it will go a lot faster if you use double pointed needles because they’re short. These ones from Clover are my favorite, either in 5 or 7 inch length.
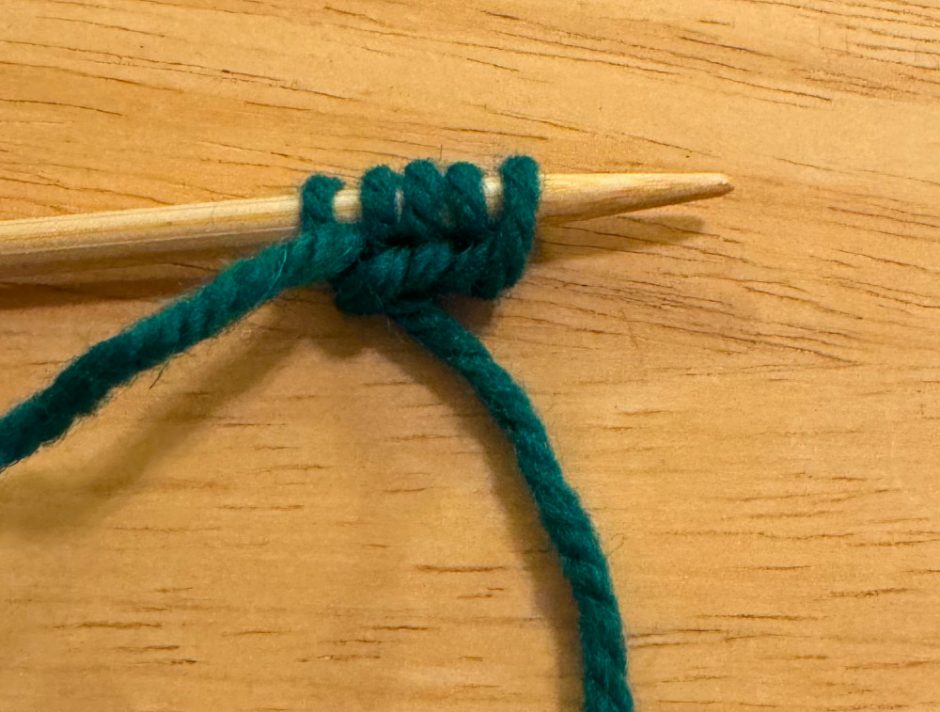
To start you’ll need two double-pointed knitting needles and the yarn you want to work with.
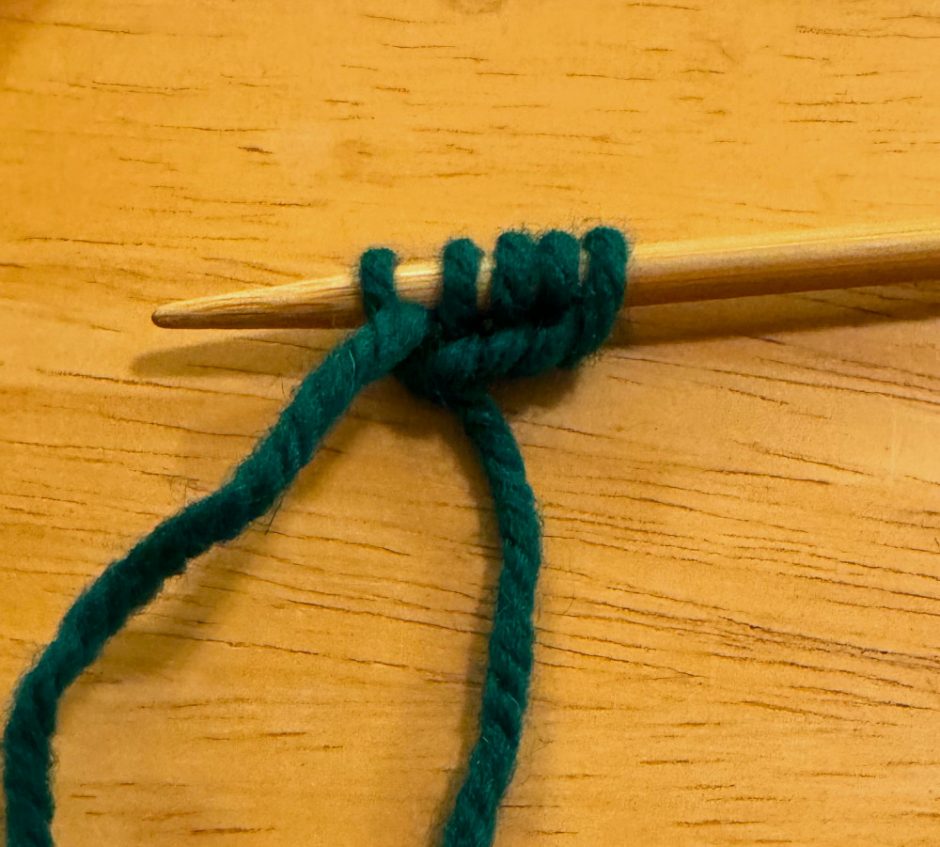
Cast on a small number of stitches. Most cord markers on the market use 4 stitches, but I usually do either 3 or 5 (I have 5 in the photos here).
Instead of turning the work, slide it back to the other end of the knitting needle and put that needle back in your left hand. Pull the yarn up across the back of the work and knit the stitches again. Alternatively, you can turn and knit the first row, then slide from there, depending on your cast on method. I use long-tail, where the cast on looks like a row of knitting anyway.
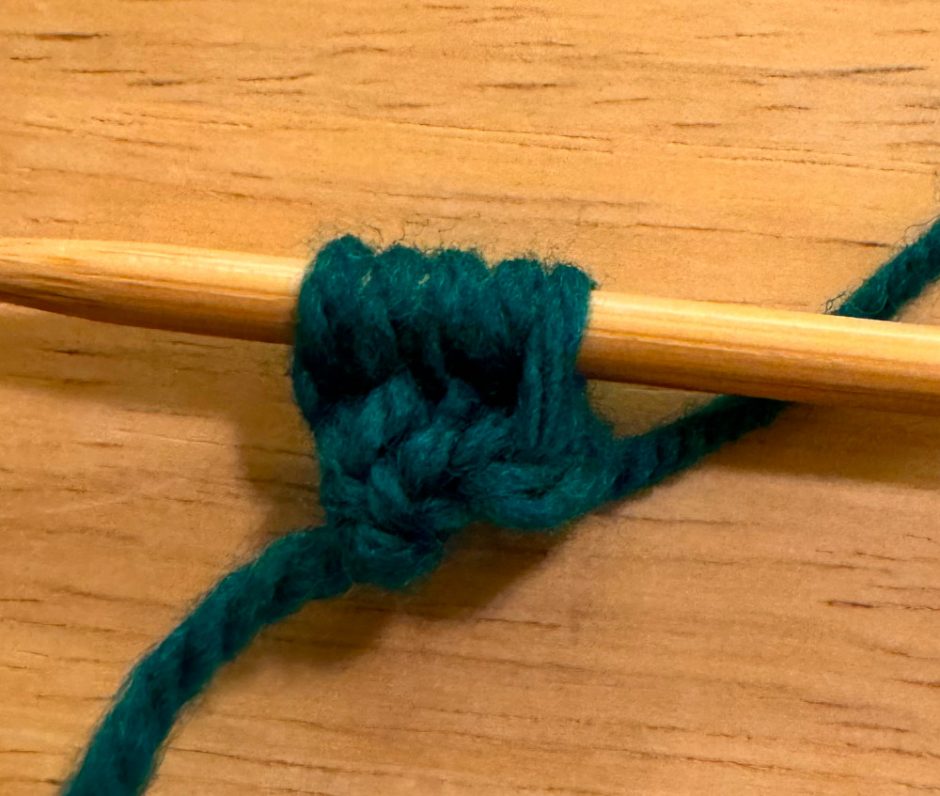
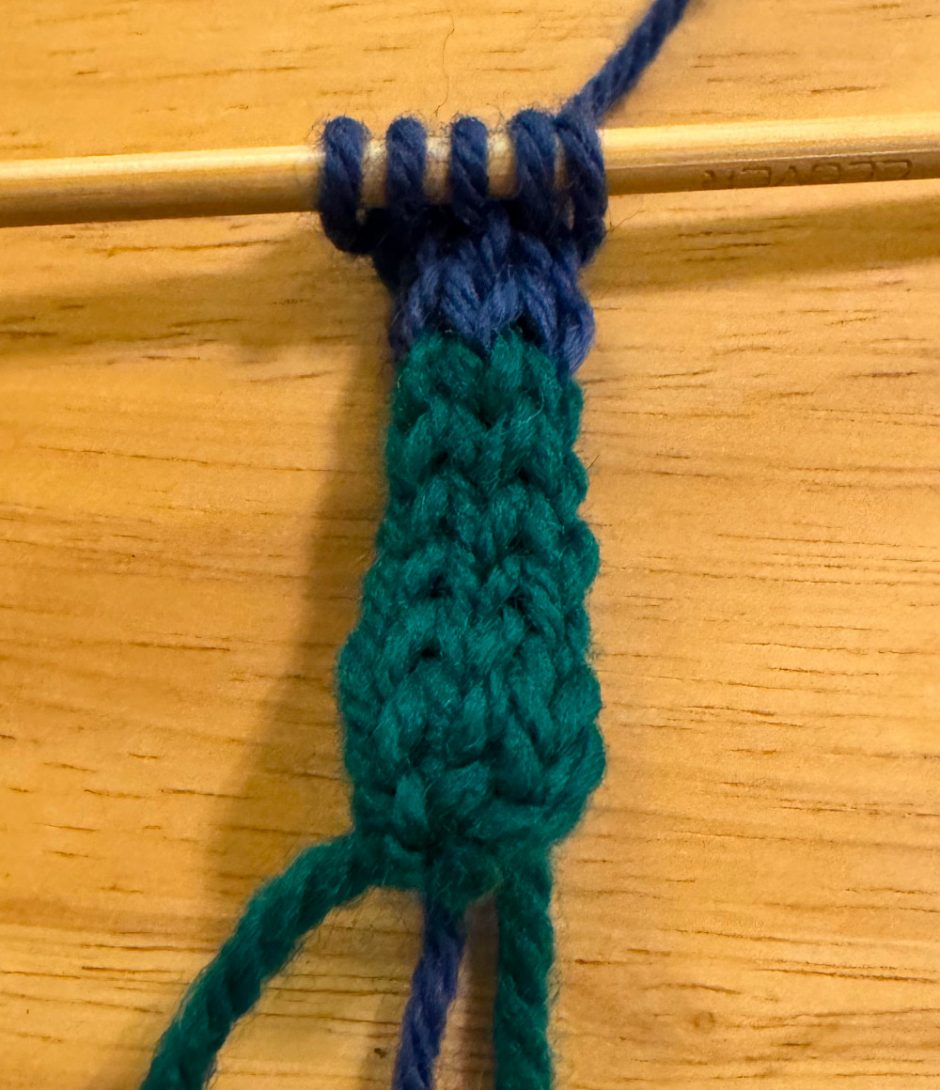
Repeat that step as long as you need to for the length of cord you want. Every couple of inches you’ll want to tug on the cord so it evens out and closes up along the back. You can even change colors if you like!
To finish the cord you can do a regular bind off, knit 2 together then slip that stitch back and knit 2 together again (or however many times for the number of stitches you have), or cut the yarn, leaving a long tail and use a yarn needle to thread the yarn through the stitches.
You can weave in the ends just by hiding them inside the cord.
Making Knit Cord with a French Knitter
I don’t know why cord makers of this sort are called French knitters. They are sometimes called knitting spools, peg knitters or knitting dolls, because sometimes the base is shaped like a doll (it can also be a mushroom or other shapes, or just a piece of wood or plastic).
This kind of cord maker consists of a tube with pegs (usually 4) at the top. Yarn is wrapped around the pegs twice, then you lift the first loop over the second loop to make the stitch.
If you’re familiar with loom knitting this will make sense to you, because it’s the exact same process.
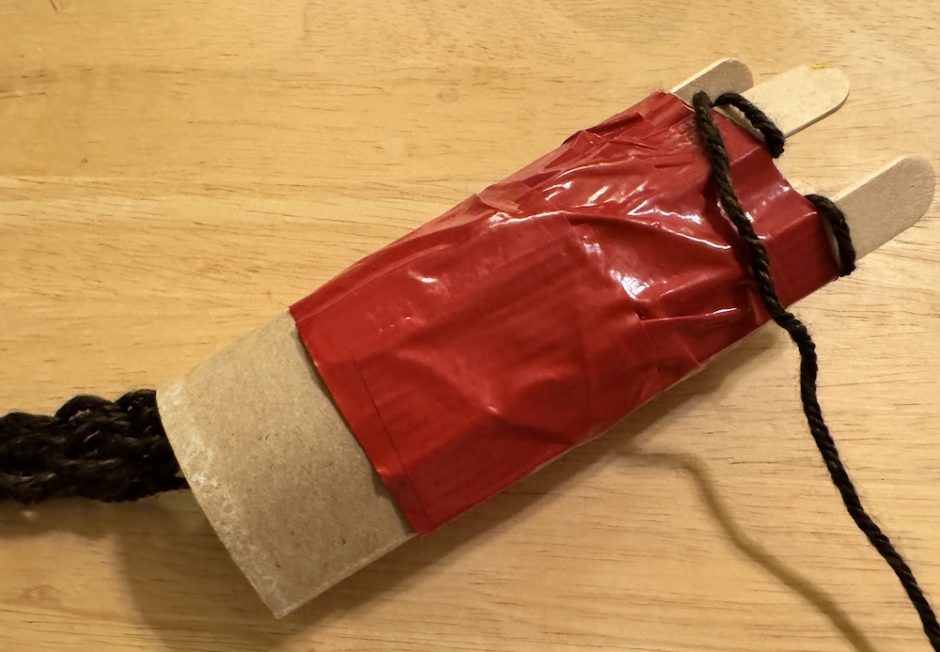
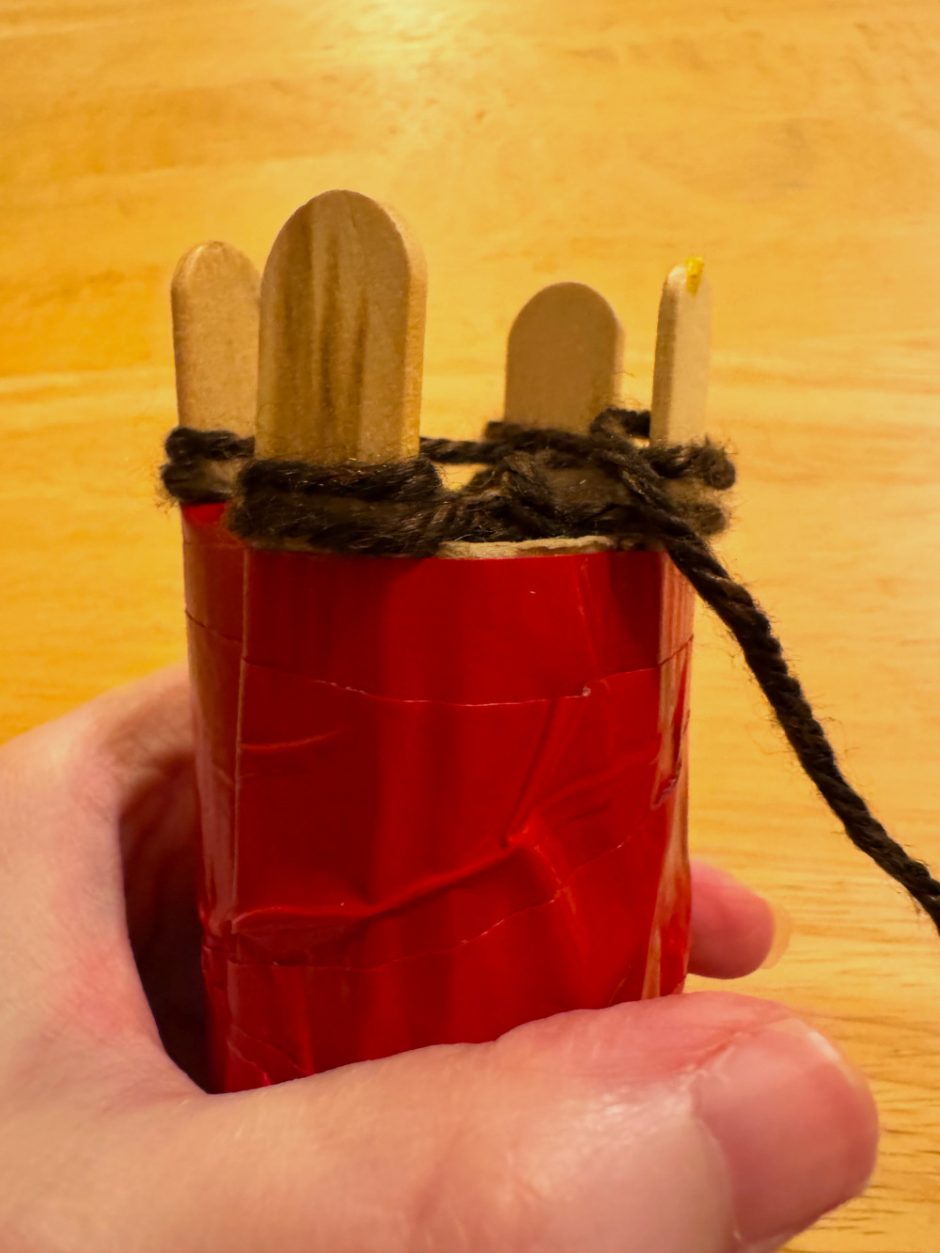
You can also make your own French knitter with craft sticks and a cardboard tube, like mine shown here. The size of the sticks will determine the size of the tube, with larger sticks making a larger tube. (You can also buy French knitters with interchangeable pegs so you can work with different weights of yarn.)
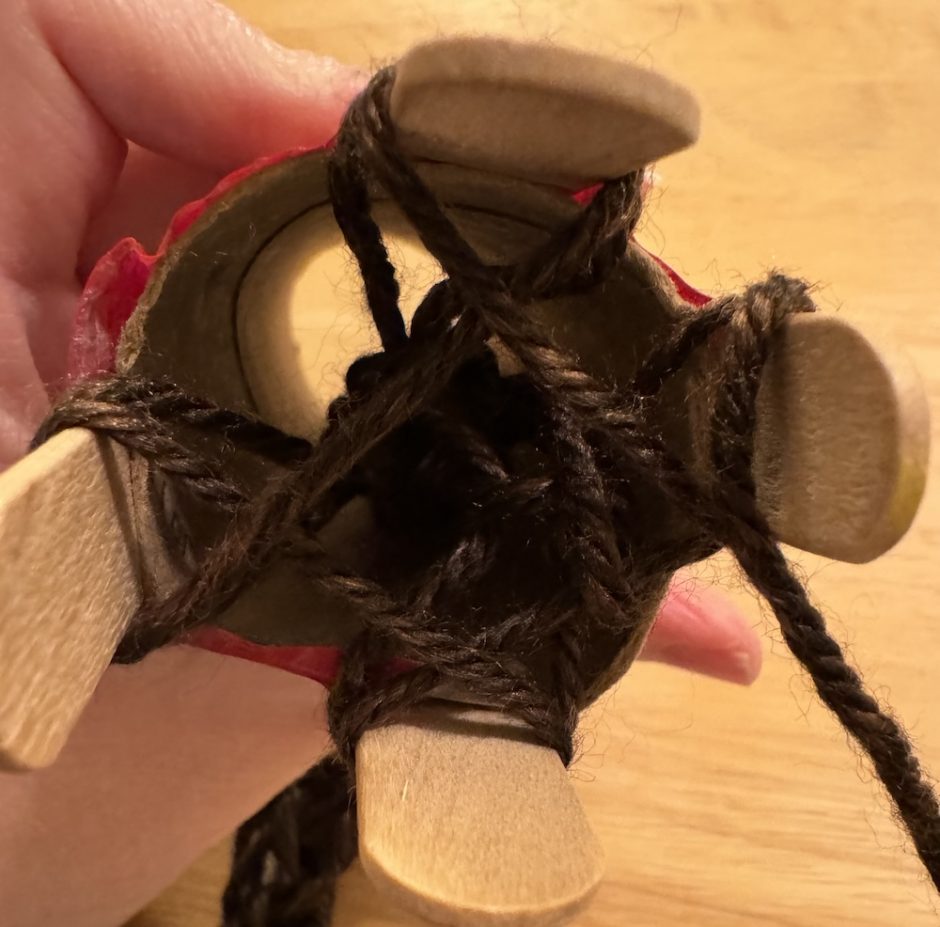
Whatever kind of tool you use, you start by threading the yarn into the tube. Wrap each peg counter-clockwise, then wrap each one again so there are two loops on each peg. Mine is already in progress, but this is how it should look from the top when it is double wrapped.
Lift the bottom one over the top one on each peg. Wrap again and repeat.
Make the cord as long as you want, and finish it by leaving a long tail of yarn, threading the yarn through the last loops and pulling tight.
Crank-Powered Knit Cord Makers
The last, easiest and most expensive way to make knit cord is using a crank cord maker. This works the same way as a French knitting but instead of having to make the loops and pull them over by hand, the machine feeds the yarn and a crank turns the pegs (which is this case are hooks), which causes the stitches to form.
These machines are generally best with lighter weight yarns (I actually broke my last one trying to use yarn that was too thick).
A crank powered cord maker comes with a weight, often a heavy clothespin or a washer shaped weight, which you attach to the end of the yarn before you start making the knitted cord. This helps keep the yarn in the proper position to feed through the machine.
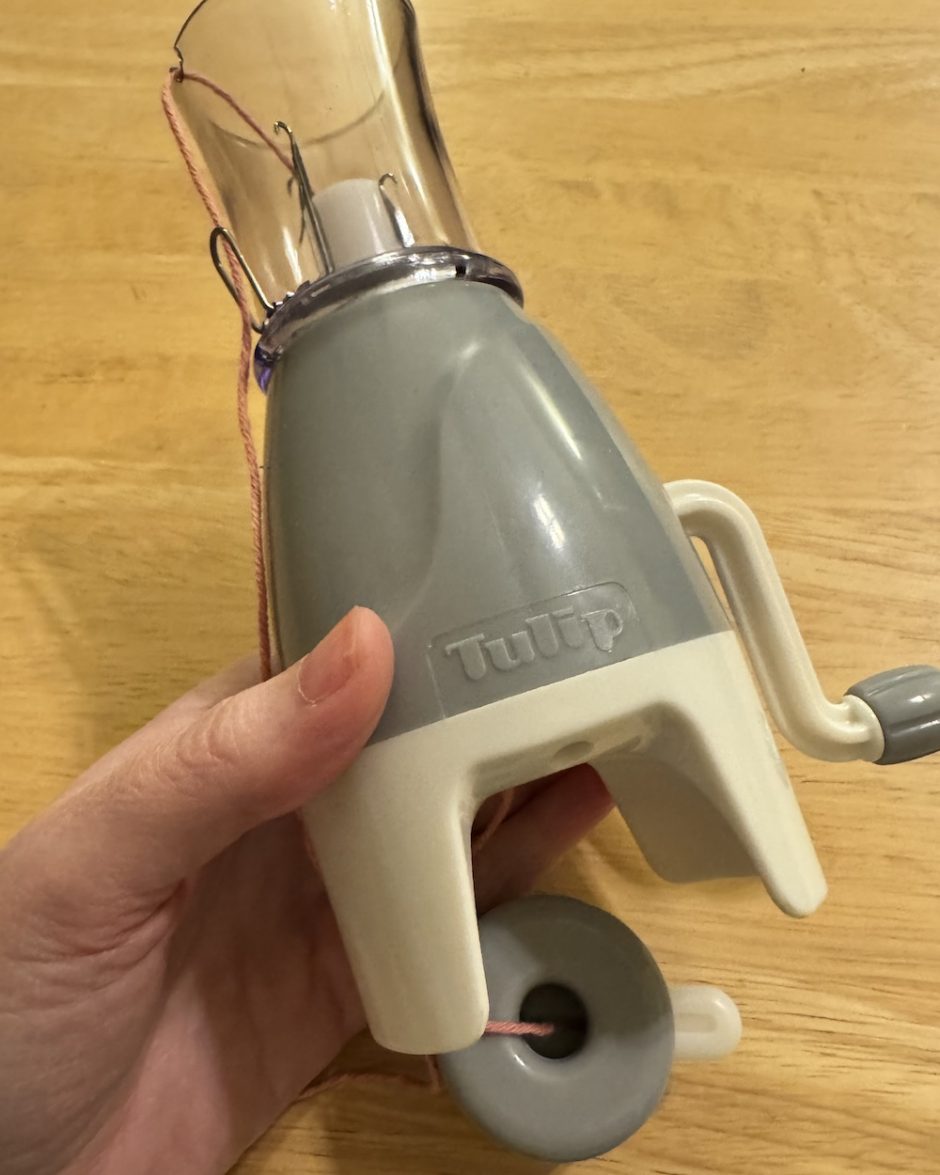
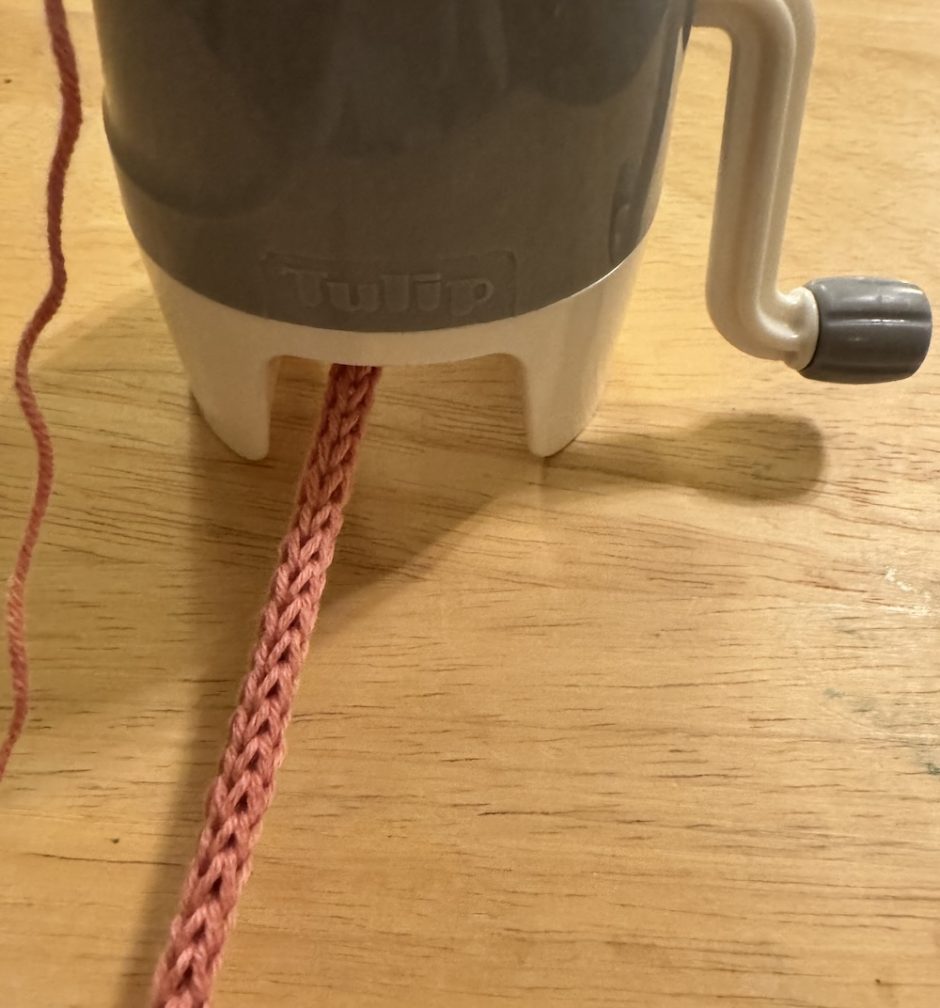
Each machine is a little different in the setup. I have the Tulip I-cord Knitter Machine, which has an eye on the side to thread the yarn up through before you guide it to the notch in the top and back down the center of the machine. Once the yarn is through the machine, you add the weight to the bottom.
Make sure the hooks are open before you start.
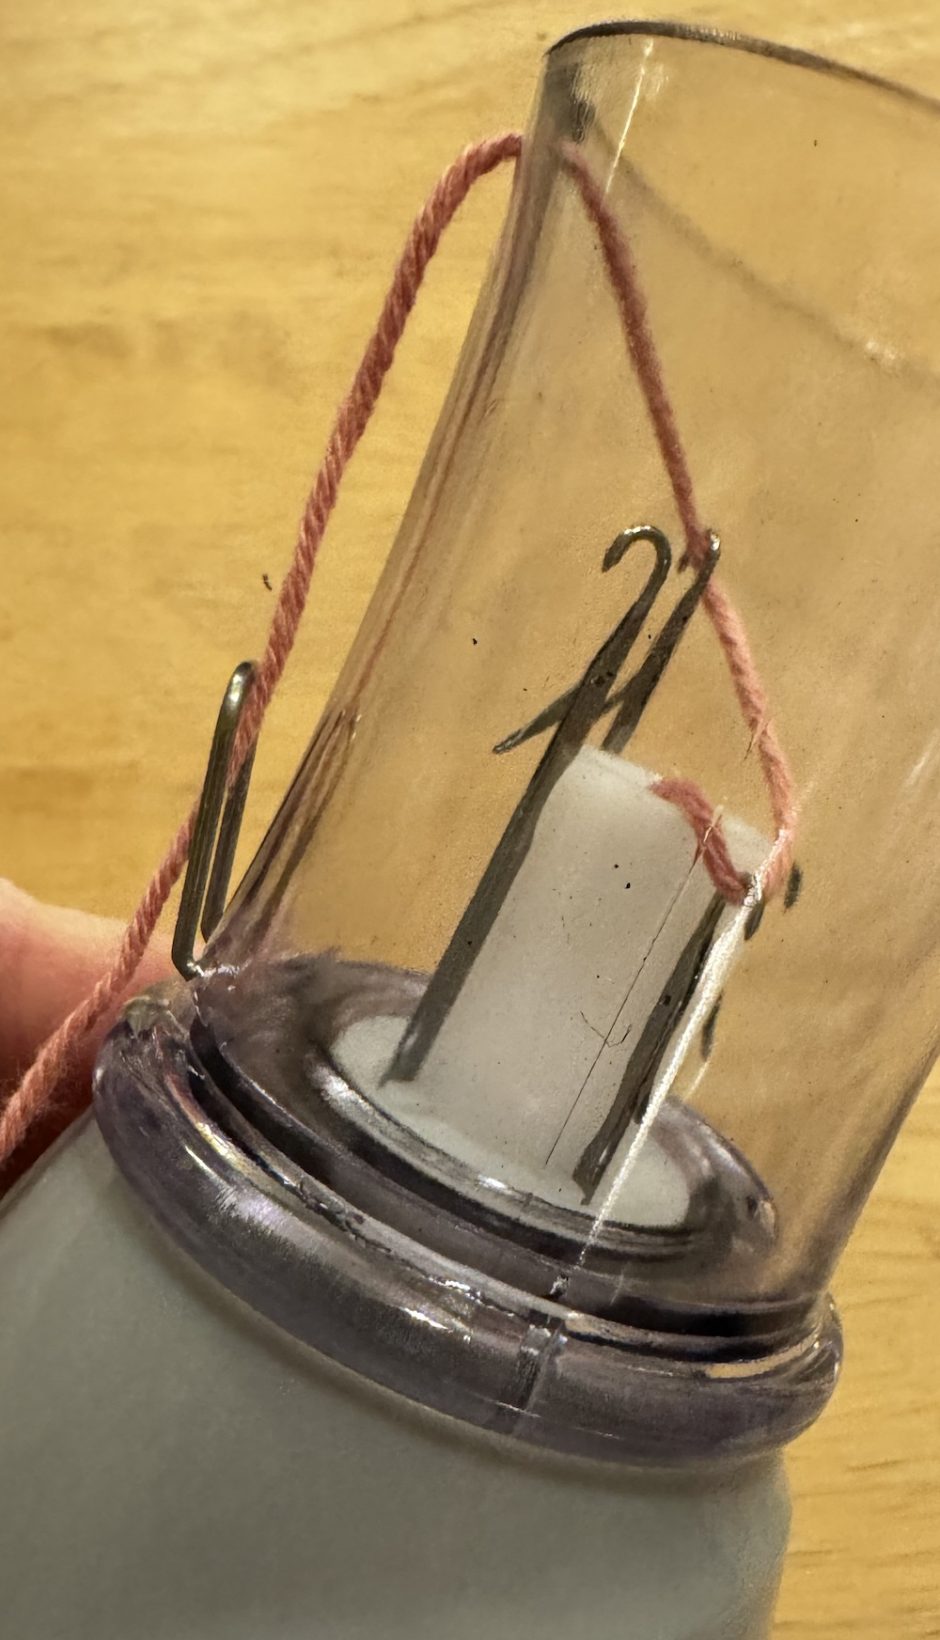
Thread the yarn through every other hook on the first pass, making sure that the hooks close. Turn the crank clockwise and the stitches will begin to form. Make sure the weight can dangle freely while you work (don’t set the I-cord maker on a table while you crank).

As you go the cord will appear through the bottom of the machine.
As with other types, you can finish off your knit cord by pulling the yarn end through the stitches.