Affiliate links may be included for your convenience. View our privacy and affiliates policy for details.
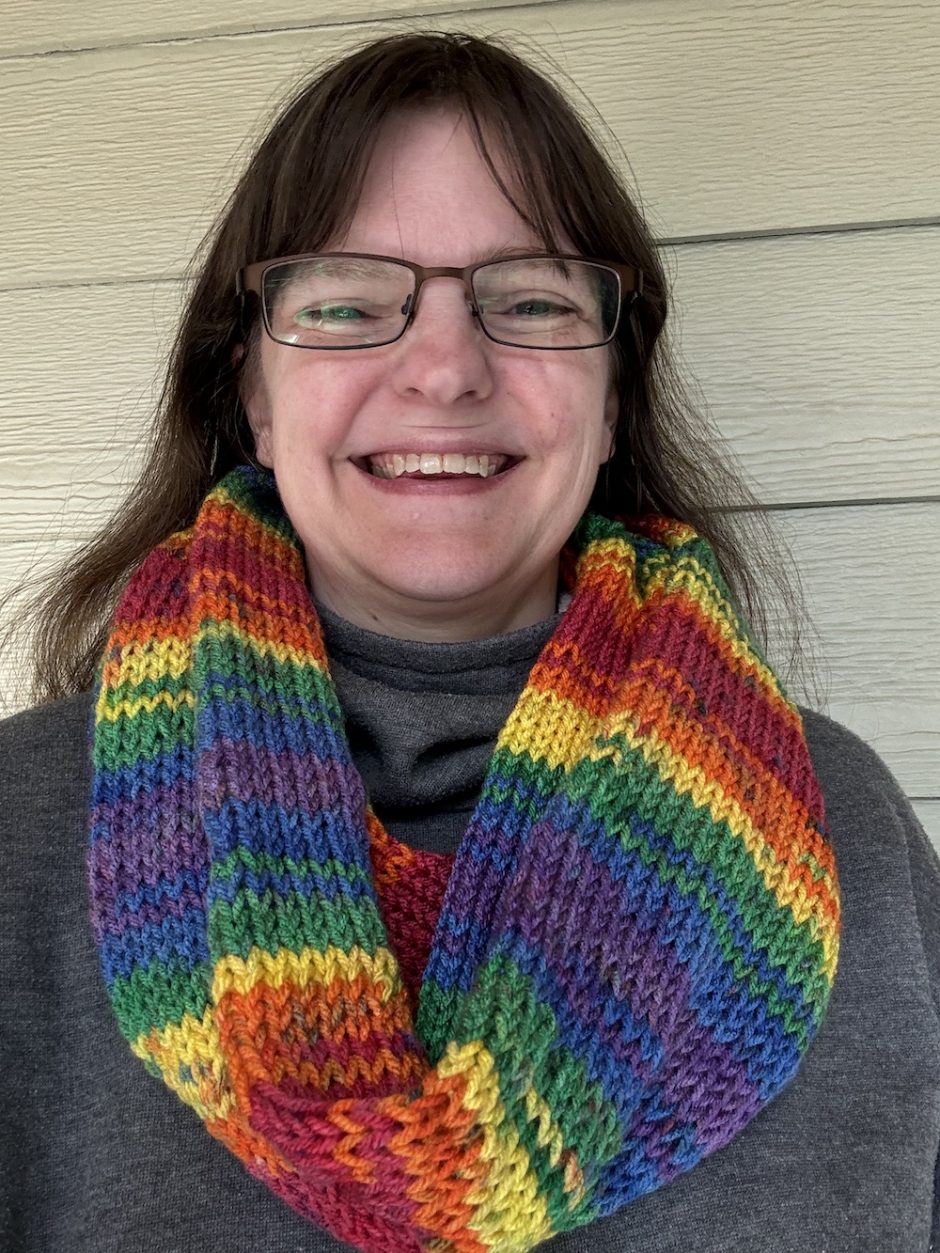
I feel like I’ve been seeing a lot of people experimenting with the Sentro and other knitting machines lately, and while most people seem to make a hat as their first project, my favorite thing to do with it is to knit a loop scarf, which you can learn with this simple loop scarf knitting machine pattern.
What is the Sentro?
The Sentro knitting machine is a round, plastic device that has a hand crank to move the yarn through a series of pins to make knit fabric. It’s sort of like loom knitting but faster, since there’s a crank.
There are several different sizes of Sentro knitting machines out there, sized based on the number of pins they have. The smallest is the 22 pin, and there is also a 40 pin and a 48 pin. There are a few different brands that may have different configurations of hooks, but these are the most common ones.
The Addi Express, for instance, has 46 needles for its king size model, while the small one has 22 needles.
I have a 40, which is great for making adult sized hats and scarves. I love this loop scarf knitting machine pattern because it’s so much faster than knitting a scarf by hand, and they’re a great width for kids or adults.
There’s a bit of a learning curve when it comes to knitting with a crank knitting machine, but once you get it it’s a fun way to make quick projects.
What Can You Knit on a Knitting Machine?
Sentro knitting machines are known for knitting tubes, which can be made into hats, scarves, headbands and home decor projects.
These machines also have the option to knit flat panels (full disclosure: I haven’t figured out how to do that yet) so as long as you don’t need a panel wider than the number of stitches your machine can produce, you can make anything you would otherwise knit by hand.
I’ve seen beautiful sweaters and even skirts made by stitching panels together.
As I mentioned before, many people learn to use the machine by making a double-thick hat, which is basically just a tube you fold in on itself and close at the top to make into a hat shape. This is a great first project because it’s fast, but it does require you to count your rows.
Some machines have a built-in counter but mine doesn’t, which may be why I prefer a knit loop scarf as a first project, because you can make it as long as you want. (You can buy a digital counter to install on your knitting machine, I just haven’t done it yet.)
How to Knit a Loop or Infinity Scarf
This loop scarf knitting machine pattern is relatively quick and easy to do as a first knitting machine project.
I like to start with a bit of waste yarn to knit the first couple of rows, which can then be ripped out to reveal live stitches for finishing at the end.
Supplies
- two balls of Big Twist Living in color Inclusivity (this yarn is exclusive to JoAnn), or about 400 yards medium/worsted weight yarn of your choice, plus a few yards of waste yarn (I use Lion Brand Basic Stitch for this purpose)
- Sentro or other crank-powered knitting machine, 40-48 pegs (note: if your machine has more needles your scarf will come out a little wider and a little shorter than mine)
- two circular knitting needles of any size (optional, I use them for finishing)
- yarn needle (I love the ones with bent tips, you can even use them to help fix tucked stitches)
Size
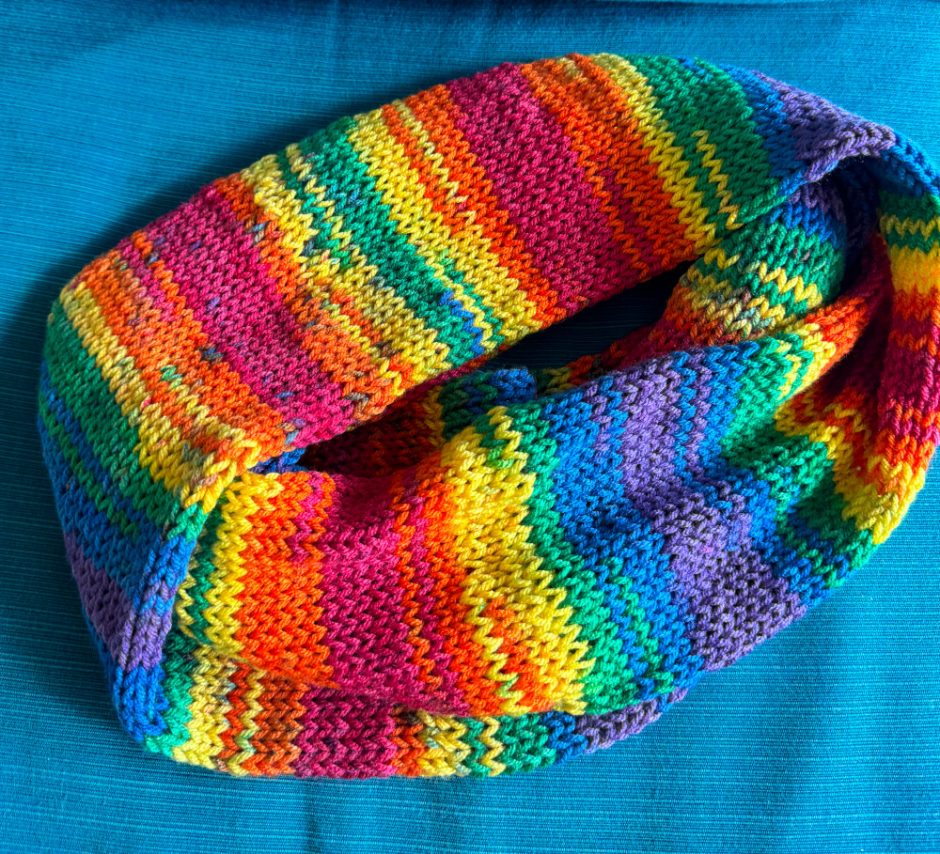
Finished scarf is about 11 inches/28 cm around and 78 inches/almost 2 meters long before looping. You can make yours as long or as short as you want, depending on how much yarn you have.
Loop Scarf Machine Knitting Pattern
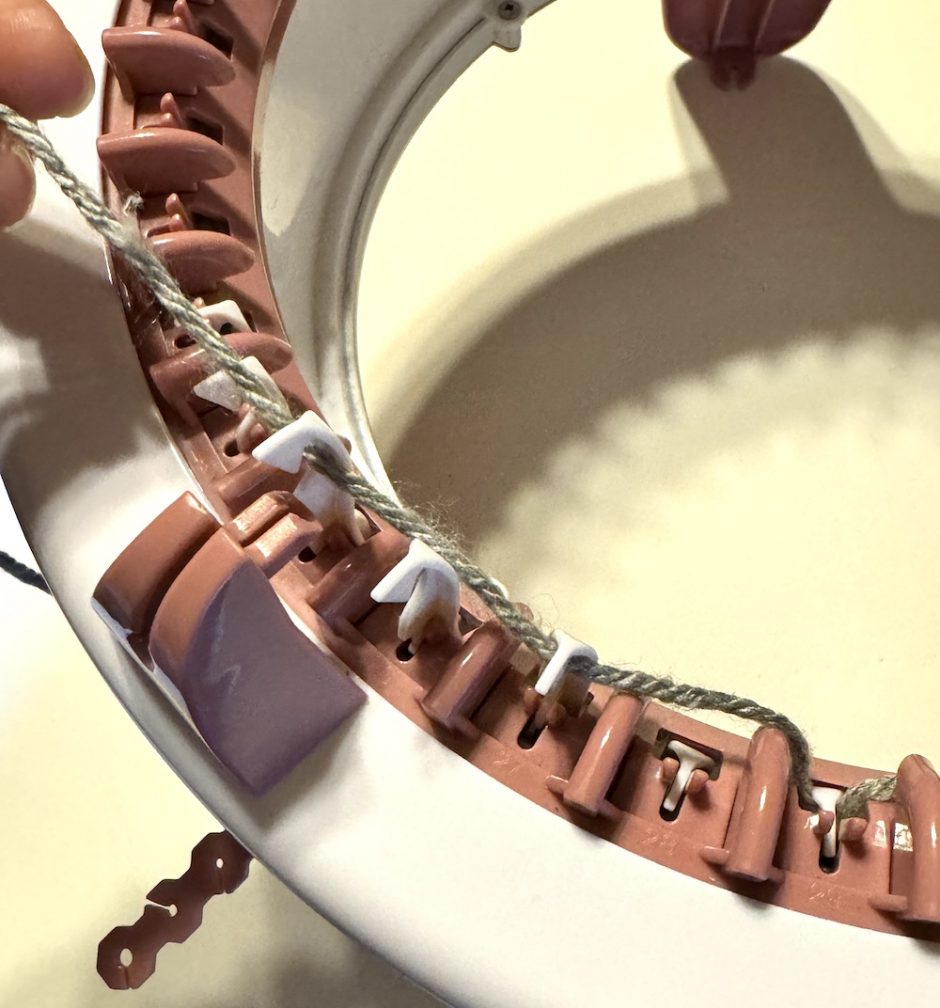
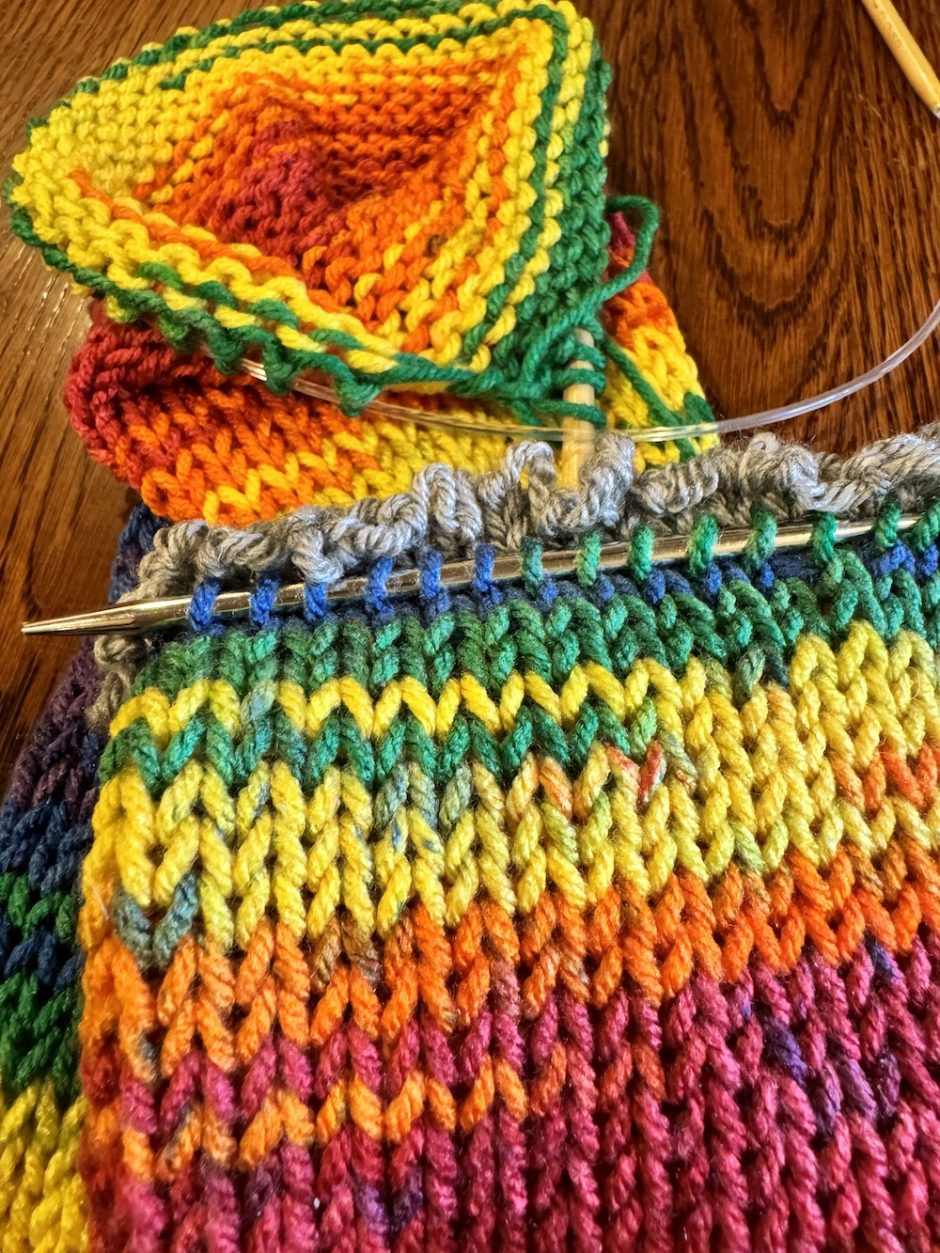
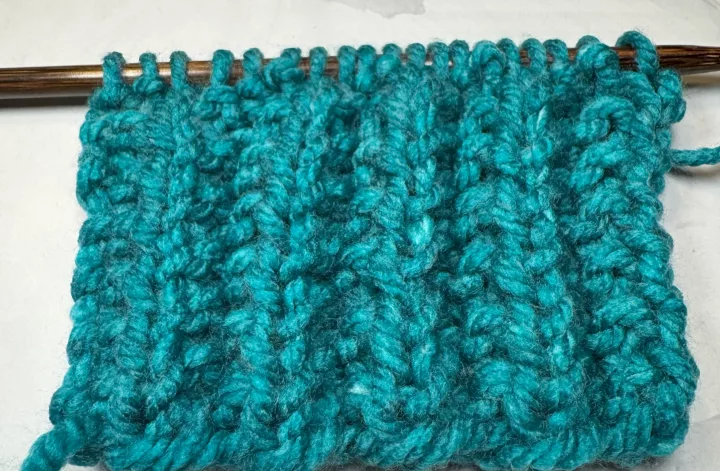
Start with your waste yarn and thread the hooks, starting with the black hook or hook number 1. The yarn should go under the first hook, behind the second, under the third, behind the forth and so on all the way around.
Crank a couple of rounds with the waste yarn before joining in the working yarn.
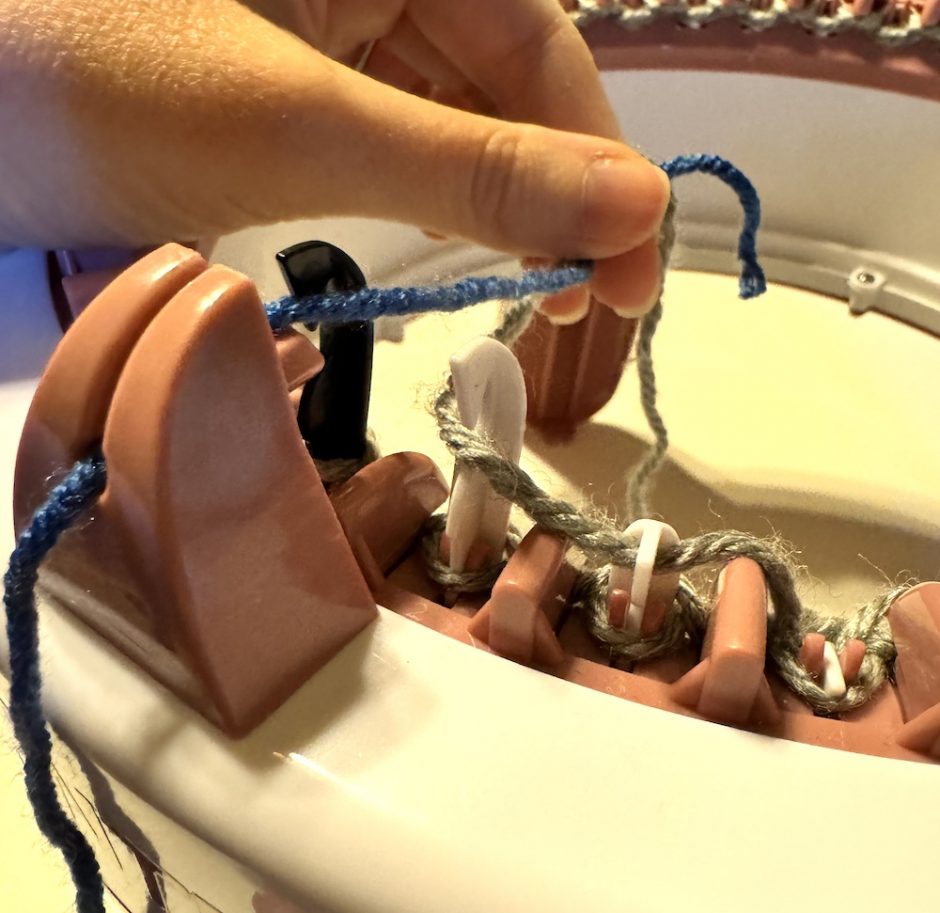
To start the working yarn, work to the black needle/first needle. Leave a tail of a few inches on the inside of the machine. (Note: if you want to sew the ends closed without grafting, leaving a tail of about a yard will be helpful later. See finishing your loop scarf, below.)
I like to hold onto both yarn ends for a few stitches on the first couple of rounds just to make sure the stitches aren’t too loose. Thread the working yarn through the tensioner (I use the loosest setting).

When you need to work in a new ball of yarn, whether because you’re running out or you want to add your own stripes, work to the black/first needle. Leave a few inches of tail on each ball of yarn as before. After I work the first couple of rounds with the new ball, I tie a knot to secure the ends. You could weave in the ends if you wanted, but since this is inside the loop I think it’s fine this way.
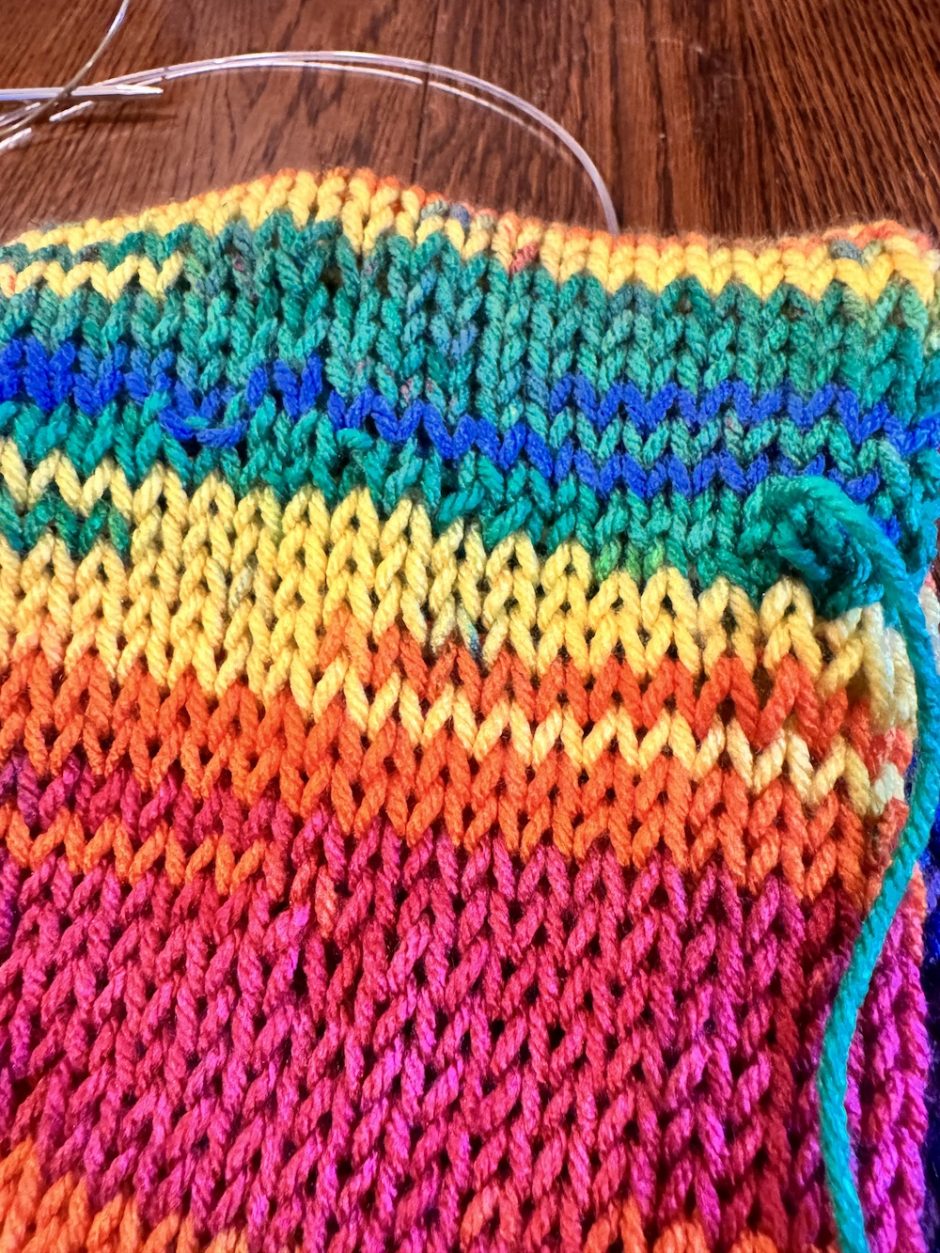
Continue cranking to desired length or until you have a couple yards of yarn left.
Finishing Your Loop Scarf
Because I’m a knitter, I naturally think about how I would finish this loop scarf machine knitting pattern if it were knit by hand. Because there are live stitches on both ends I decided I wanted to do grafting, because that is the most unobtrusive seam and it leaves the loop open on the inside, so when you’re wearing it you don’t really see or feel the seam unless you go hunting for it.
Grafting isn’t the easiest way to finish a loop scarf, but it does look great and is worth learning, especially if you’re a knitter.
If you want to graft your stitches, pick up all the stitches from the machine with one double pointed knitting needle and the stitches at the beginning of the scarf with another double pointed needle. You can slide your needle through the right leg of each stitch, then remove the waste yarn and your stitches will be ready for you.
Align the live stitches so there’s no twist in the scarf (unless you want one!) and with the wrong sides/insides facing each other. Graft the stitches with the remaining yarn. If you know how to graft and need a reminder, starting with the front sent of needles, go into the first stitch as if to purl and leave on the needle. Go into the first stitch on the back as if to knit and leave on the needle. Then it’s knit off, purl on on the front and purl off, knit on on the back until you run out of stitches.
I didn’t do the best job but it works!
When you’re done, weave in your end: I like to stick the needle in the side of the fabric then pull it out somewhere in the middle so there’s a few inches on the inside of the scarf. Trim the excess and make sure the yarn end hides inside the scarf.
If you don’t want to do this, thread your needle with the rest of the yarn and slide each stitch from the machine onto the yarn. Make sure you aren’t bunching up the stitches so the end will lie flat.
If you left extra yarn at the beginning you can do the same thing to pick up those stitches and remove the waste yarn. Then fold the scarf so there’s no twist and sew the ends together.
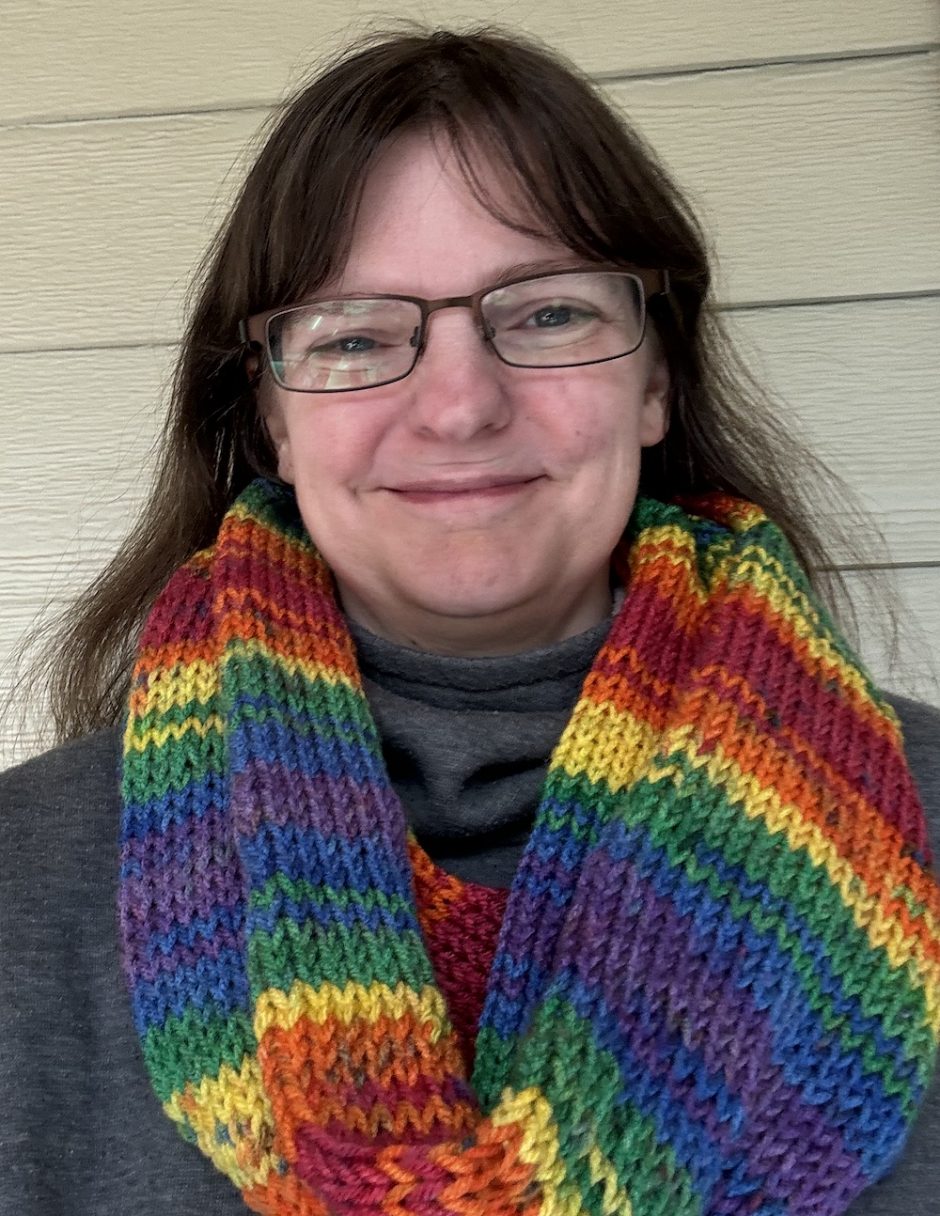
This kind of loop scarf only takes a couple of hours to knit and it’s so cozy. They’d made great holiday gifts or charity knitting projects. And now that you know how to make one with a single yarn, you can try a striped loop scarf next!


5 Comments
I absolutely love the loop scarf pattern! The step-by-step instructions were so easy to follow, and I can’t wait to try it out. Thank you for sharing this lovely project—it’s perfect for the upcoming chilly months!
Enjoy! I hope you have as much fun making it as I did.
I absolutely loved this loop scarf knitting machine pattern! The instructions were clear and easy to follow, making the process enjoyable. Can’t wait to try it out with some colorful yarns. Thank you for sharing such a creative project!
Yay! So happy to hear!
Ang Delta Executor ay may regular na update upang masiguro ang compatibility. Sa Delta Executor new update, mas mabilis ang loading time at mas stable ang overall functionality.