Affiliate links may be included for your convenience. View our privacy and affiliates policy for details.
Intarsia is one of the common ways to add color to your knitting projects, but if you don’t know how to knit intarsia, it looks kind of hard and confusing. Never fear; it’s actually pretty easy!
What is Instarsia Knitting?
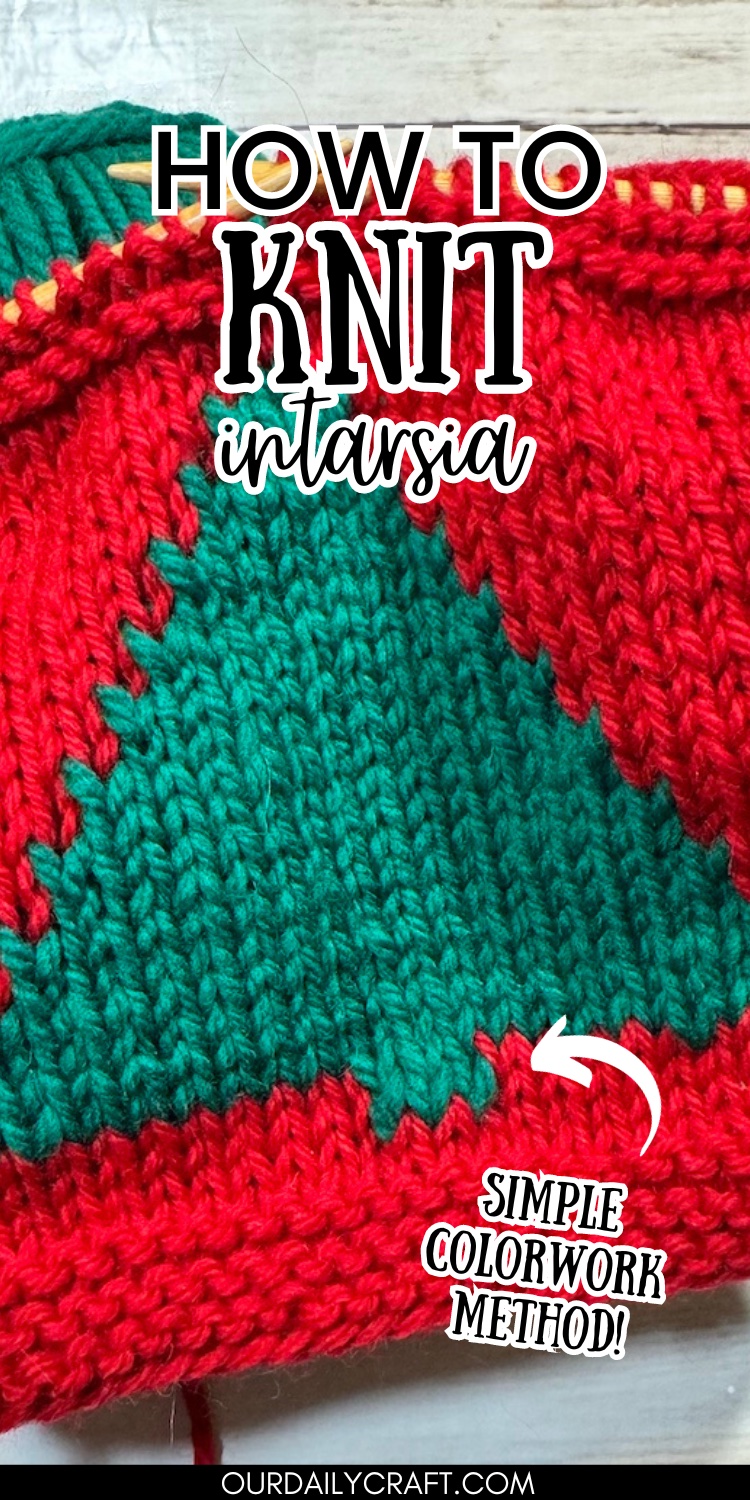
Intarsia knitting is a way to make big blocks of a different color in your knit fabric. While stranded knitting is typically used with smaller motifs, if you want to make a big design on your project, you’re going to want to use intarsia.
The key difference is that with stranded knitting you carry the yarn you aren’t using across the back of the work to get it to where you need it again. With intarsia you use a different ball of yarn for each block of color, dropping the old yarn and picking up the new one as you need it.
The name intarsia apparently comes from wood inlays where the designs are made with different colors of wood. It’s also sometimes referred to as jacquard knitting or picture knitting.
Setup for Intarsia
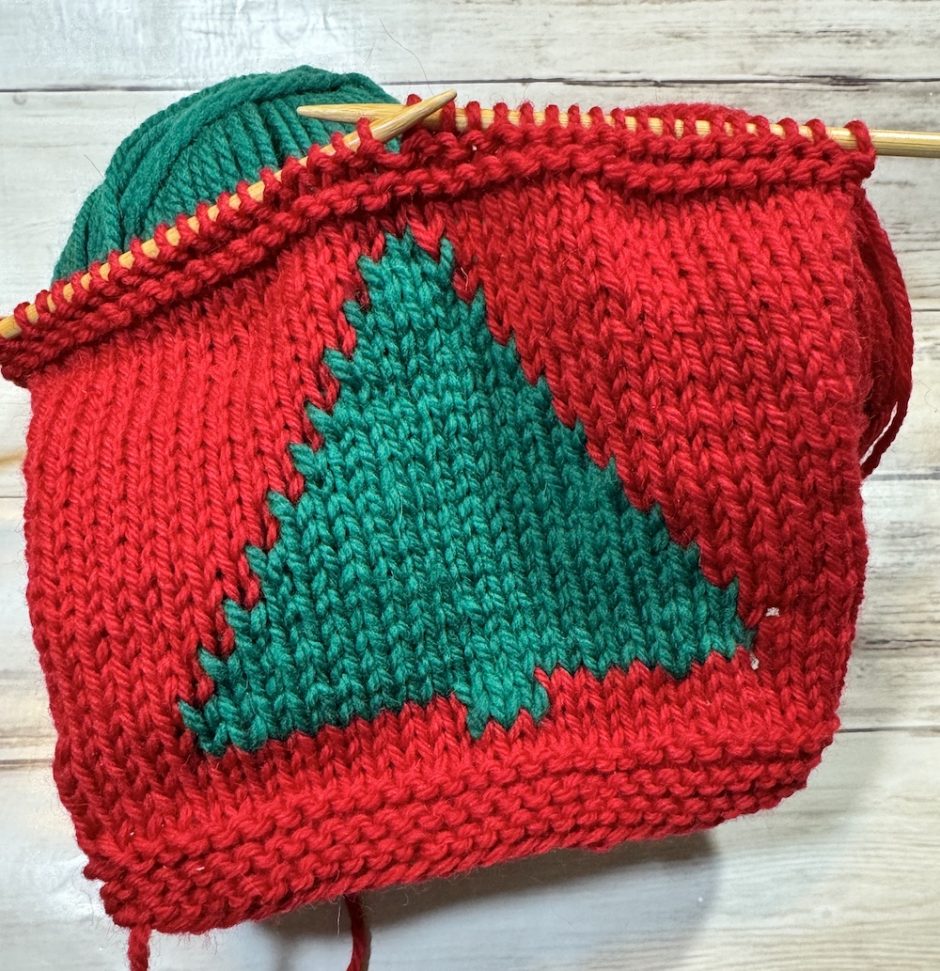
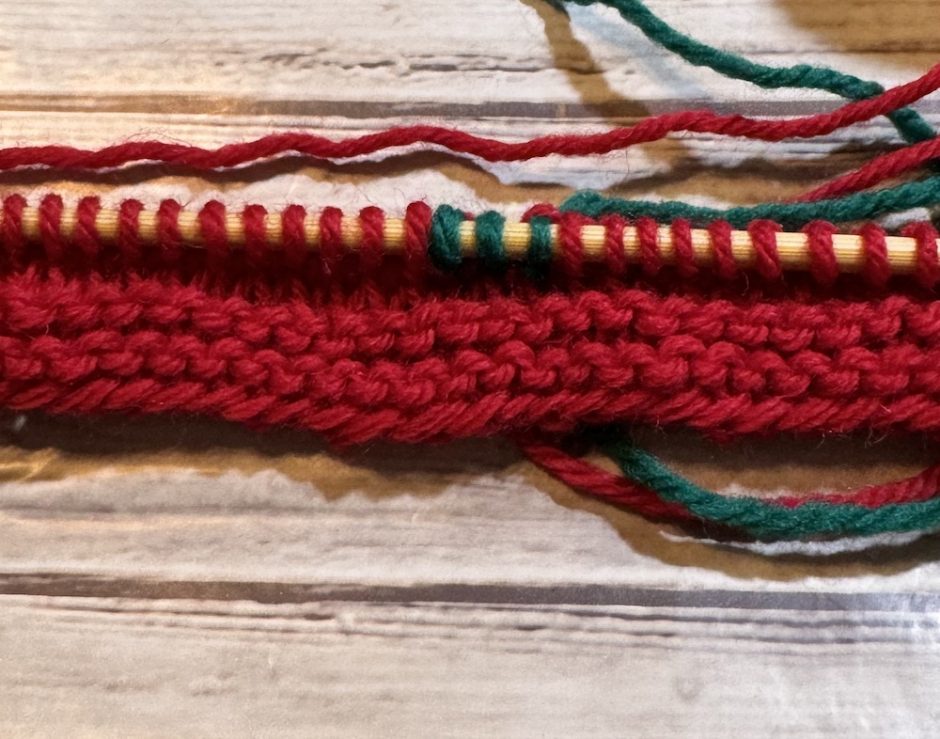
Intarsia knitting is typically worked from a chart, which will show you stitch by stitch which color to knit. Take a look at the chart to determine how many balls of each color you will need.
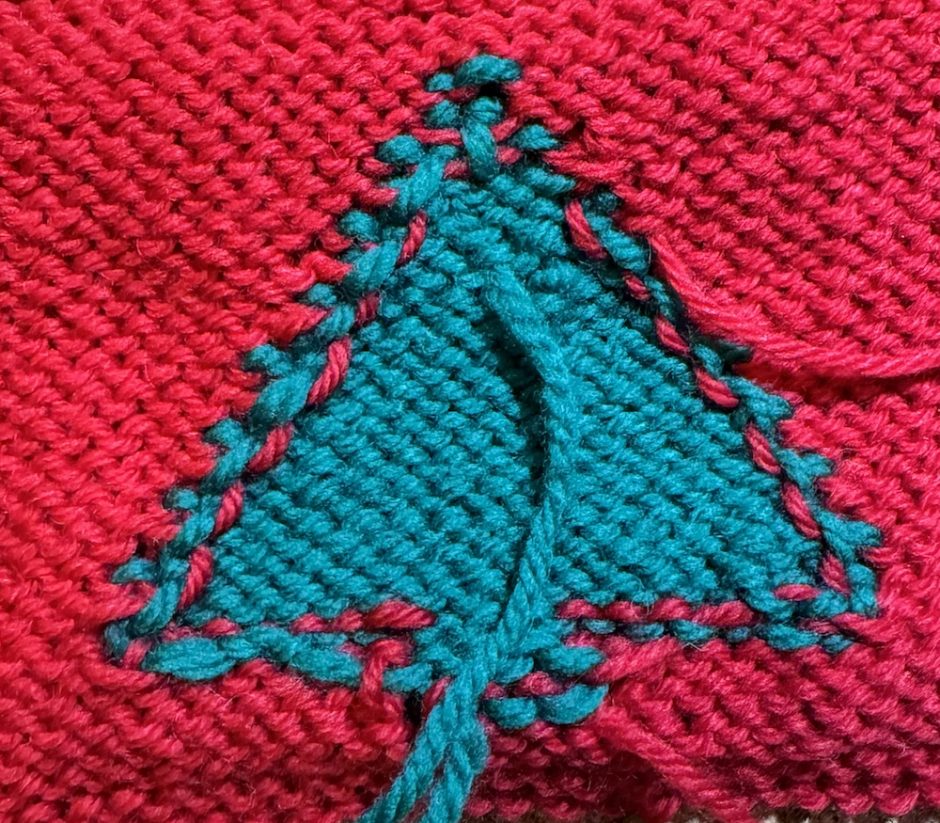
For example on this Christmas tree project, you have two sections of red (on each side of the tree) and one of green. So you’ll need two balls of red yarn and one of green. If you want to see the finished version and/or knit one for yourself, check out the Christmas tree coffee cup cozy knitting pattern.
You can work with the center and outside threads of the same ball of yarn, but I find it’s easier to untwist the yarn when it gets tangled if you have two separate balls.
If you were doing something like a heart you might need two balls of your contrast color when working the tops.
How to Knit Intarsia
While there are methods for knitting intarsia in the round, the most common method for how to knit intarsia is working flat in stockinette stitch (knit one row, purl one row).
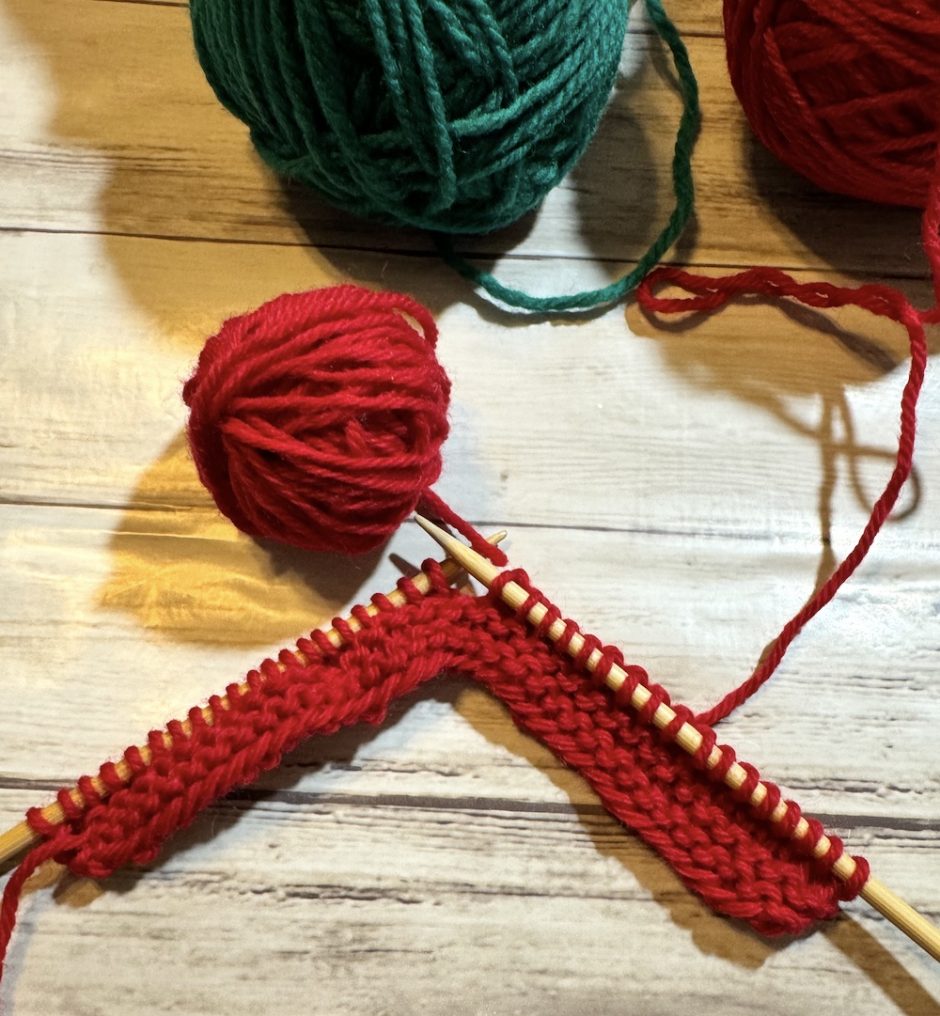
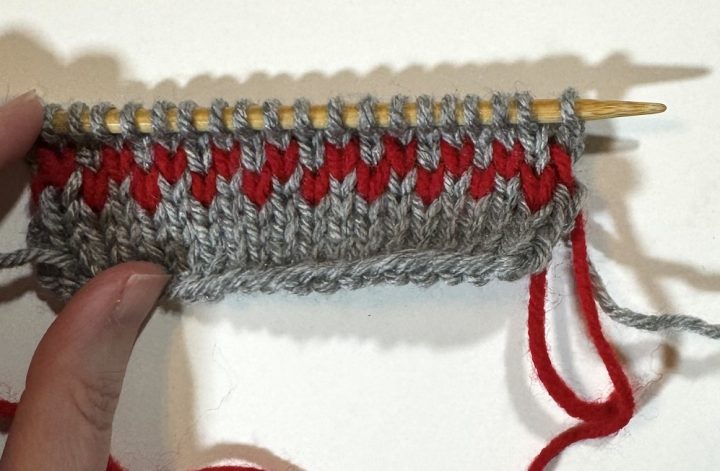
To start working intarsia, work to the beginning of the colorwork section using a single ball of the main color of yarn. Usually you’ll begin the colorwork on a right side or knit row.
Leave a tail to weave in and begin working in the new color as indicated on the chart.
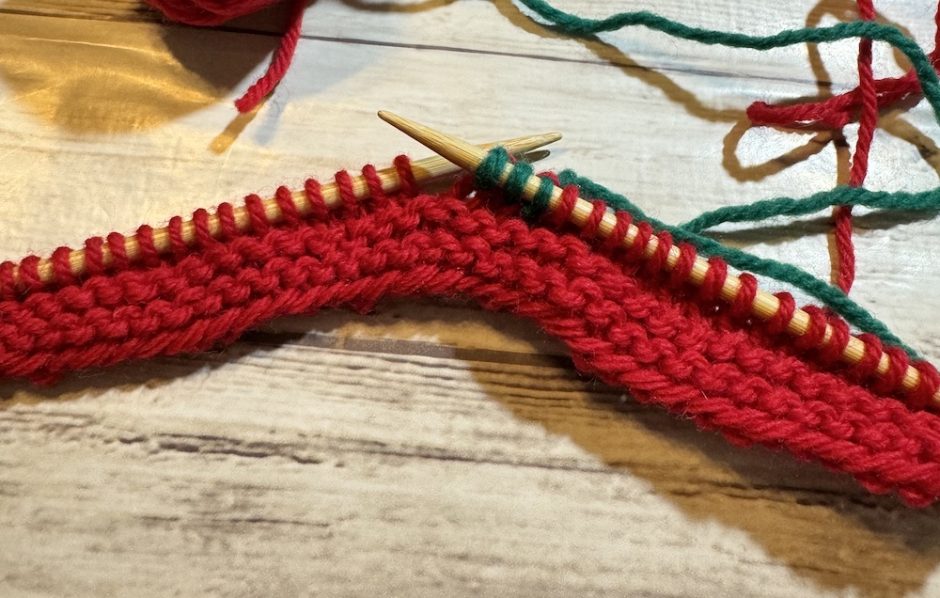
When you’re done with the section worked in the contrasting color, join in the second ball of the main color to complete the row. If there’s more than one block of color in the row, join in each new yarn in the same manner.
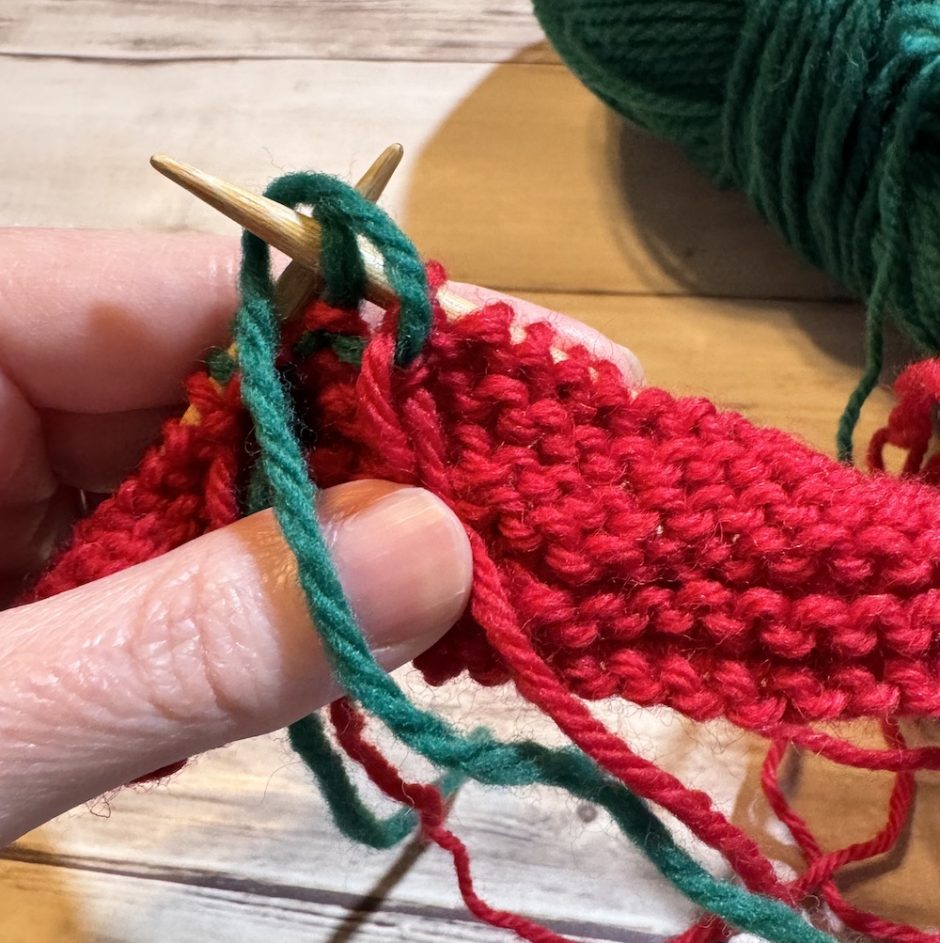
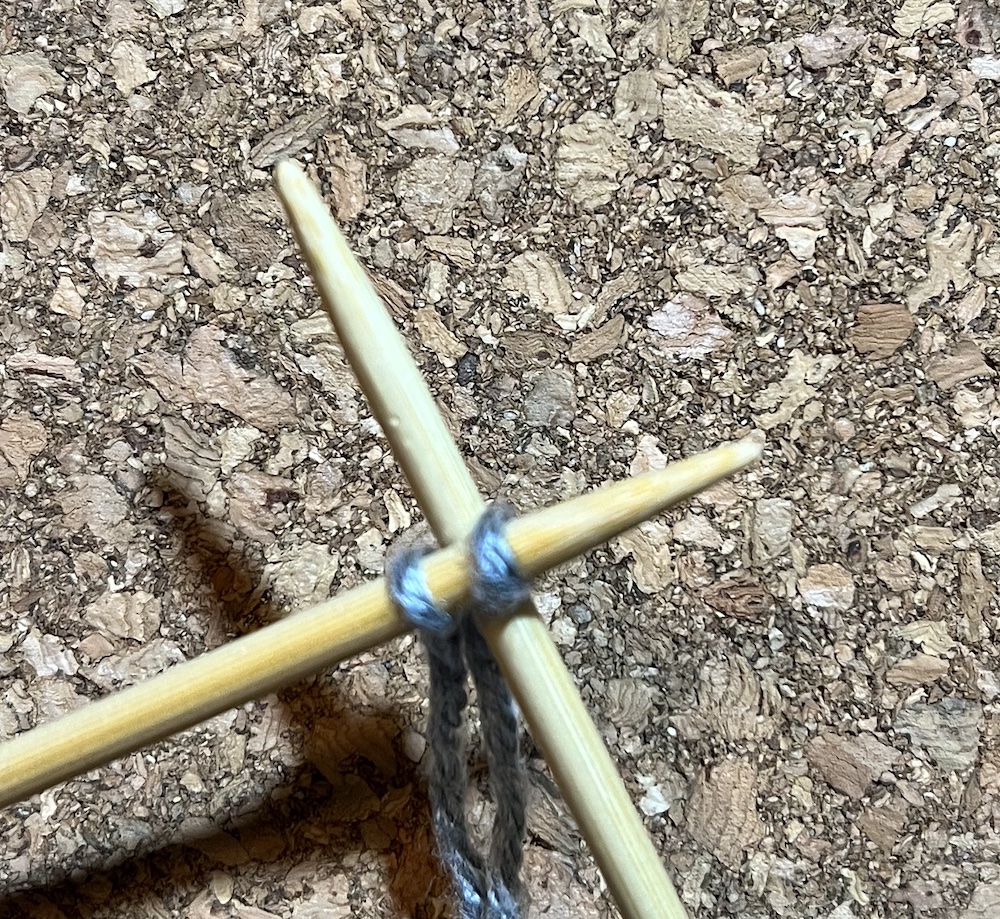
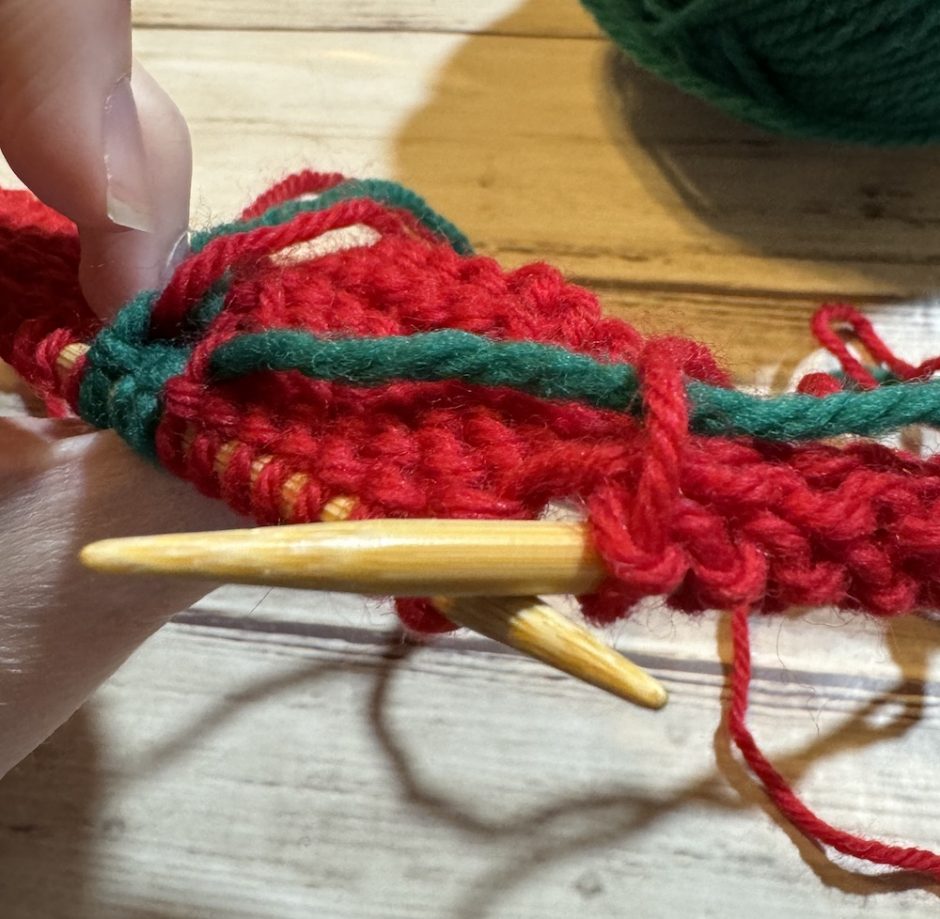
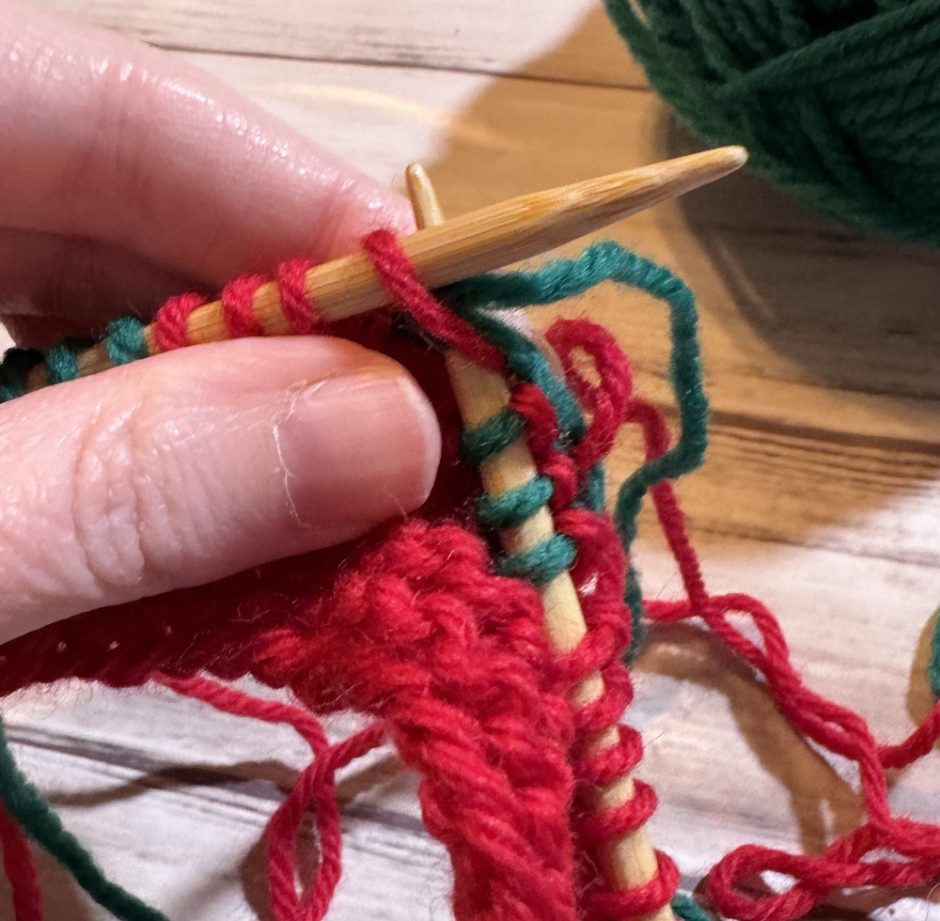
On the next row and each subsequent row, when you get to the color change, you need to twist the yarns together to keep their from being a hole in your project. To do that, just grab the new yarn from underneath the old yarn and work on as normal.
Of course this gets exponentially more complicated in terms of yarn management when you’re working a big project with lots of little balls of yarn, but the technique is still the same.
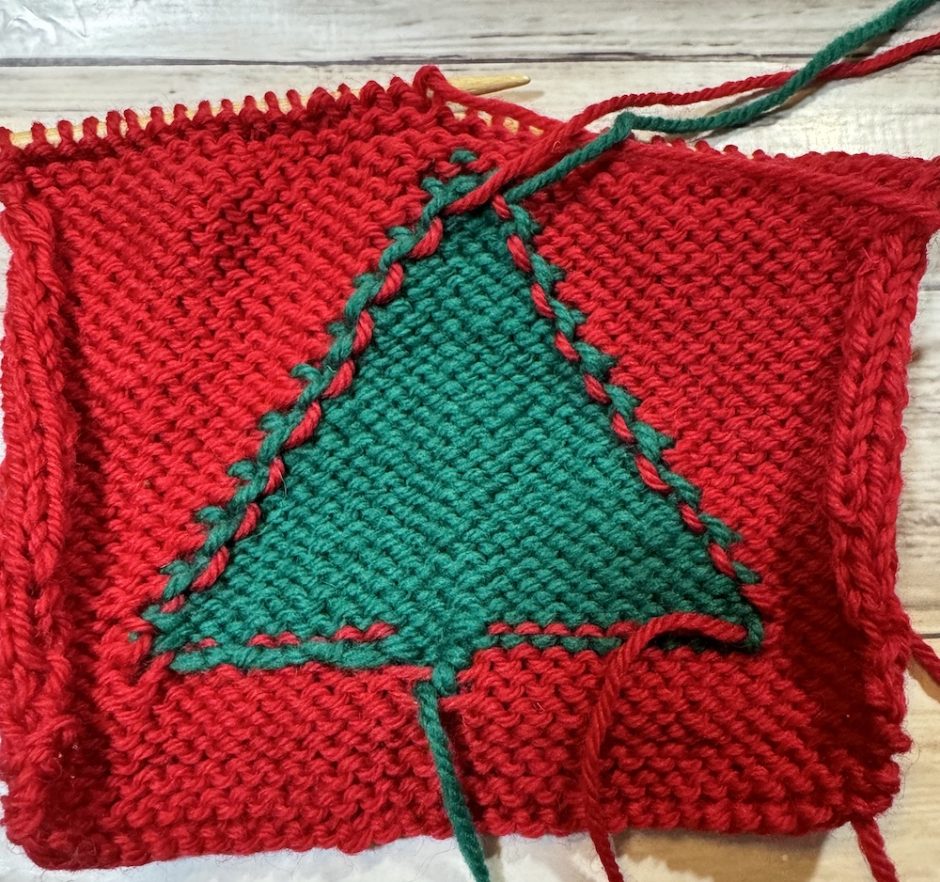
When you’re finished with the colorwork section you can drop and cut the yarns you were using, leaving a tail to weave in, and go on working with a single ball of the main color if there is more knitting to be done.
Instarsia Knitting Tips
Try not to pull too hard when you change yarns. You don’t want to distort the edges of the colorwork by making those stitches too tight.
If you have a piece of the colorwork where you’re suddenly working considerably more (or fewer) stitches in the color from one row to the next, you can carry the yarn as you would for stranded knitting. If the distance is quite long and you don’t want to leave the float loose on the back side, you can work the float with the stitch a couple of times along the length of the float to catch it.
Use your yarn ends to hide any holes that might have occurred where you changed colors, and be sure to always weave in your ends on the same color fabric as the end you are hiding.
Easy Intarsia Knitting Patterns
If you’re ready to learn how to knit intarsia and use this technique in some easy knitting patterns, here are some fun and easy patterns to try.
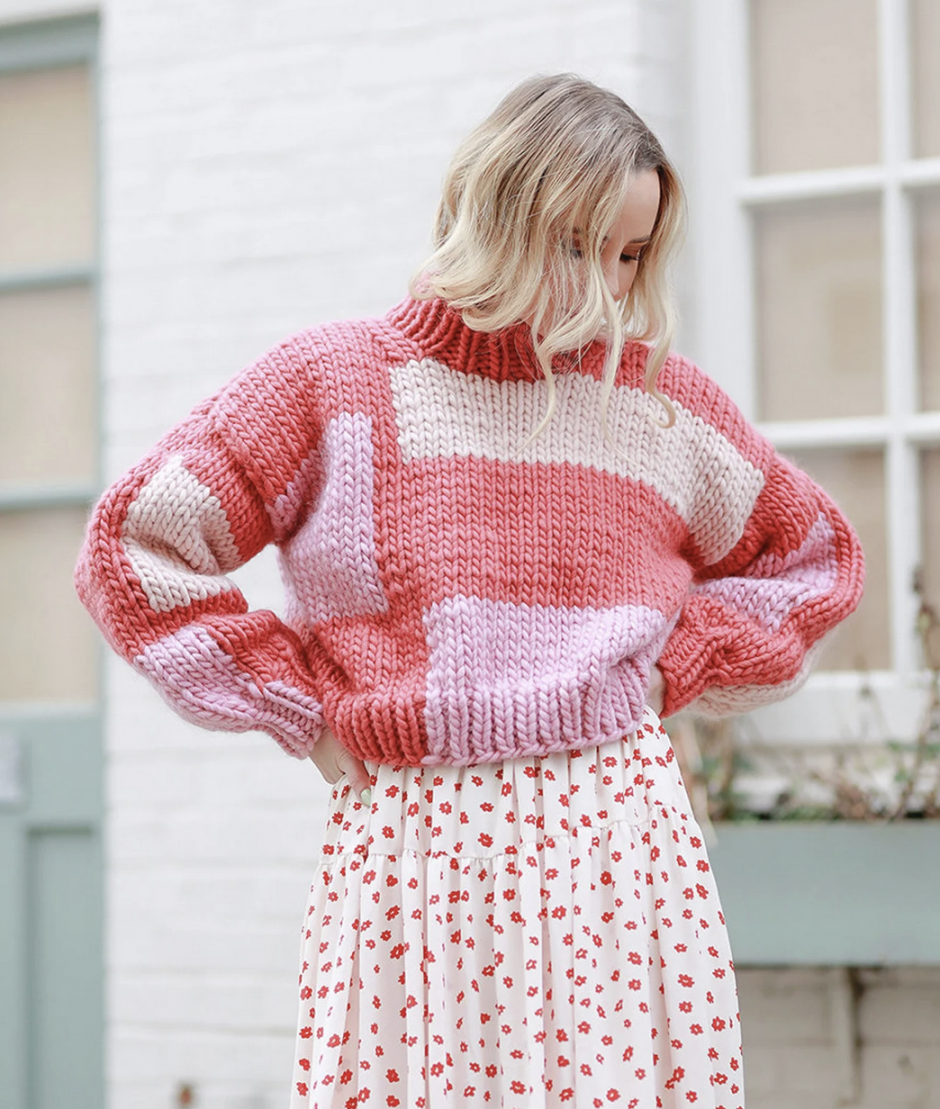
Color blocking is a great place to start when it comes to learning how to knit intarsia. The Berkeley Sweater from Shop Vicky Knits on Etsy is a great one to try because it uses super bulky yarn and just three colors. The knitting is simple and the pattern comes in sizes small to extra large.
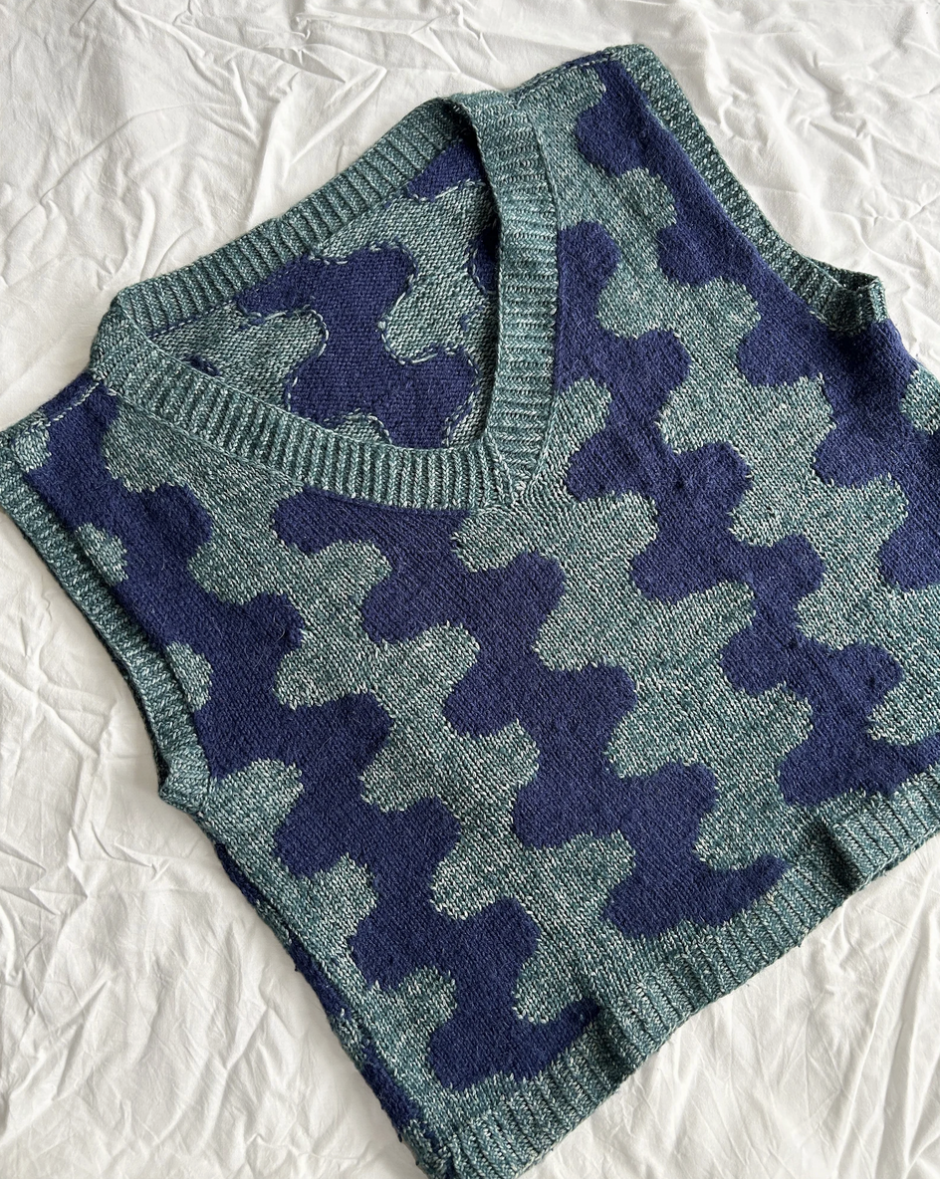
The Squiggly Vest from Etsy seller Luna Wear Patterns is only a little more complicated than actual blocks, as it uses squiggly vertical stripes to add tons of interest. This vest is sized from small to 2XL and uses two colors of DK weight yarn.

Jacqueline Cieslak’s Mooncrush Tank has great wavy color blocks, too, and looks super fun to stitch for summer. You can find it on Ravelry.
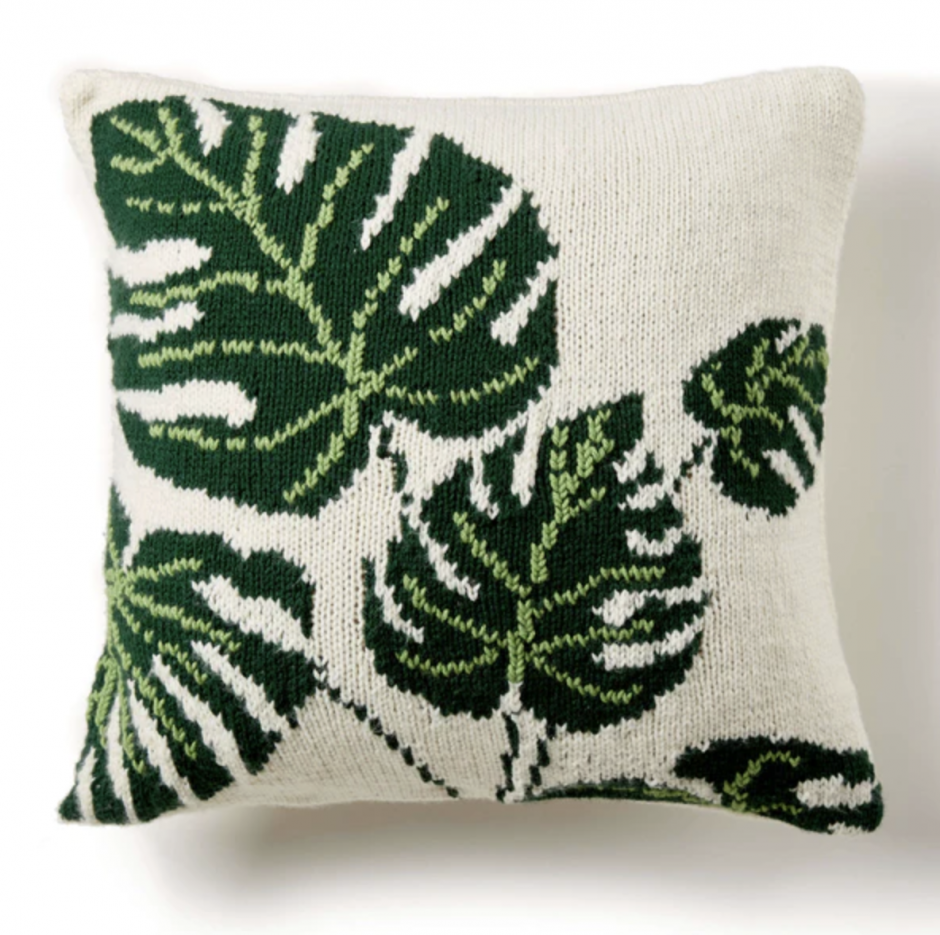
I love this Tropical Leaf Pillow from Yarnspirations. The fun thing about this one is, while it is more complicated than some of the other projects, you’re still only working with two colors at a time, since the veins are added with duplicate stitch once the pillow has been knit.
My book Colorwork Knitting has a chapter on intarsia that includes a pair of polka-dot socks, a pair of mittens with a reindeer motif, a vest with a large flower doodle on the back, a star-studded scarf and an argyle style hat, all worked using the intarsia technique. You can buy the book directly from me.