Affiliate links may be included for your convenience. View our privacy and affiliates policy for details.
I’m still obsessed with weaving over here, and this is a great little take anywhere kind of project (I had it in my purse yesterday afternoon!) that will allow us to talk about some actual weaving skills in ways we haven’t had to so far. ![]()
How to Make a Cardboard Loom
You can make a loom out of any kind of cardboard or paperboard you have handy, in whatever size you want. Mine was already this size; it was part of the bottom of a case of some kind of canned drink. It’s about 8.5 inches long by 4.5 inches wide. 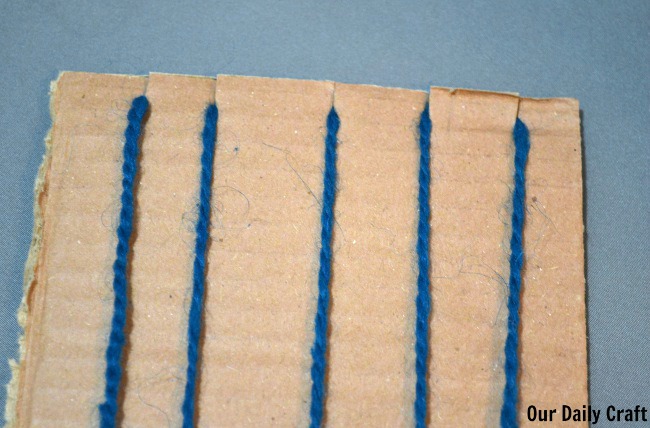
I cut five little slits, about .75 inch deep, on each of the short sides of the cardboard and wrapped blue yarn through the slits: starting at the back, go through one, then it’s opposite on the other side, then across the back to the one next to it, across the front to it’s opposite and so on.
I wanted to use self-striping yarn on this one just to see what would happen, so I left my strands pretty long. To do this, gather the tail into kind of a flat ball that can slide under the threads.
Weaving Tension
Now’s as good a time as any to talk about tension, because it’s kind of important for a project like this.
You don’t want your threads to be so loose you have a lot of extra space on the sides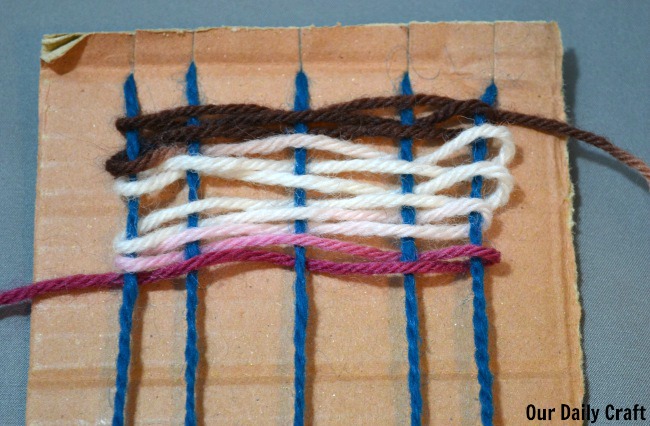
or so tight they’re pulling the warp threads on the sides. 
It’s a balance, and it takes a lot of practice to get it just right. In the meantime, adjust as you go and do your best. Mine still isn’t perfect but it’s pretty good.
Joining New Yarn
Though I did make my strands long, it was necessary to add more yarn twice. I like to use what’s called a fisheman’s knot, where you tie each strand to the other, and don’t worry much about the tails, which can be tucked to the inside later if you want.
Finishing a Piece of Weaving
Once you’ve filled up your loom, how do you finish the project? 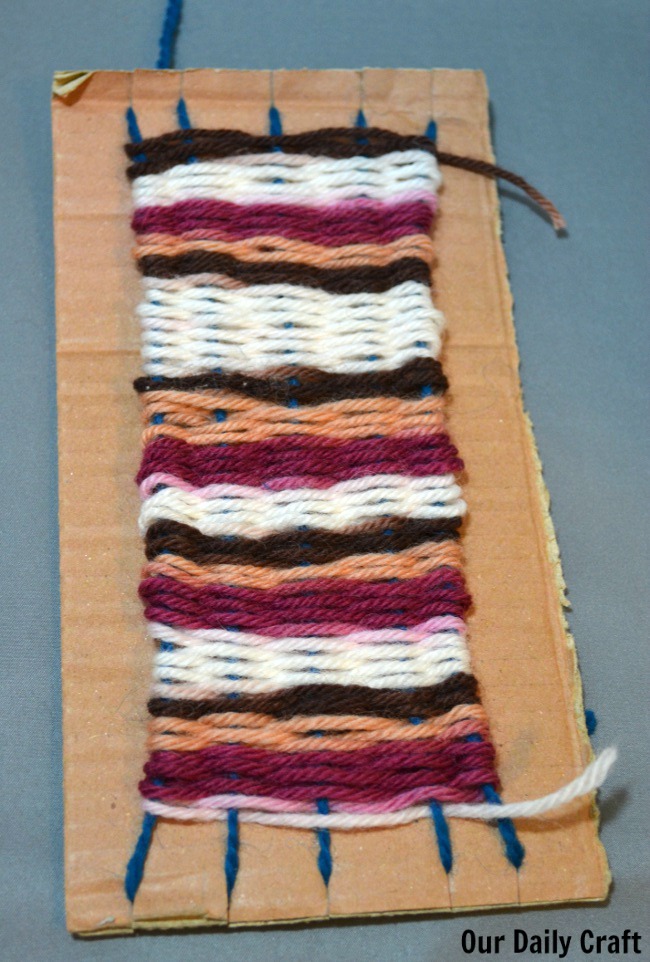
First, trim any excess yarn from the strand you were weaving with, leaving just a couple of inches. 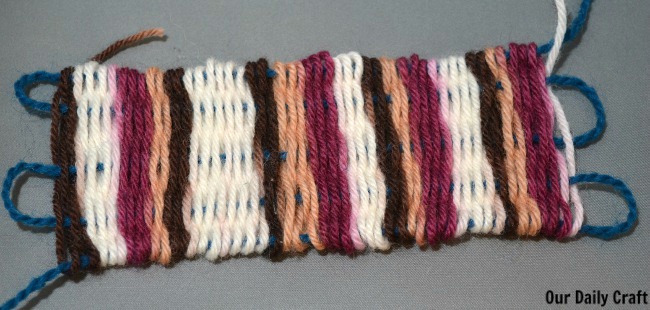
Carefully pull the warp threads out of the slits.
You can leave the open loops at the sides if you want, or gently pull the threads (holding on to the woven part as you do so it doesn’t stretch out of shape too much) until they close down on the weaving. Mine isn’t really even but I can keep working on it. 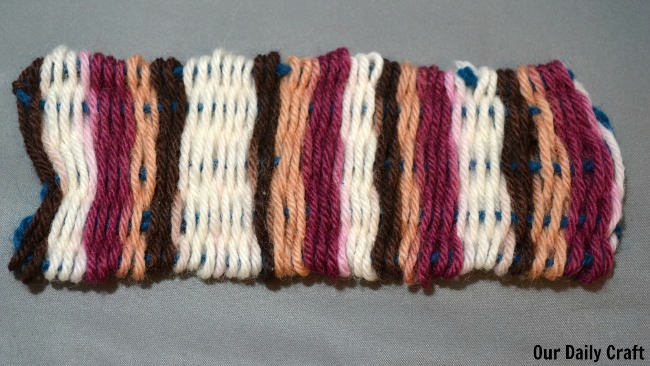
I like to tie the loose ends together, then tuck the ends into the center of the weaving and you’re done.
Using Bits of Weaving
This morning the girl asked me what this is for and I don’t know if I have an answer. It came out about 7 inches long and a little more than 3 inches wide. It could be a coaster that holds my teacup and the little tea strainer. It’s almost long enough to work as a cuff if I added some kind of edging to it. It could be a bed for a Barbie, and it’s not really too thick to be a bookmark.
If you make little bits of weaving I’d love to know what you use them for.
I’d also love to see your creations with the hashtag #ourdailycraft.

1 Comment