Affiliate links may be included for your convenience. View our privacy and affiliates policy for details.
I know there are other uses for the Turkish cast on than toe-up socks, but that’s the only time I’ve used this cast on method.
If you wanted to work other small tubes with a seamless beginning — such as a doll arm or leg, or gloves if for some reason you were working from the fingers down — Turkish cast on would be a great choice.
You could also use it for bags worked from the center out with a different rate of increasing to make a flat circle.
What is Turkish Cast On?
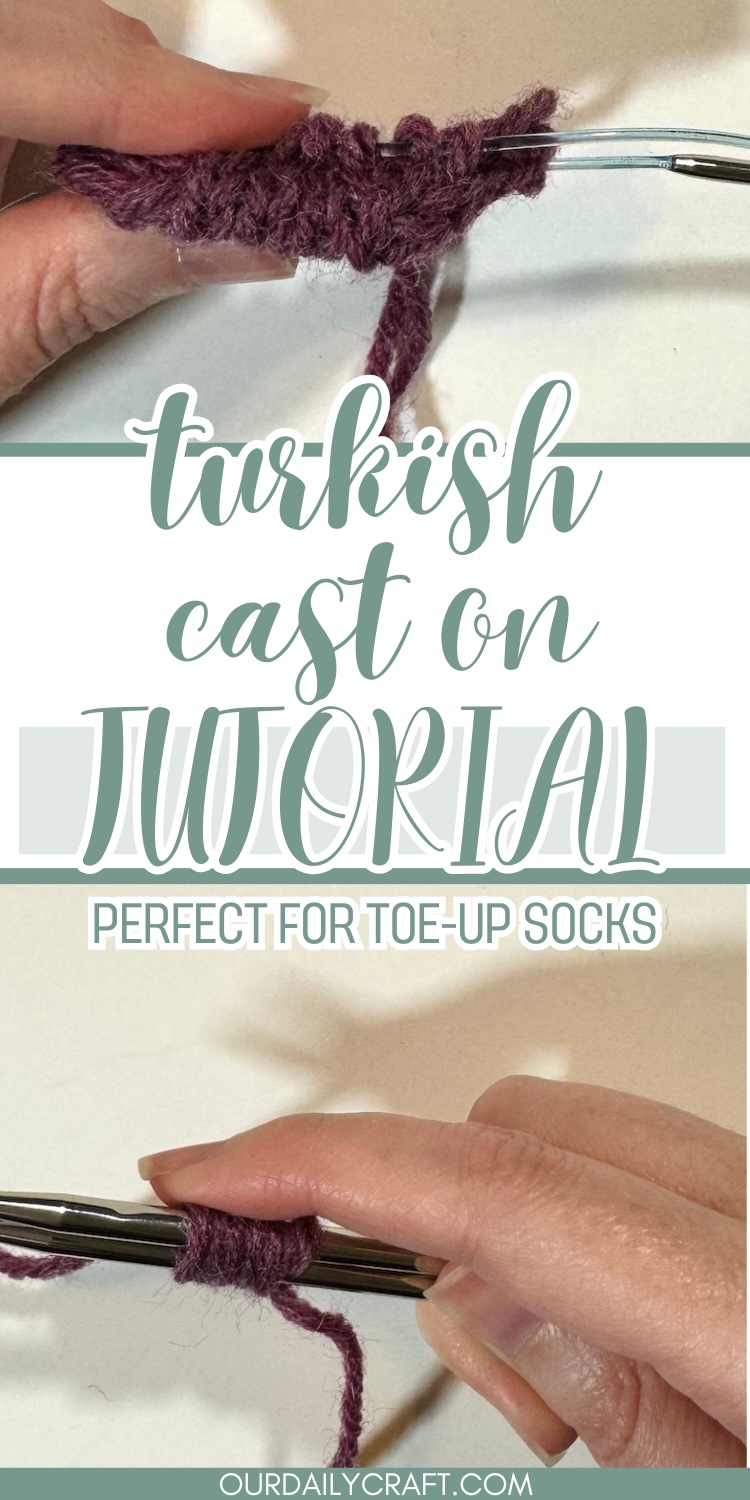
Turkish cast on is a method for casting on a circular knitting project that involves making loops around two needles and then working stitches on each side of the loop.
I have no idea why it’s called Turkish cast on, though I do know it’s also sometimes called Eastern cast on.
It’s a pretty quick and easy method for beginning a toe-up sock, and it gives you a toe with no seam.
Advantages and Disadvantages
I think I just covered most of the advantages of working a Turkish cast on: it looks nice, makes a seamless beginning to a project and is pretty easy to do.
It does require a bit of concentration on the first round to make sure you’ve got all the stitches you’re supposed to have, but once you get past that it’s smooth knitting.
One disadvantage is that you really need to work this cast on with circular knitting needles — either one for the magic loop method or two for working with two circulars instead of double points. There’s a point in the cast on where the loops sit on the cable of the needle and I don’t know that it could easily be worked in another way.
If you want to use this cast on but prefer working on double points, you could do the cast on with a circular needle and work the setup round, then work the stitches onto DPNs to complete your project. Or you can work the figure 8 cast on instead.
How to Knit the Turkish Cast On
For demonstration purposes I’m using worsted weight yarn and a size 8 US/5mm circular knitting needle. Of course this works with any weight of yarn and any needle size, but again you need a circular needle or two to make it work.
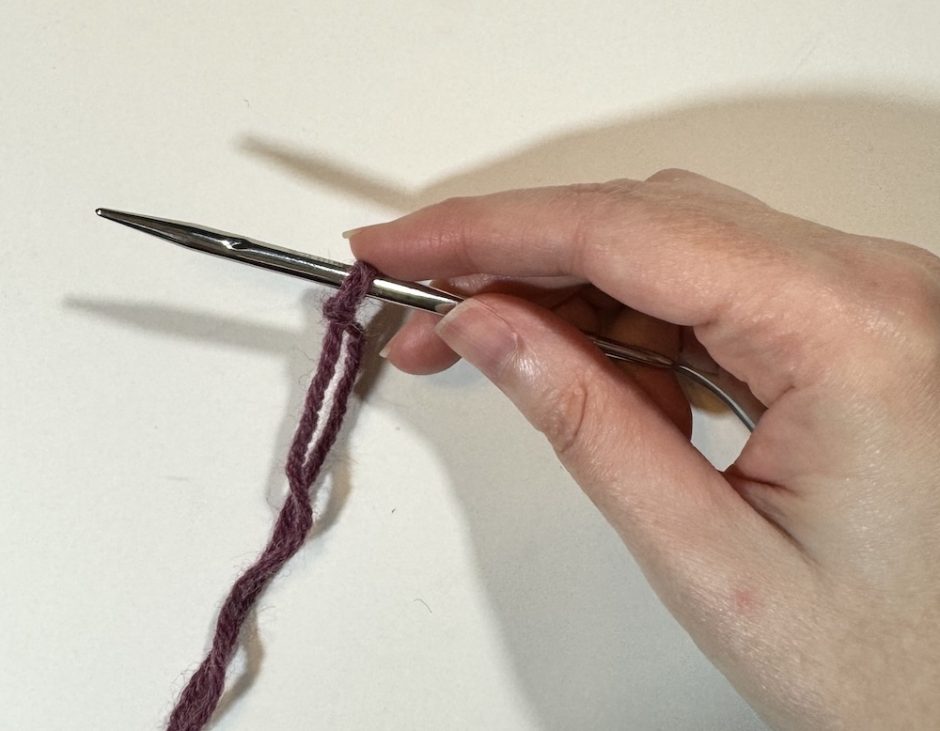
Begin with a slip knot.

Put your needles parallel to each other, with the slip knot on the top needle. I have my needles pointing to the left but you can do it either way.
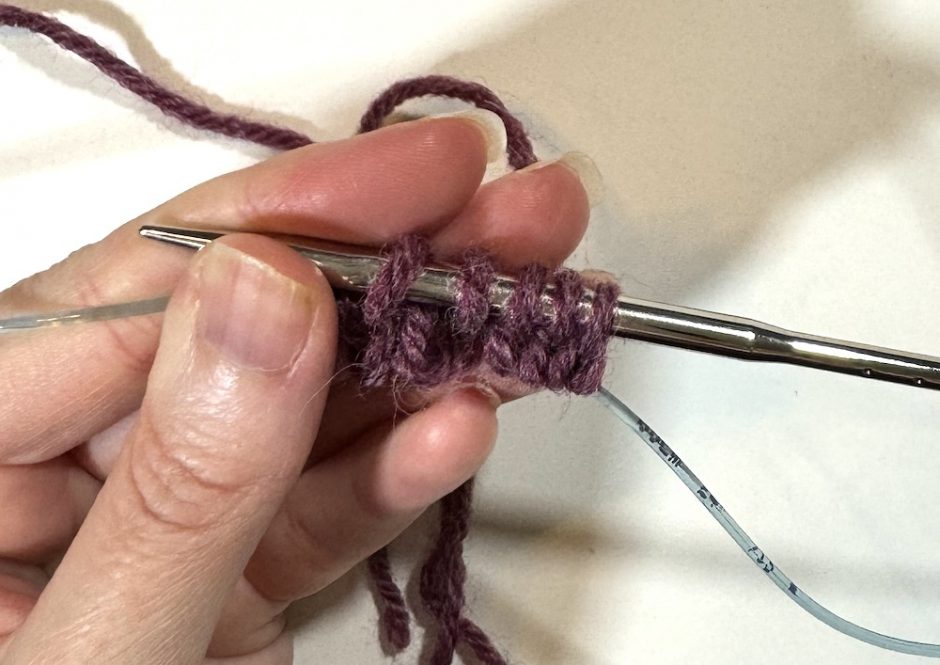
Wrap the yarn counter clockwise around the needles. This counts as two stitches: one on the top needle and one on the bottom. The slip knot does not count as a stitch.
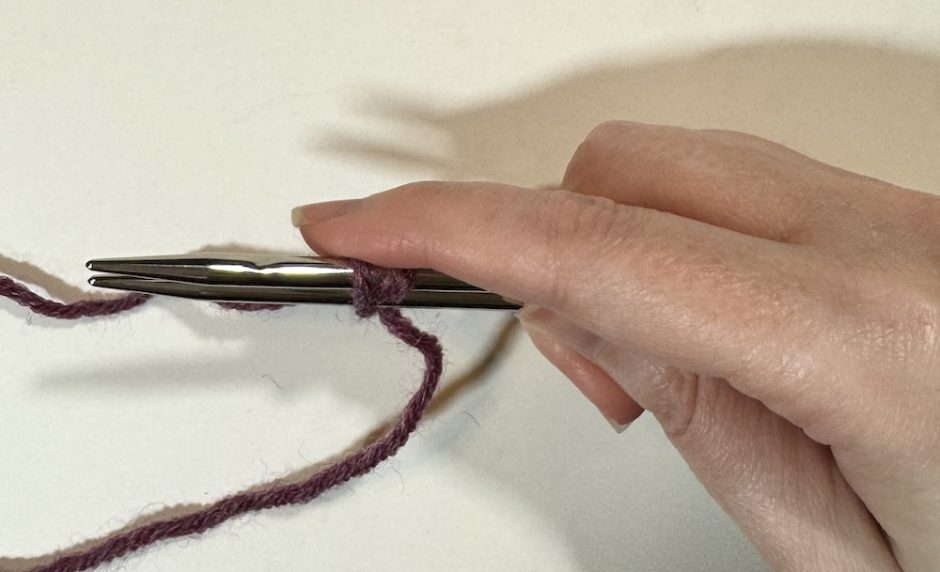
Continue to wrap the yarn around the needles until you have as many loops as half the number you need to cast on. I have five loops for 10 stitches on mine.
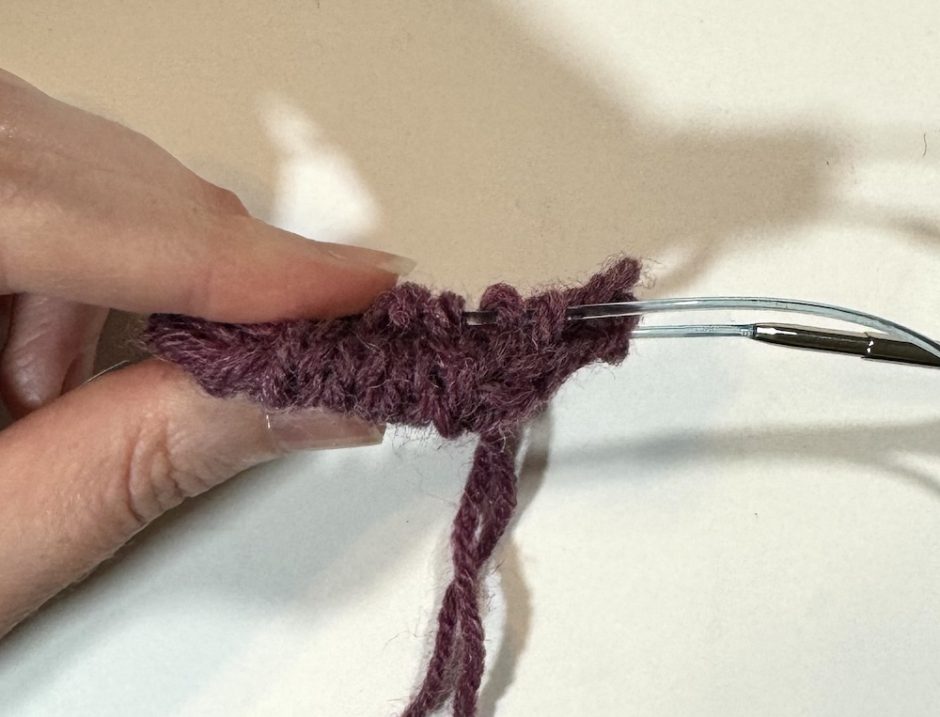
Turn the needles to face the right if you haven’t already, and pull the bottom needle out so the loops are hanging on the cable. Make sure you hold onto the yarn tail so you don’t lose a stitch here.
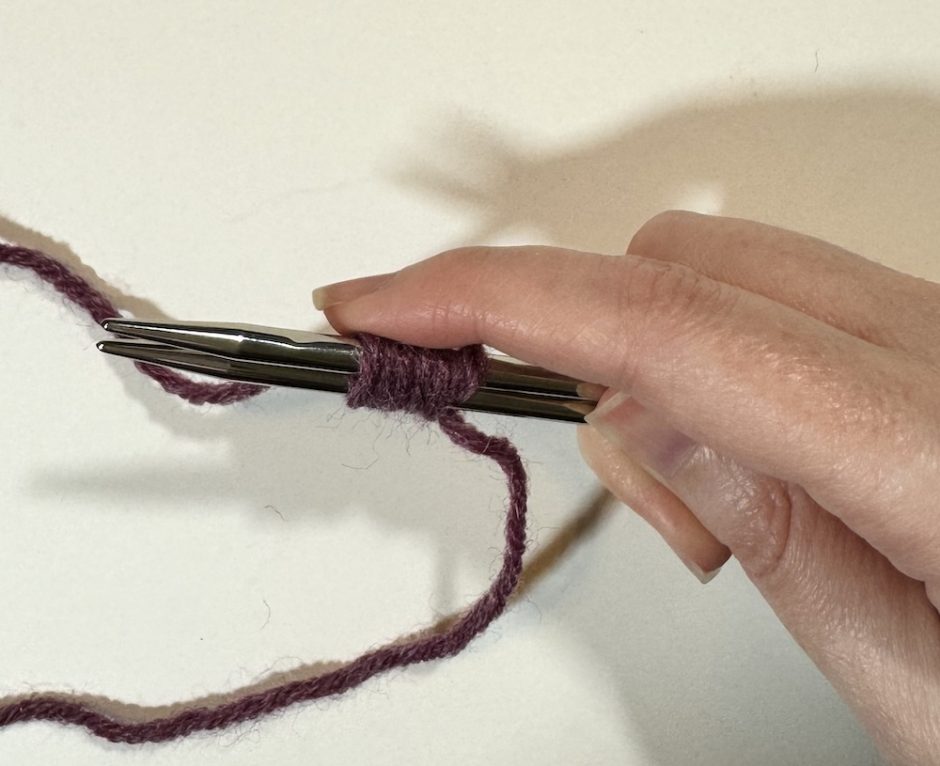
Knit the stitches from the top needle.
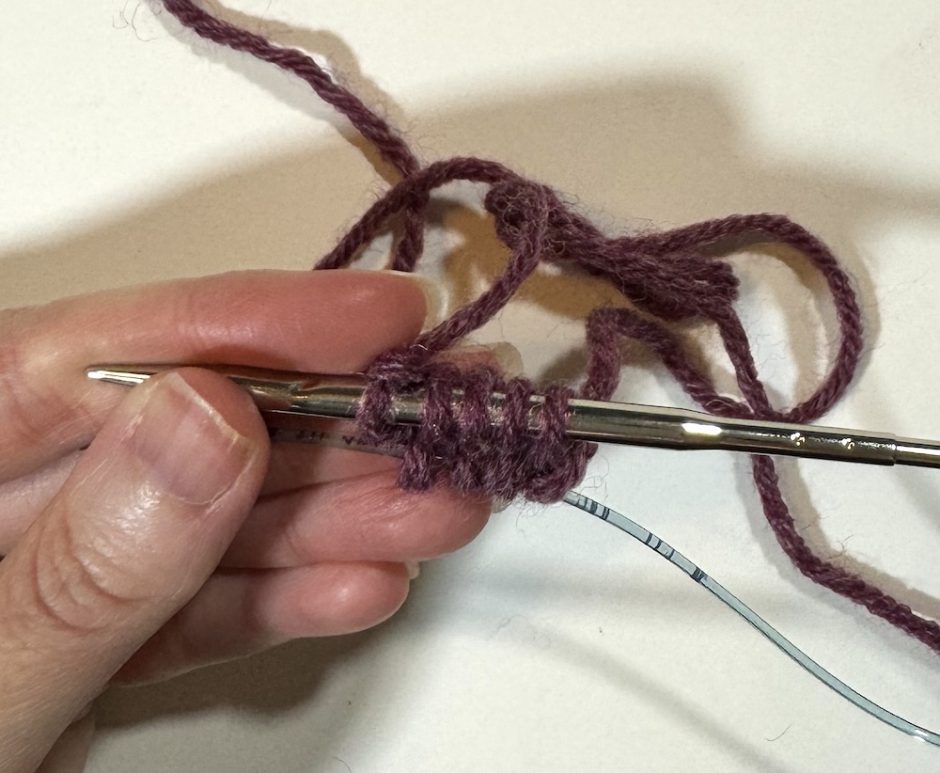
Gently pull on the needle so the stitches you just worked are on the cable and push the loops from the bottom up onto the other needle so they can be knit. Here you’ll find the slip knot, which you can slip off the needle. Again hold onto your end and be mindful of all the stitches as you go.
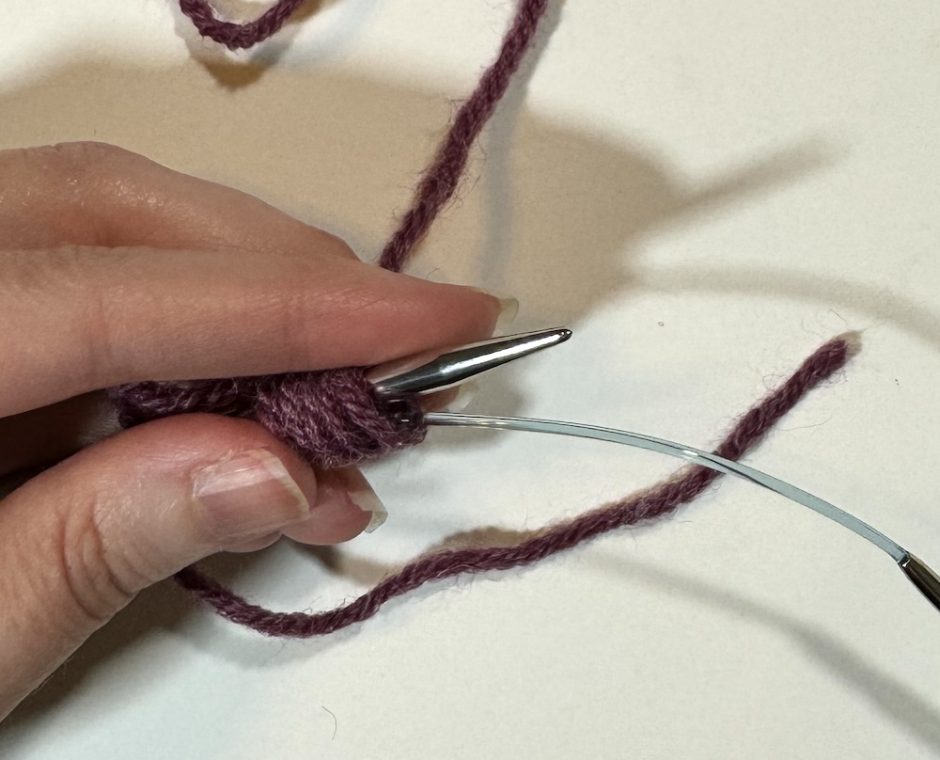
Knit across these stitches. Make sure you have the same number of stitches on each side when you’re knit the first round, then continue according to your pattern instructions.
Tips for Working Turkish Cast On
Most of the time when I’m writing about different cast on methods I’ll say that you can work them without the slip knot, but in this case the slip knot is important for stability, so don’t try to skip it. You’ll be removing it anyway so it’s not a big deal.
The main thing to watch out for when working Turkish cast on is that you don’t drop the first stitch or the last stitch on either side of your needles. Since these “stitches” are really just loops of yarn, there’s nothing holding them in place until you knit with them.
But once you’ve worked that first round of stitches, you can go on with any stitch pattern, begin to increase for your sock toe, whatever the pattern calls for.