Affiliate links may be included for your convenience. View our privacy and affiliates policy for details.
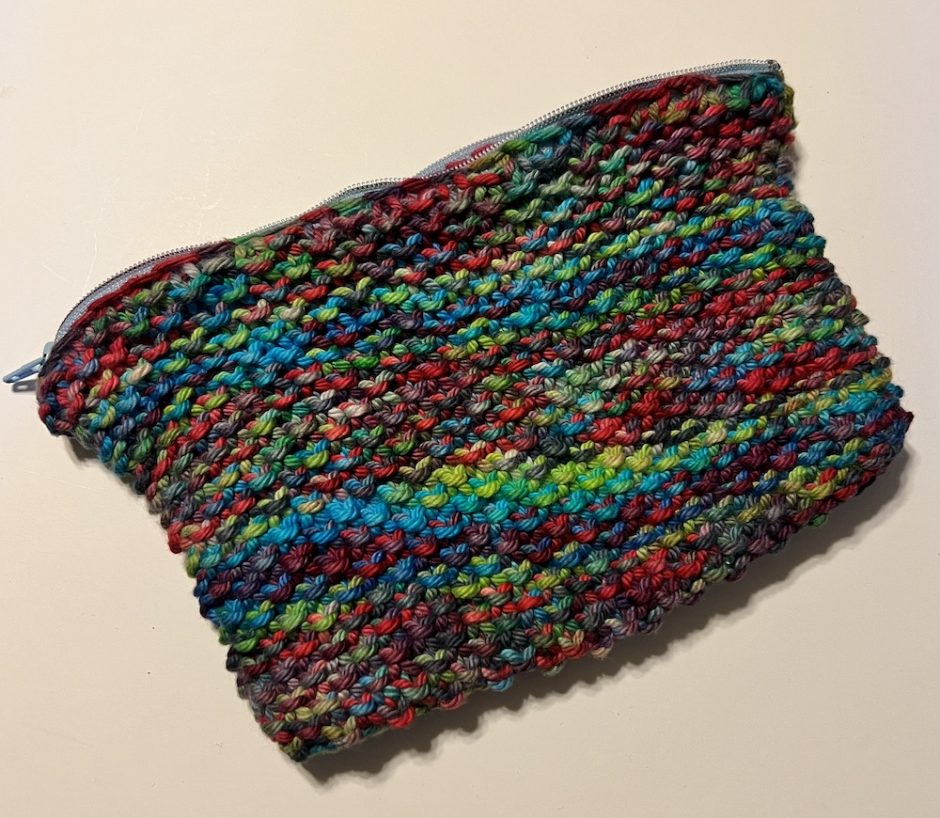
This fun zipper bag knitting pattern is worked from the top down, so you’re never really casting on stitches, you’re just making it as big as the zipper you want to use. Then you work from the zipper to your desired length, do a three-needle bind off and you’re done!
A Use What You Have Project
This zipper bag knitting pattern was inspired by a part of a zipper that we’d cute down to use for some other project, then it never got used (isn’t that always the way?).
I wanted to use it to make a bag, but I didn’t want to have to figure out how many stitches I needed to cast on to make it a perfect fit around the zipper. So I decided to work from the zipper down.
Even though I only used one kind of yarn (a worsted weight cotton that’s been in my stash for years) I consider it a stash-busting project because you could easily make stripes with all your odd balls, or use up a couple of different bits of leftover yarn.
You can also make the bag as big as you like. Mine is sort of pencil case sized but you could make it big enough to be a project bag if you want. And of course you can use any weight of yarn you have on hand, too.
Zipper Bag Materials
To make a bag like mine, you’ll need about 70 yards of worsted weight cotton. Something like Lily Sugar ‘n Cream or Lion Brand 24/7 Cotton would be a great choice. You don’t have to use cotton if you would rather use acrylic or even wool, but cotton is nice because it is durable.
Of course how much yarn you need will depend on the size of your zipper and how long you want your bag to be.
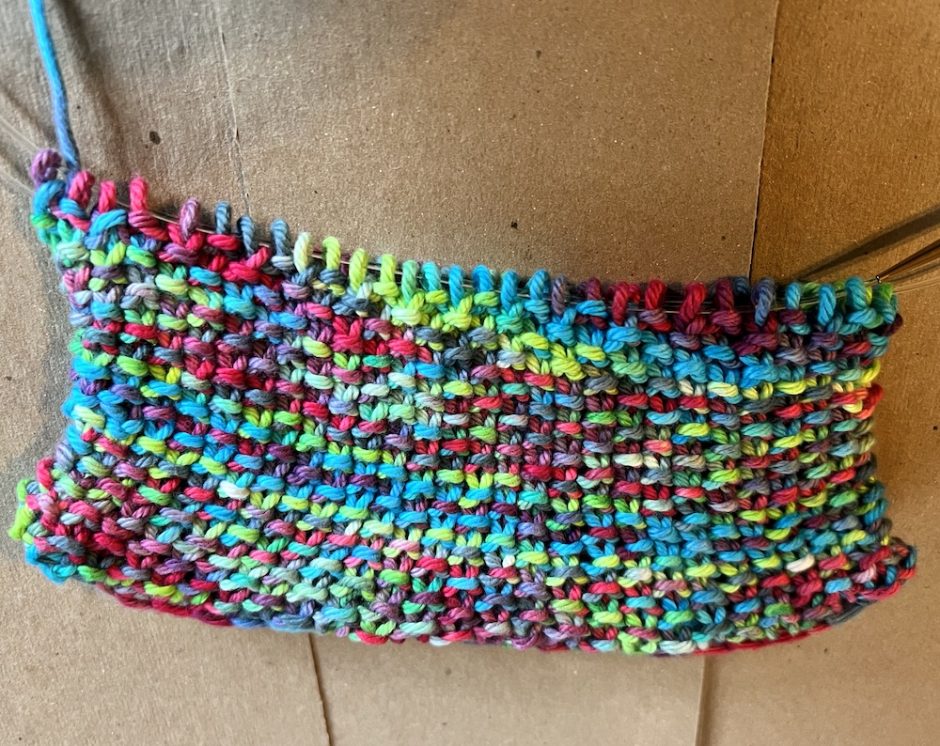
Speaking of, my zipper is about 8.5 inches/12.5cm long, and my bag is 5 inches/12.7cm deep.
In addition to your zipper and your yarn, you’ll need two circular knitting needles in a size to work with your yarn (I used size 7 US or 4.5mm) and a sewing needle that has an eye big enough for your yarn and is sharp enough to pierce your zipper’s fabric. You may also want a locking stitch marker, or just pay attention to which end of the zipper is the beginning of the round.
Zipper Bag Knitting Pattern
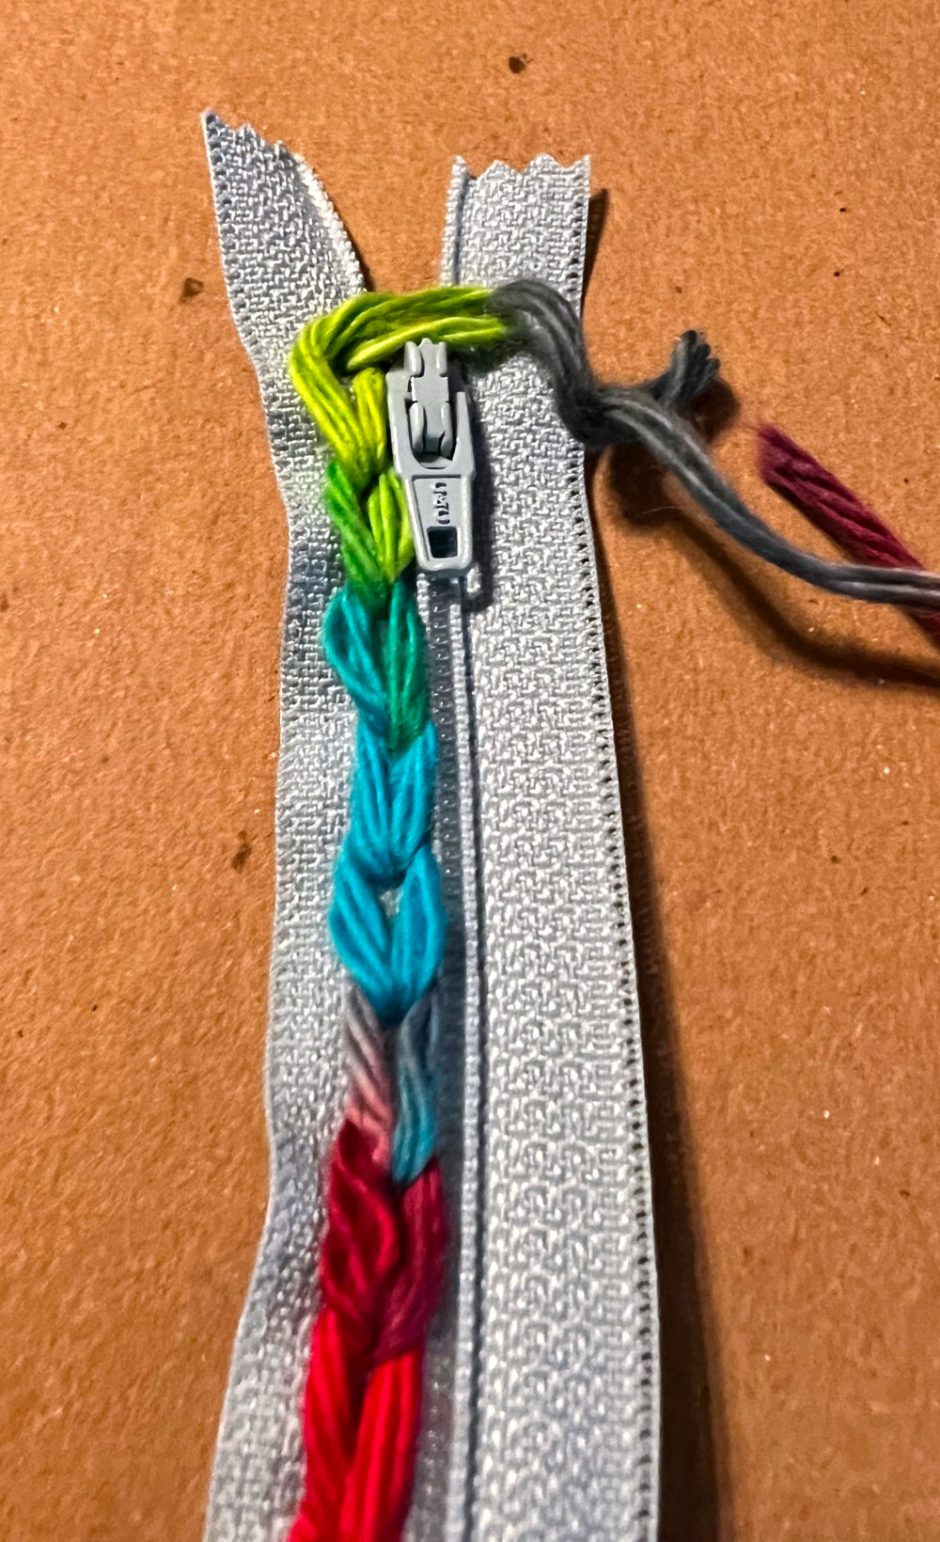
To start, cut a length of yarn about as long as your wingspan and thread it on your yarn needle. Tie a knot at the end. Work chain stitch around the zipper. Try to make about the same number of stitches on each long side (though we do actually need an odd number of stitches, so no big deal if it’s not perfect). When you get back to where you started, you can kind of weave in the end and/or tie another knot to secure.
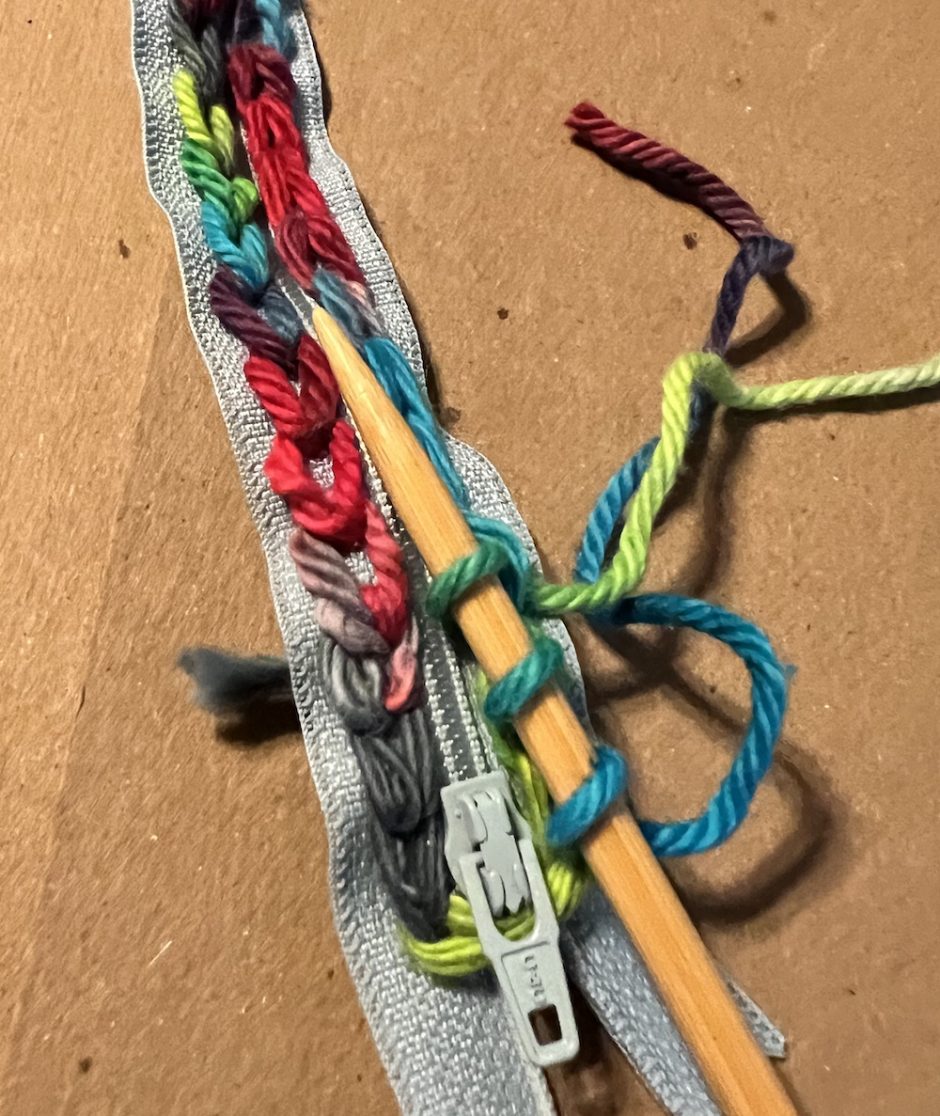
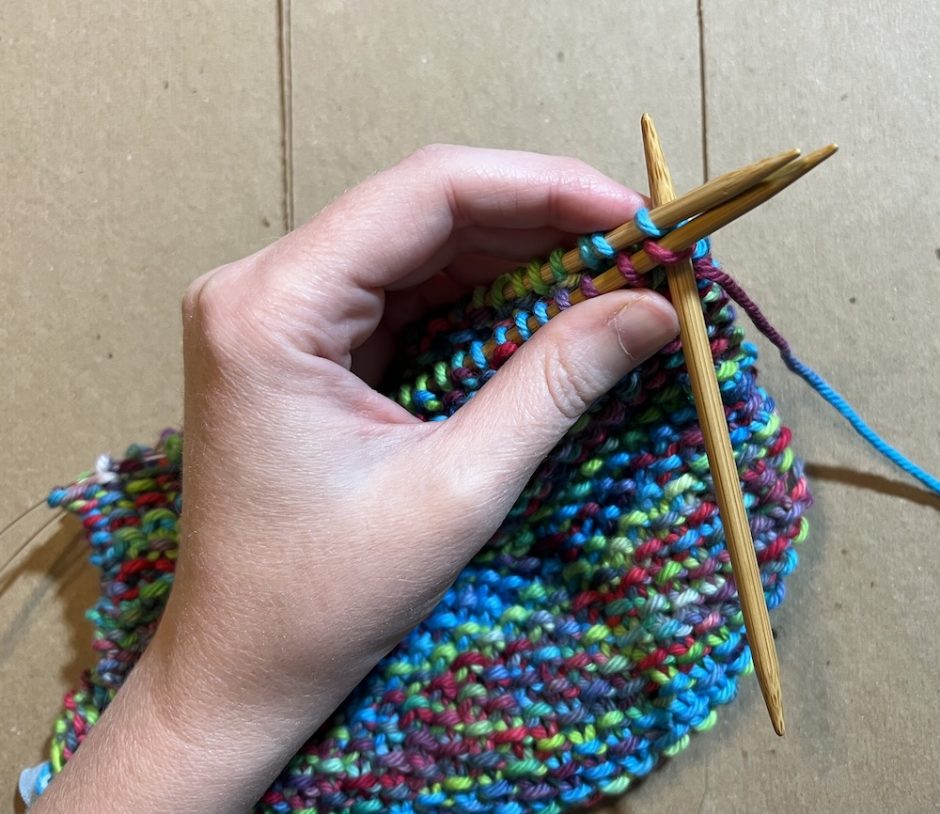
Using the yarn that’s attached to the ball and your knitting needles, pick up and knit a stitch in each chain around. I worked two stitches on each short side of the zipper. It was easiest for me to divide the stitches onto two circular knitting needles, but if you have one that’s the right size and it’s comfortable for you, you can do that instead.
If you don’t already have an odd number of stitches, work two stitches together somewhere in the next round.
Work seed stitch in the round as follows: *Knit 1, purl 1. Repeat from * around.
Round 2 will be *Purl 1, knit 1. Repeat from * around, but because we have an odd number of stitches, you don’t have to pay attention at all. Just keep on doing knit 1, purl 1 around until your bag is the length you want or you’re close to running out of yarn.
Of course you can change yarn whenever you need or want to, or use a different stitch pattern, whatever you like. This is more formula than pattern.
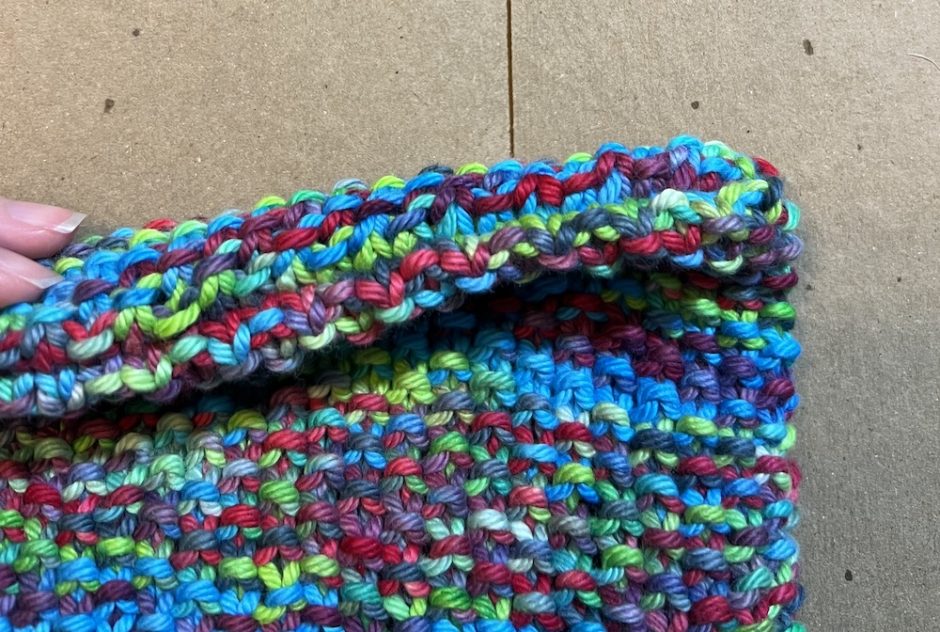
Turn the bag inside out (opening up the zipper makes this easier). Work a three-needle bind off on all stitches. Note: because we have an odd number of stitches, we’ll be left with one stitch without a pair at the end. I just knit it together with the last stitch and fastened off as usual.
Cut yarn and weave in ends.
Add this project to your Ravelry queue.

2 Comments
Thank you for this pattern. What a neat idea for a zipper bag…start with the zipper and then knit the bag to fit it. That saves all the frustration of trying to get a zipper to neatly fit the beautiful and carefully crafted bag. It also fits my ‘don’t waste’ policy of removing and saving fully functional zippers, buttons, etc from clothing that is no longer wearable and is headed to the rags bin.
Your instructions in this pattern are clear and easy to understand and follow, and the photos are really helpful. I thank you for your creative ability and willingness to share.
Thank so much! This zipper had been bothering me for a while because I knew I wanted to do something with it but I wasn’t sure what to do. I loved working from the top down (though it’s a little fiddly at the beginning) and how easy it is to get started and make the bag just the right size.