Affiliate links may be included for your convenience. View our privacy and affiliates policy for details.
This week’s Iron Craft challenge was to make something from a country other than your own. When I went to the library by myself last week I was casting about for something cool to craft, and I settled on origami, which is maybe a little obvious, but it’s something I always wanted to try.
I decided to start simple, since I don’t have any actual origami paper, so I used 12×12 pieces of scrapbook paper to make some origami boxes. 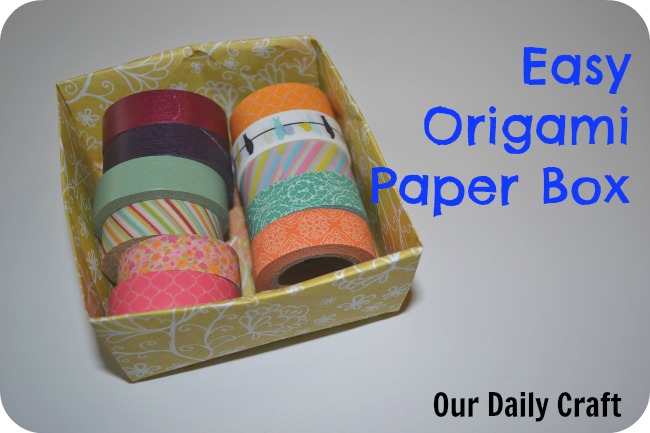
Trust me when I say these really are easy. I did it right the first time, and it takes just a couple of minutes to put one together. And all you need is a piece of paper. It doesn’t matter what size, so long as it’s square.
Making a Box
First, put the paper pattern-side up. Fold in half lengthwise and unfold. Fold in half widthwise and unfold. Fold diagonally and unfold. Repeat on the other diagonal and unfold. That will leave you with a paper creased like this: 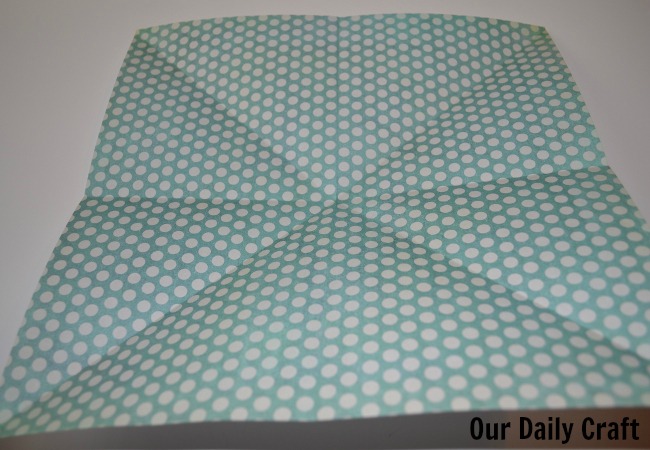
Flip the paper over and fold each corner up to the midpoint of the paper, like so: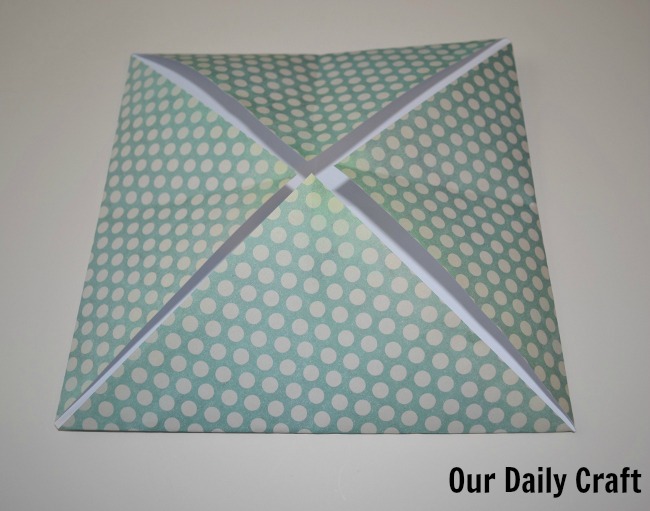
From here, fold the bottom edge up and the top edge down to the center point.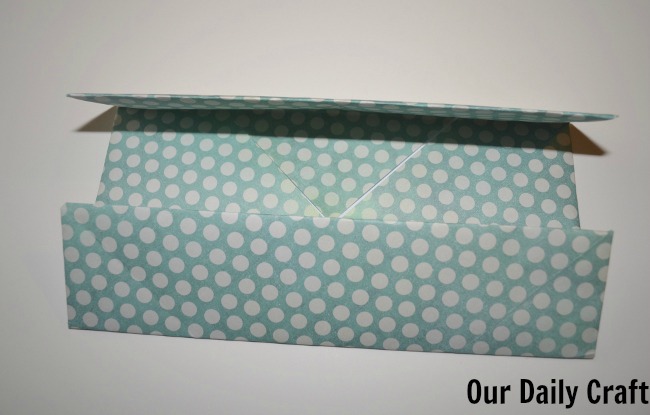
With the paper still folded this way, fold the shorter edges into the center point. You’ve got lots of layers here, so it’s kind of fiddly.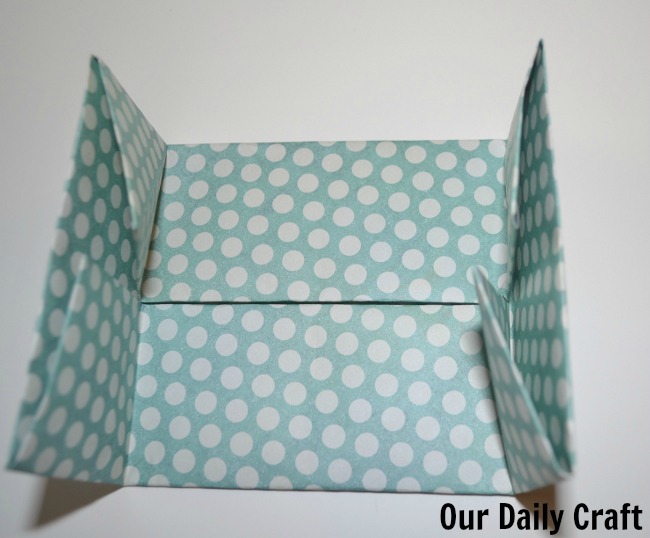
Open the paper back up to where you were in step two, and then fold out two corners that are opposite each other. Then fold the other two edges back over toward the center. 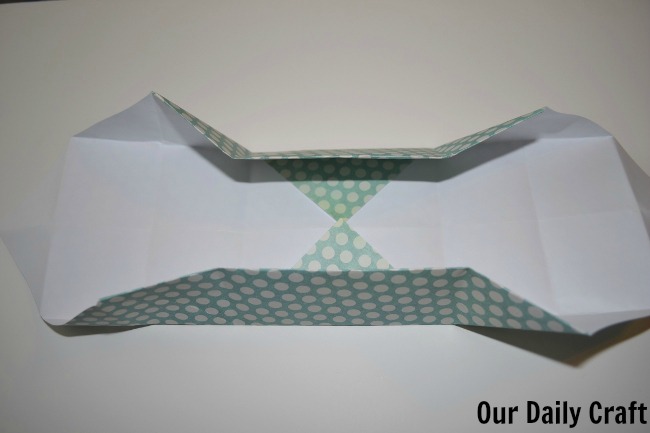
Those two edges are two sides of the box. The other two you get by doing some kind or origami magic I can’t quite explain. Here’s the best I can do. The side looks like one big triangle with a fold toward the tip and a fold at the bottom. Push down on the sides where that fold at the back of the triangle is and keep your fingers there. Use your thumbs to lift up the point end, while at the same time folding the paper at the second fold, briging it over the side and back down into the box. 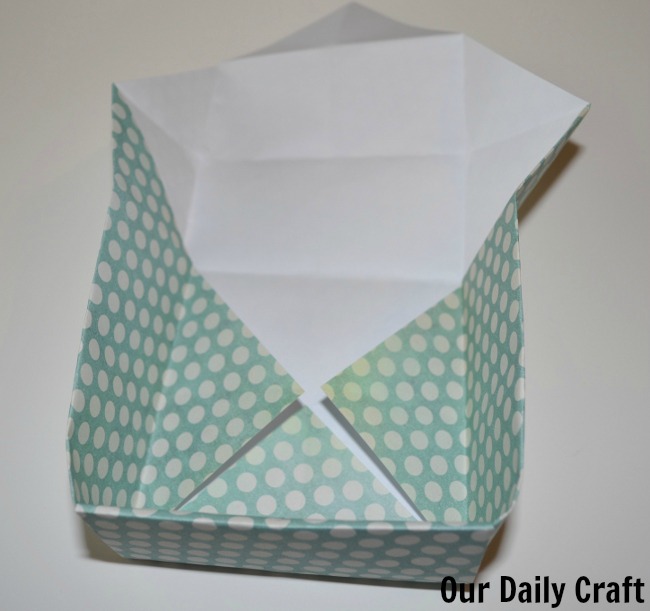
It makes more sense when you’re doing it than it does to write it, because you’ll be able to see where the folds are. Give all your corners an extra-firm folding so the box will sit flat and square. If you want, tape the corners down in the bottom of the box. 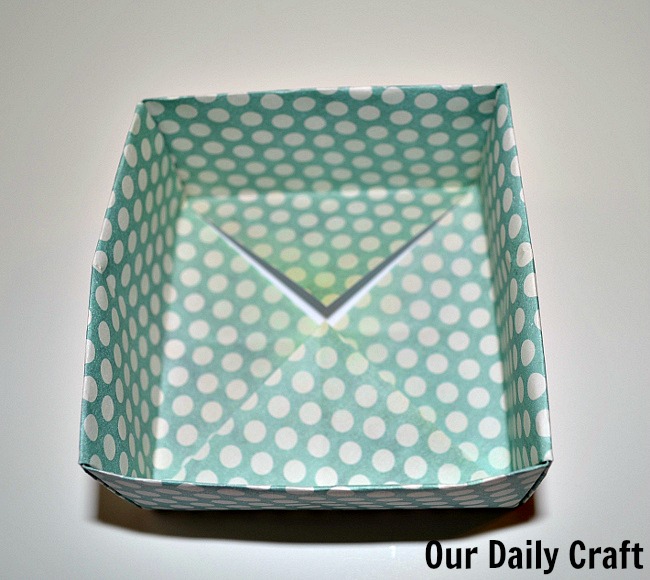
Using the Boxes
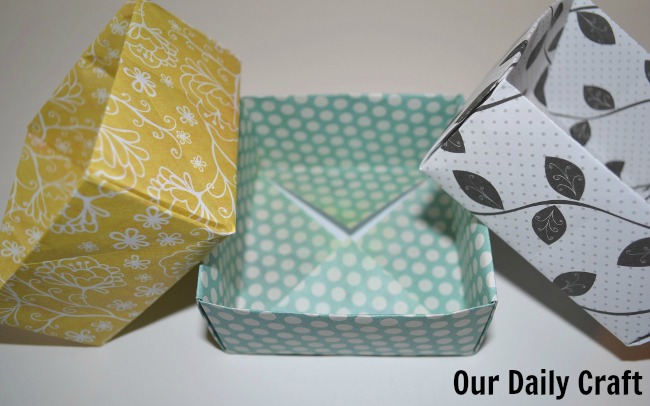 These boxes are perfect for storing any little thing you might want to make look a little cuter. For instance, of course, washi tape.
You could store little art supplies like buttons, stickers or bits of thread and yarn in them, or just behold their adorableness.
If you have a small, lightweight gift, trim one piece of paper so it’s a little smaller around but still square and repeat the same process, then you can use them as a gift box that becomes two little storage boxes.
I hope this is just the beginning for me and origami. Have you ever done any fancy paper folding? I’d love to hear about it.
Related articles


5 Comments
very useful for a teacher like me. I can put little things out of my table with that box.. Thanks
I have origami paper laying around from past crafts, I’m going to have to try out these boxes! I think they would be really great on my desk! And they might help me keep organized. :/
Visiting you from your SITS tribe.
Love the boxes! You did a great job!
Aww, thanks!
I loved as much as you’ll receive carried out right here.
The sketch is attractive, your authored subject matter
stylish. nonetheless, you command get got an shakiness over that
you wish be delivering the following. unwell unquestionably come more formerly again as exactly
the same nearly very often inside case you shield this increase.