Affiliate links may be included for your convenience. View our privacy and affiliates policy for details.
When you have a knitting project with live stitches that you want to close together, such as the toe of a sock, a loop scarf or even the top of a hat, grafting knitting is a great choice.
This is a seamless option that makes the bind off look just like a row of knitting, and while there’s a little bit of a learning curve, it’s not that difficult to do. Let’s learn how to graft stitches together!
What is Grafting?
Grafting knitting is a process by which you stitch sets of live stitches together in a way that looks like a row of knitting. When it’s done you shouldn’t really be able to tell where the seam is, which is why it’s perfect for socks because you won’t feel the seam.
Grafting is sometimes called Kitchener stitch, named for Lord Horatio Herbert Kitchener, the British Secretary of War during World War I, who served the British military throughout the world over the years.
As far as we know he wasn’t a knitter himself, but he did encourage knitters in the UK, US and Canada to knit for the war effort, popularizing a sock pattern that used this seamless toe finishing technique.
In 1918, Vogue published a sock pattern using the technique and called it a Kitchener sock, which is probably where the name came from. Kitchener’s role in British colonization efforts throughout the world and particularly in the Boer War make him a problematic figure, and since the term grafting is more descriptive of what’s happening, some knitters are shifting away from that term and using grafting instead.
Setting up for Grafting Knitting

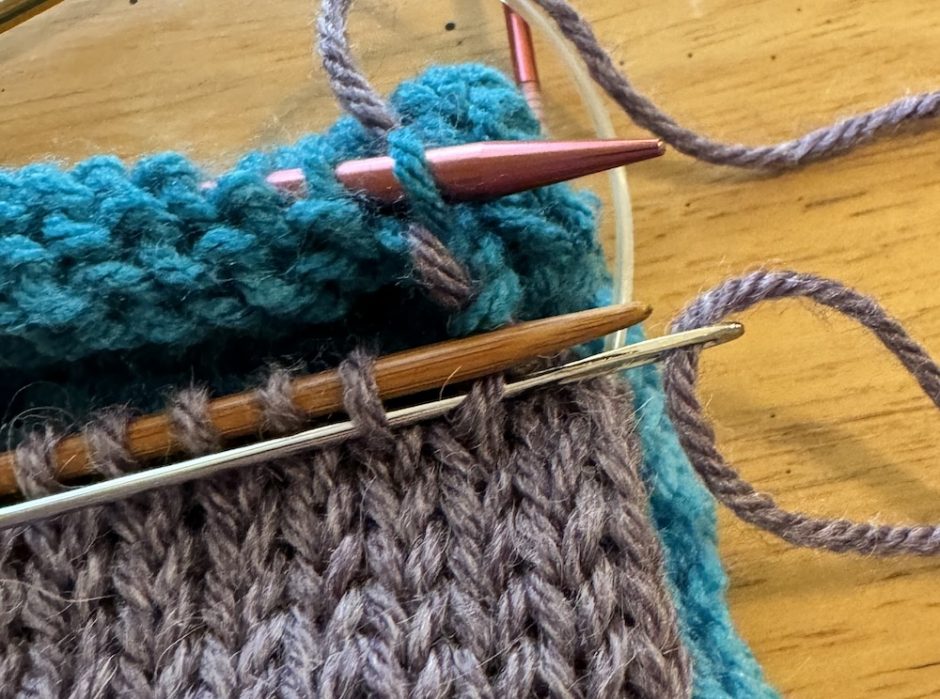
For grafting stitches to work, you need the same number of stitches on two knitting needles. So that could be the top and bottom of a sock, two ends of an infinity scarf you started with a provisional cast on, even the top of a hat with the stitches divided onto two needles.
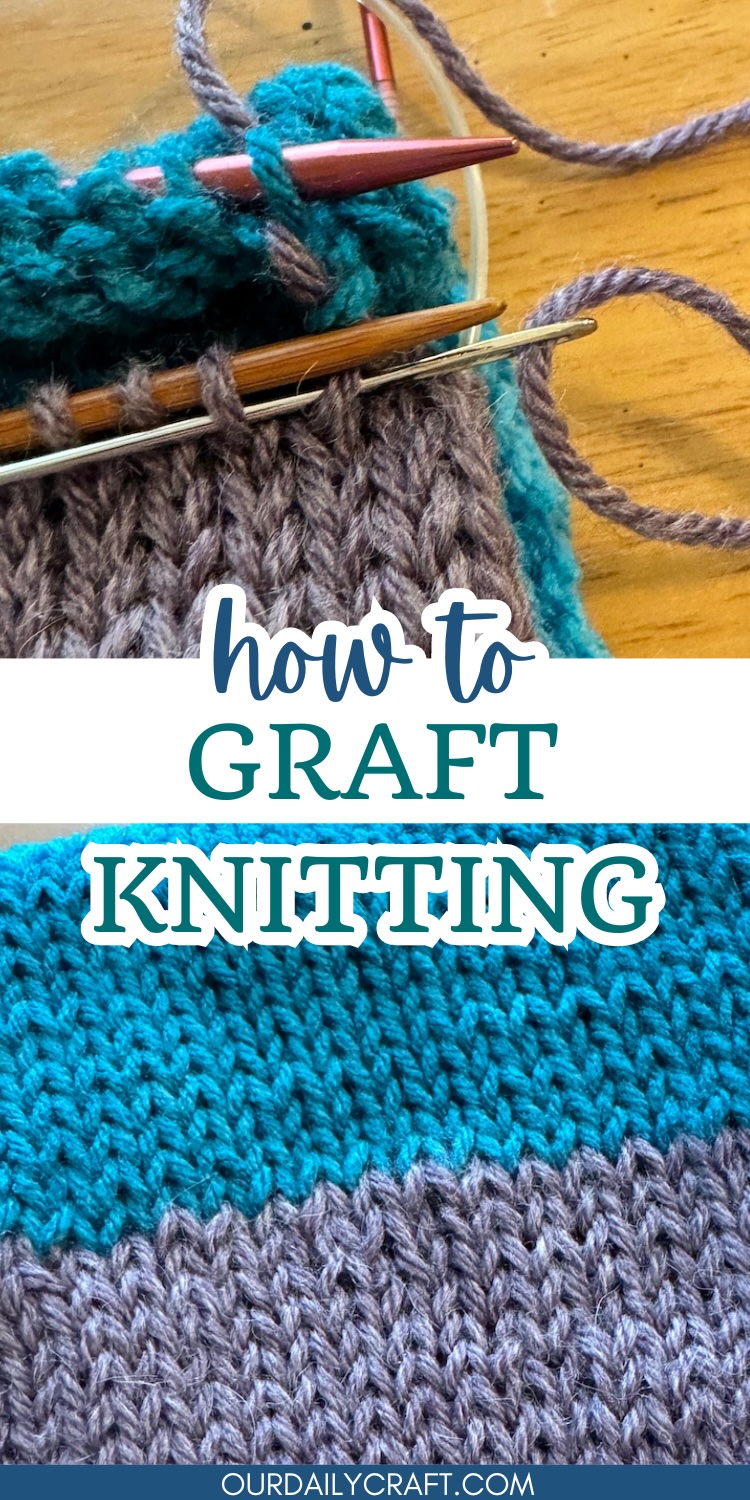
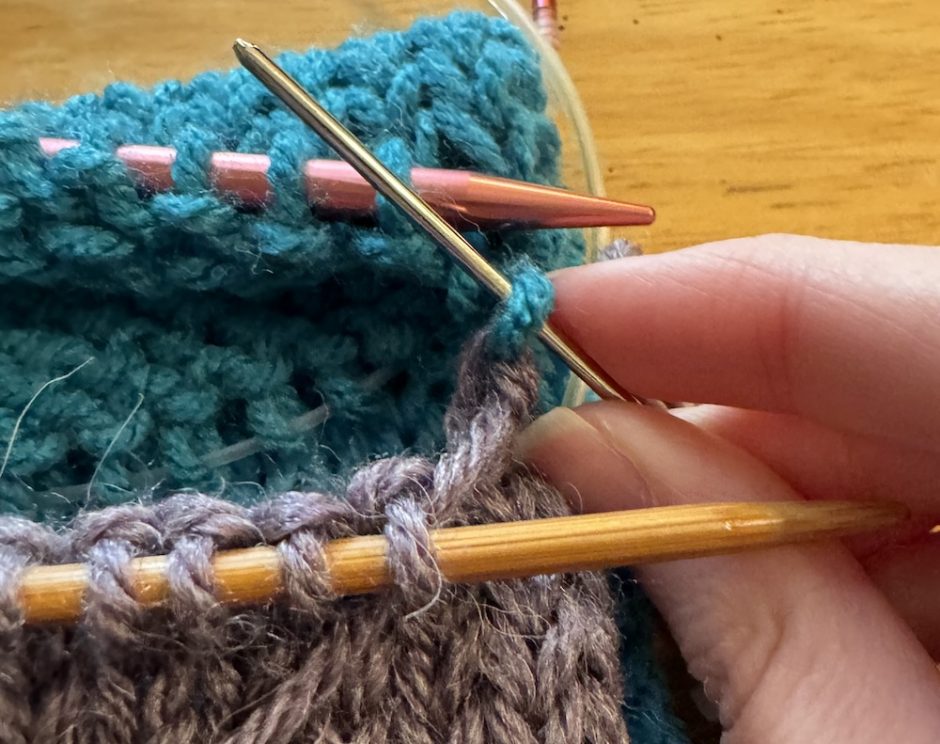
The examples shown here are from an infinity scarf knit on a circular knitting machine. This setup adds a tiny bit more difficulty because you have to make sure you’re working the stitches such that you’re not adding a twist in the scarf (unless you want to!). But you can lay the ends together the way it will look when it’s done and that should help you figure out which stitches go together.
If you’ve just finished knitting you can leave a rather long tail and use it to graft your stitches. You’ll also need a yarn needle, which has a large eye and is dull so it won’t split the stitches as easily. My favorite yarn needle has a bend toward the tip, which makes it a little easier to work with.
How to Graft Stitches
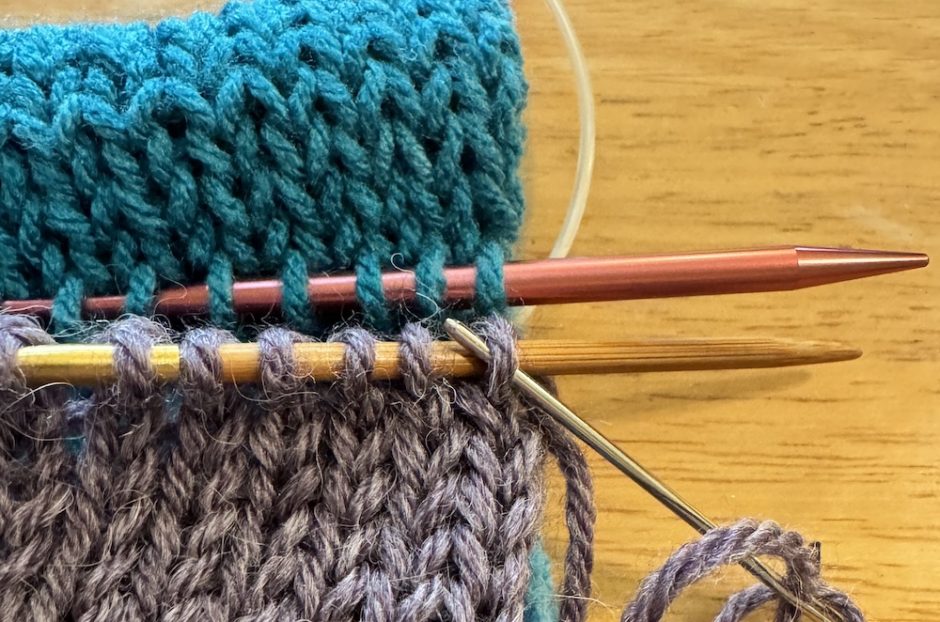
Here the yarn is attached to the front portion of stitches, but it doesn’t really matter where the yarn is coming from because you’ll treat the stitches the same regardless. Thread your needle with the working yarn and enter the first stitch on the front needle as if to purl, pulling the yarn through but leaving the stitch on the needle. (If you’re not a knitter, consider this as taking the needle through the stitch from the back to the front.)
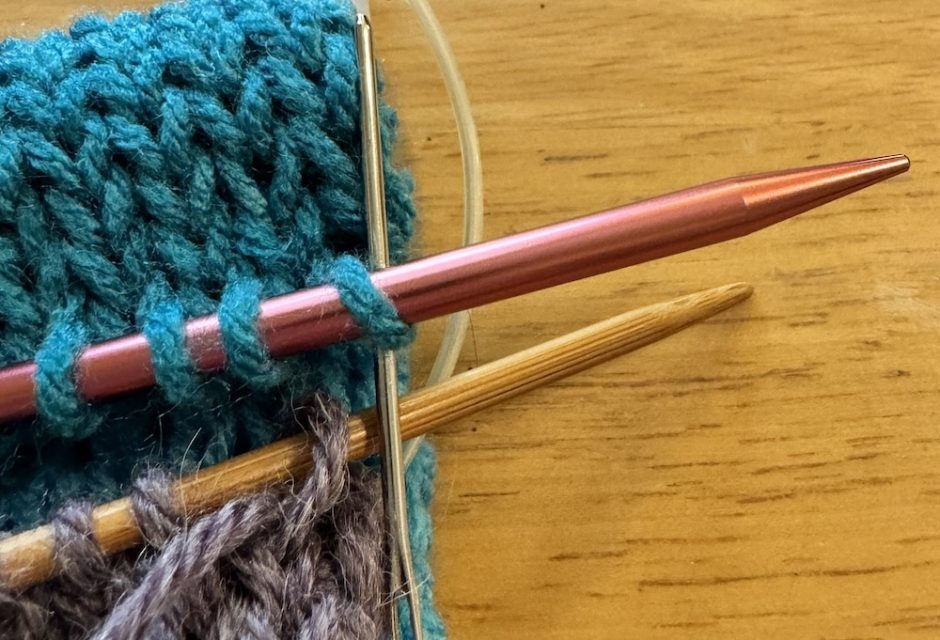
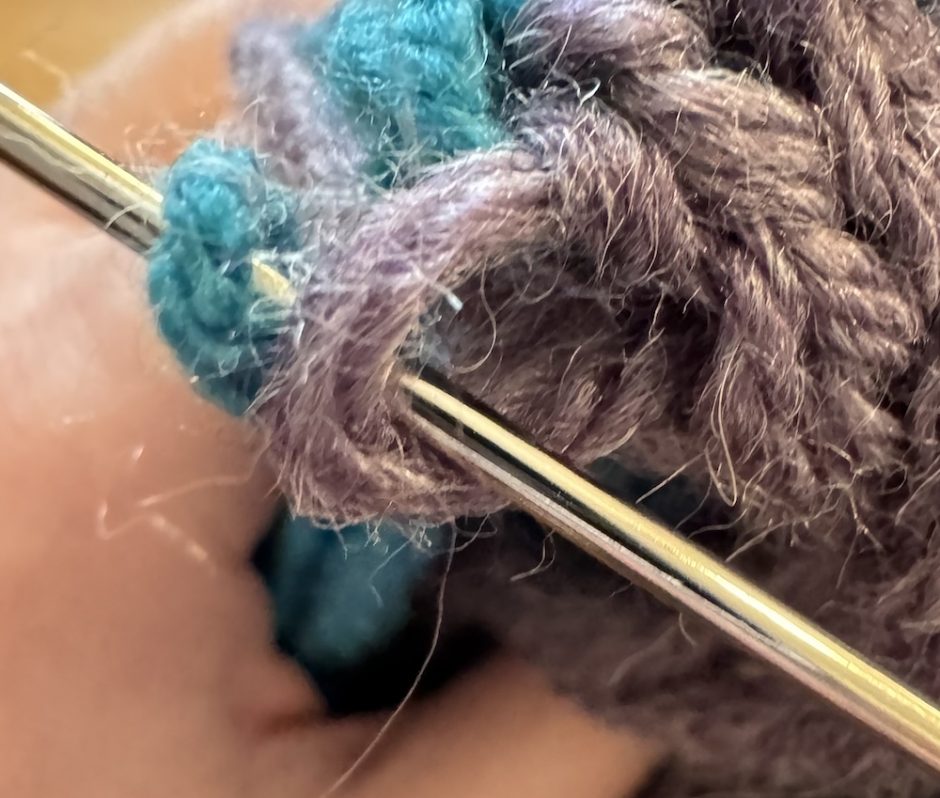
Enter the first stitch on the back needle as if to knit (from the front to the back if you don’t know knitting terms) and pull the yarn through, leaving the stitch on the needle.
Go back to the first stitch on the front needle and got through it as if to knit (front to back), this time taking the stitch off the needle.
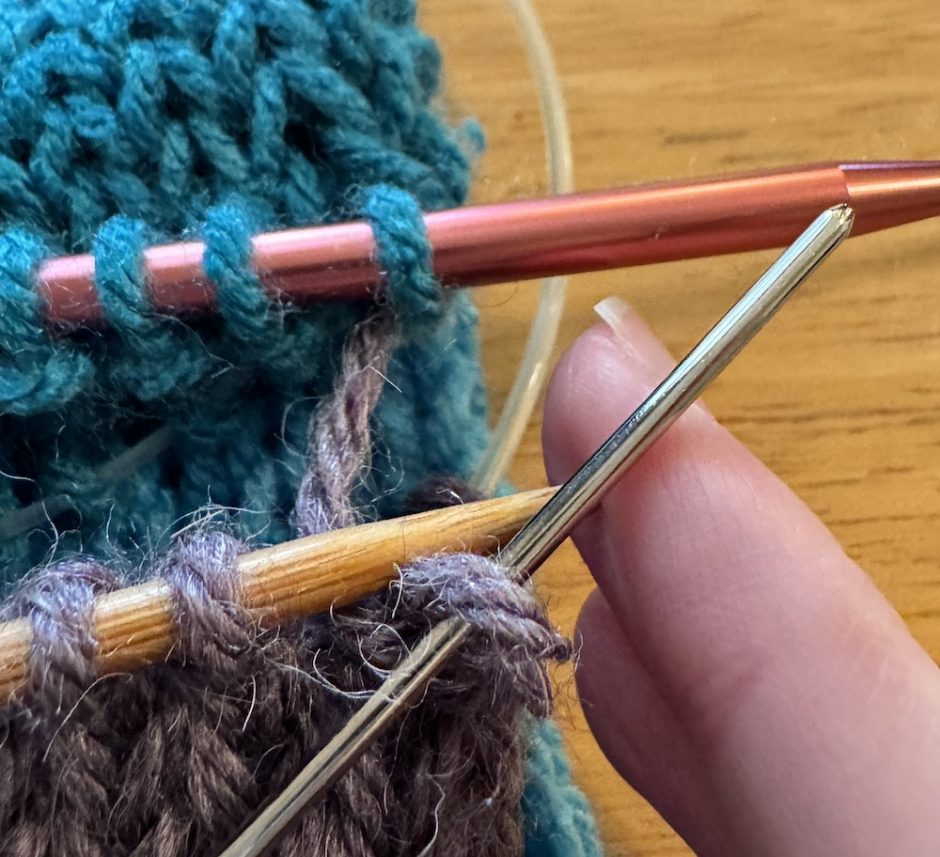
Go into the next stitch (now the first stitch on the needle) as if to purl (back to front) and leave it on the needle.
Work into the first stitch on the back needle as if to purl (back to front) and take the stitch off the needle.
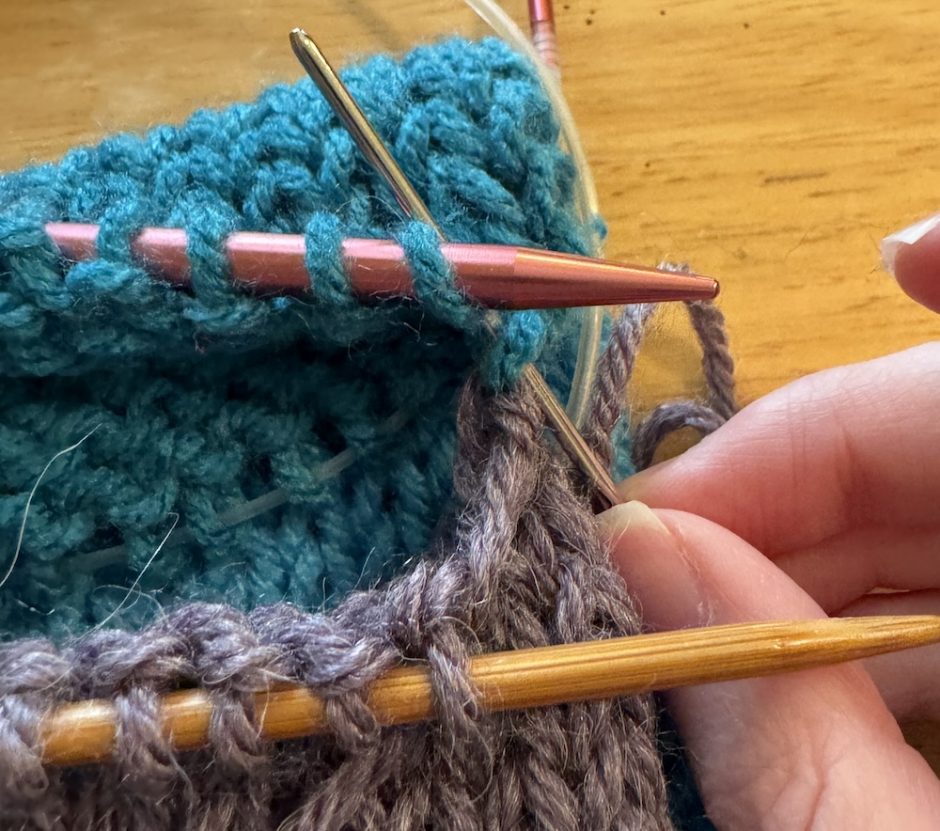
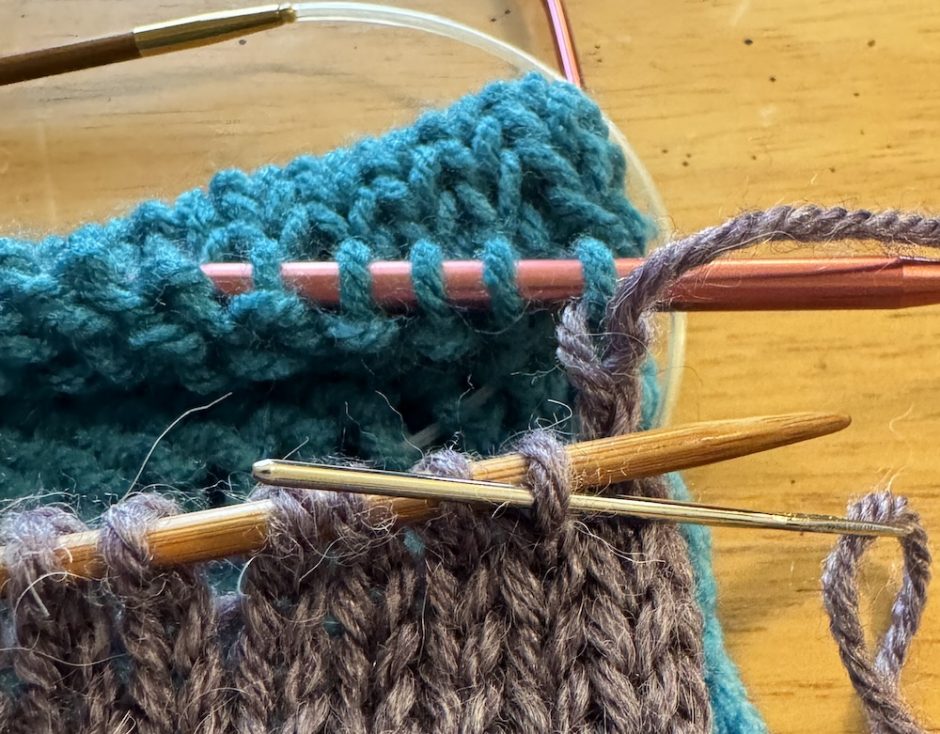
Go into the next stitch as if to knit (front to back) and leave it on the needle.
Repeat those last four moves across the row. You want to pull your yarn so that the stitches you’re making have the same tension as the stitches you’re joining: not too tight or too loose.
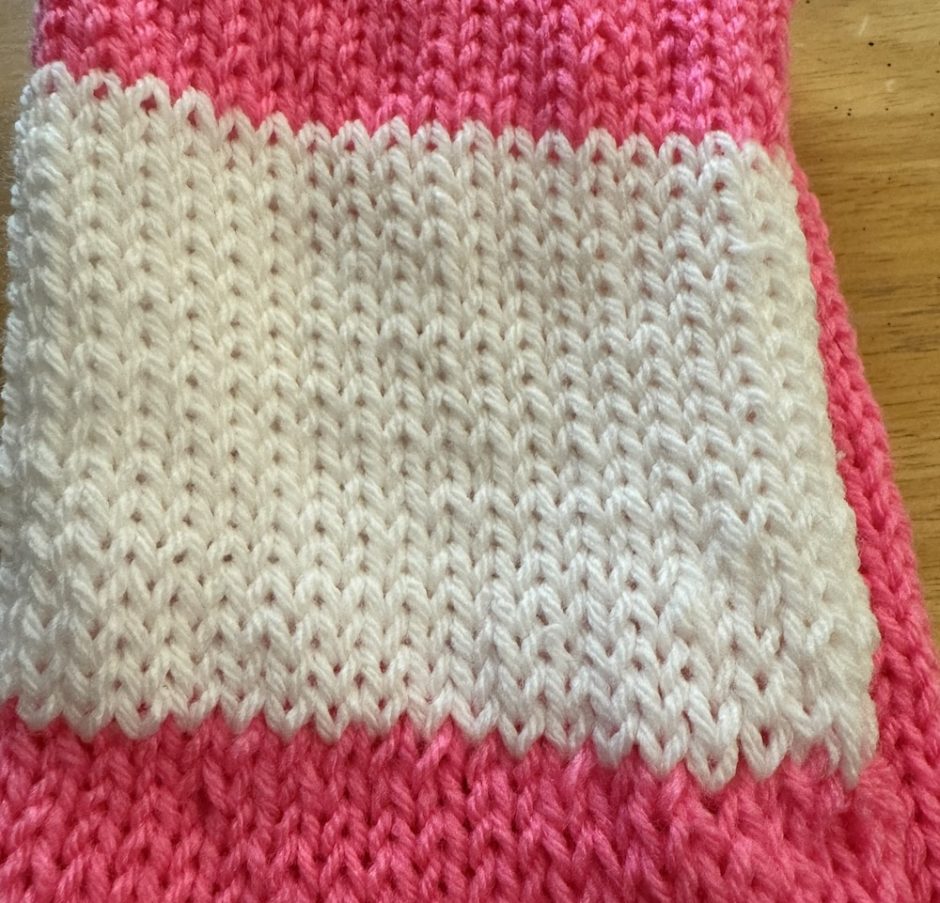
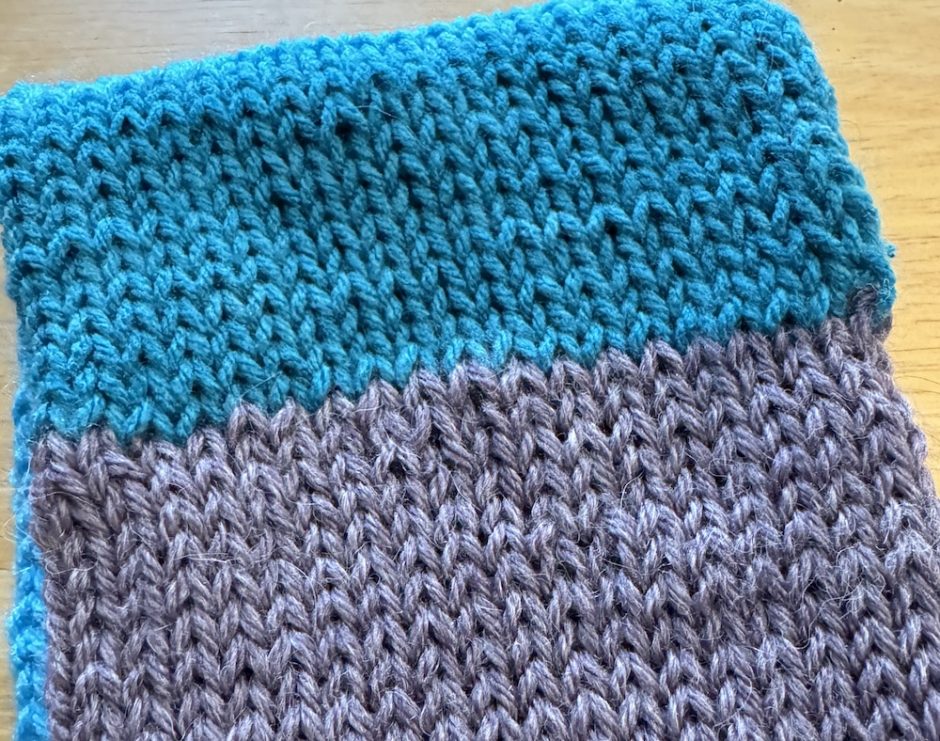
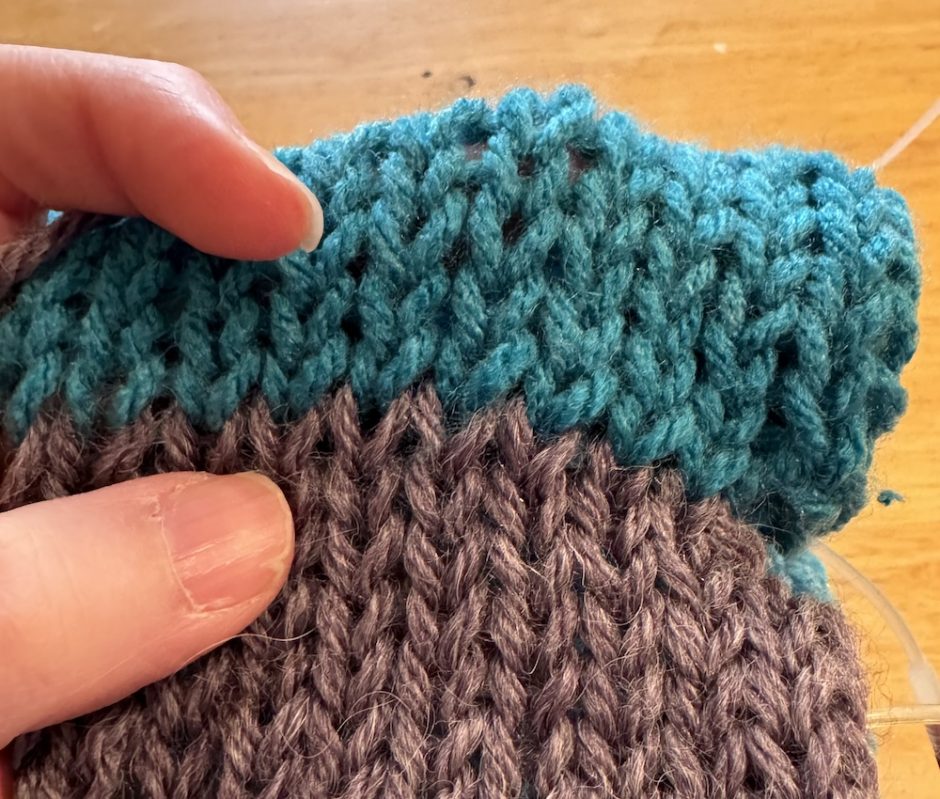
If you do it right it will be hard to tell where the stitches are grafted when you look at the finished project. Here the lower join between the pink and white stitches is the grafted area.
As you get comfortable with the moves, you can do both parts of the front or back as one movement. Here I’ve gone into the first stitch as if to knit and the second as if to purl and then will pull my needle through both. It just makes it a little faster.
When you get to the last stitch on each needle you’ll just do the last move (knit off the front, purl off the back) and weave in your yarn end, trimming any excess yarn as necessary.

Remembering How to Graft Stitches
The hardest part of grafting knitting is remembering how it’s done. Knitters typically chant under their breath “knit off, purl on, purl off, knit on” to remember the sequence.
If you don’t knit on needles but only with a circular knitting machine, you might remember it as front off, back on, back off, front on for how the needle goes into each stitch in turn.
You may get to a point where you don’t have to chant, but you’ll probably still have to think about it for a minute every time you start grafting knitting again to make sure you’re doing it right.