Affiliate links may be included for your convenience. View our privacy and affiliates policy for details.
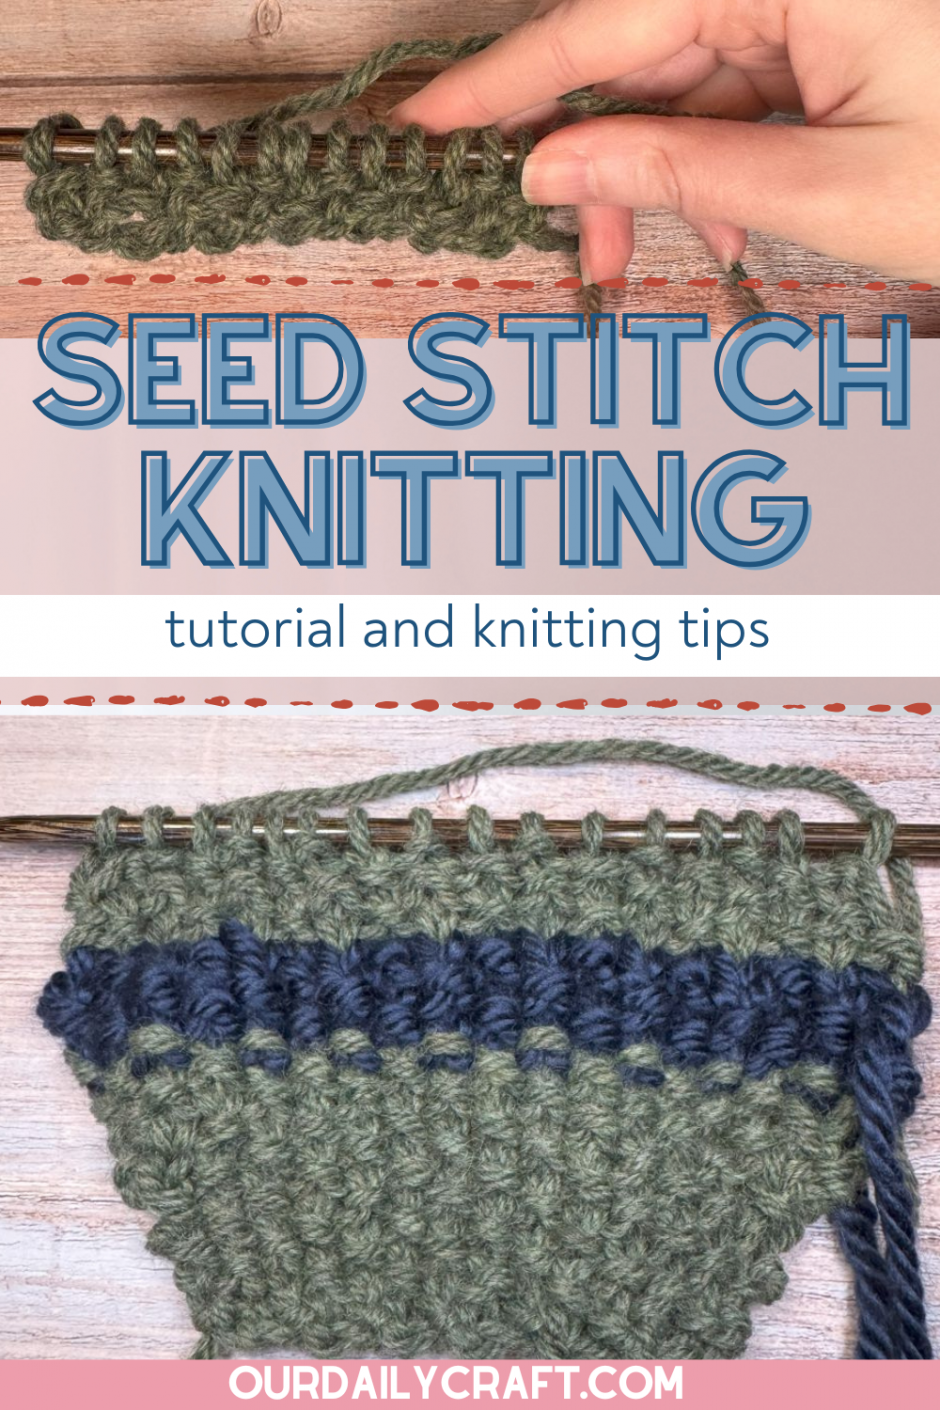
Seed stitch knitting is a lot of fun and pretty easy to do even if you’re a new knitter. Let’s learn all about how to knit seed stitch.
What is Seed Stitch?
Seed stitch is a simple repeating pattern of alternating knits and purls that also alternates from row to row.
So in the first row you would knit 1, purl 1 across, then in the second row you purl 1, knit 1 across.
Learning seed stitch knitting is a great way to practice reading your knitting so you don’t have to pay as close attention to which row you’re on.
Seed Stitch vs. Moss Stitch

One common problem people have when learning seed stitch knitting is distinguishing the pattern from moss stitch. It doesn’t help that different countries calls these stitches different things.
In the United States, alternating knit 1, purl 1 across and purl 1, knit 1 on the second row is called seed stitch. In UK terms, it’s moss stitch.
In the states what we call moss stitch is a four-row repeat: knit 1, purl 1 across for two rows, then purl 1, knit 1 across for two rows. This can also be called Irish Moss Stitch.
In the swatch above, the top half is moss stitch and the bottom half is seed stitch.
Casting on for Seed Stitch Knitting
Seed stitch is typically worked on an even number of stitches.
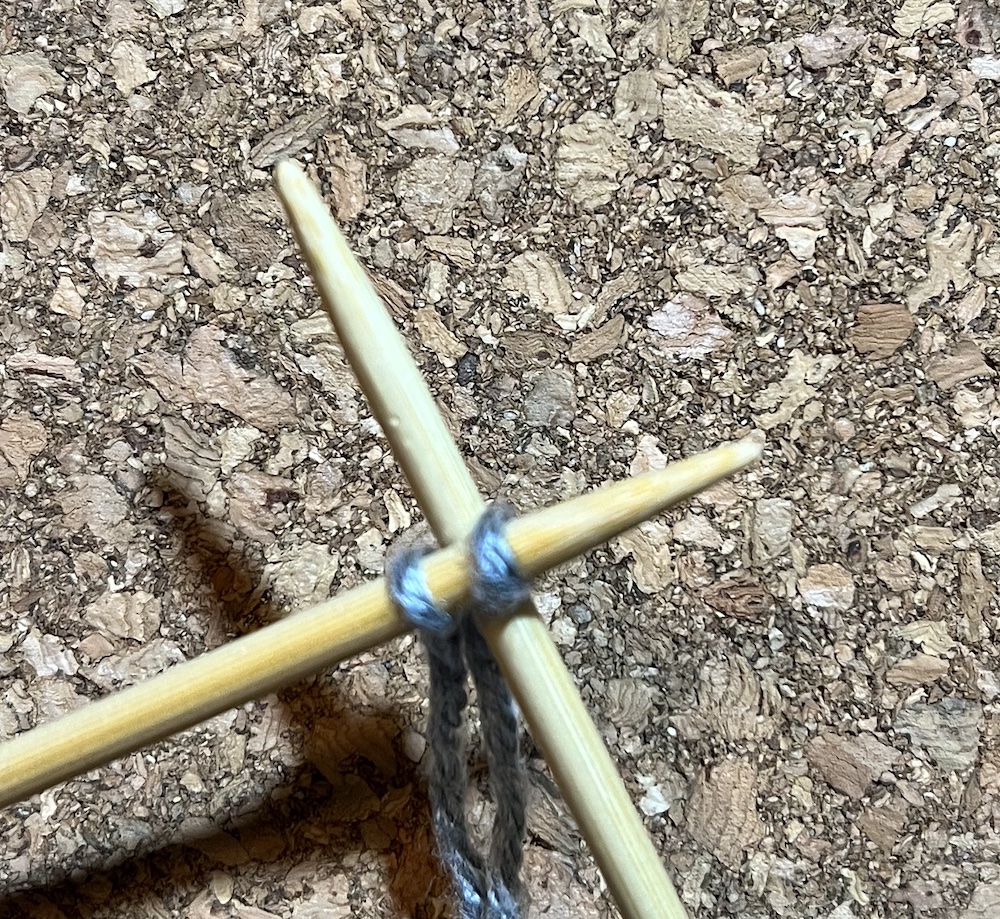
You can cast on in any way you like, but you can also do a cable cast on alternating in knit and purl stitches like we did when learning about knitting ribbing.

To do that, start with a slip knot.

Go into the slip knot as if to purl with the yarn in front. Make the purl stitch but lift it up and over onto the left hand needle instead of keeping it on the right hand needle.

Take the yarn to the back and work into that stitch you just made as if to knit. Add the stitch you just made to the left hand needle.

Repeat these two stitches until you have as many stitches as you want.
If you do this kind of cast on, you’ll start with row 2 of the seed stitch pattern. With any cast on that’s not already ribbed, start with row 1.
Knitting Seed Stitch

As mentioned above, seed stitch is a two row repeat:
Row 1: *knit 1, purl 1. Repeat from * across.
Row 2: *purl 1, knit 1. Repeat from * across.

Repeat these two rows as long as you like.
Increasing and Decreasing in Seed Stitch
Because you’re changing the stitch on every stitch in every row, adding or subtracting stitches can easily mess up your pattern.

It’s a great idea to increase and decrease at the beginning and end of the row if you can, and then just adjust which stitch you start the row with accordingly. I used a backward loop cast on to increase at the beginning and the end of the row here.

You can also do a knit in the front and back increase, which gives adds a bump that looks like a purl. Because this stitch is so busy I find you can just go right back to working in pattern after an increase and it won’t be super noticeable. For example here I had a knit stitch next to a knit in the front and back, which makes it look like I should knit 3 in a row on the next row, but doing a knit 1, purl 1, knit 1 instead works just fine.

Likewise with decreasing, working at the ends of the rows is the best option for avoiding stitch pattern interruption.
Changing Colors in Seed Stitch
Because there are knits and purls both in seed stitch knitting, when you change colors you will be able to see the old color and the new color in a broken line where you change colors.

It’s not super noticeable and I don’t normally do anything special when I change colors when knitting seed stitch, but if you want you can knit a whole row on the right/front/row 1 side of the work in the new color and then continue with row 2. This gives you an even line of color and isn’t obvious in the knit fabric.
Above you can see the difference, with continuing in pattern for the color change at the bottom and working a row of knits at the top.
Seed Stitch in the Round

One way I love to work seed stitch is in the round, but I do make one little change, which is to work on an odd number of stitches instead of an even number.
This allows you to just continue working knit 1, purl 1 around without paying attention to what round you’re on. Just put in a stitch marker at the end of the round and keep going until you have as much knitting as you need.
Binding Off Seed Stitch
You can use a standard bind off for seed stitch if you like, or just like with ribbing you can bind off in pattern.

Work the first two stitches as you would if you were working the next row of your pattern.

Bring the first stitch you worked up and over the second stitch and over the top of the needle.

Work the next stitch as it would be in the pattern.

Pull the stitch at the bottom of the right hand needle up and over the top of the needle.

Repeat across. Cut the yarn, leaving an end for weaving in, and pull the tail through the last stitch.
Want to learn more about seed stitch and its variations? The book Seed Stitch: Beyond Knit 1, Purl 1 by Rosemary Drysdale is a great resource for different stitch pattern variations and projects to work with them.