Affiliate links may be included for your convenience. View our privacy and affiliates policy for details.
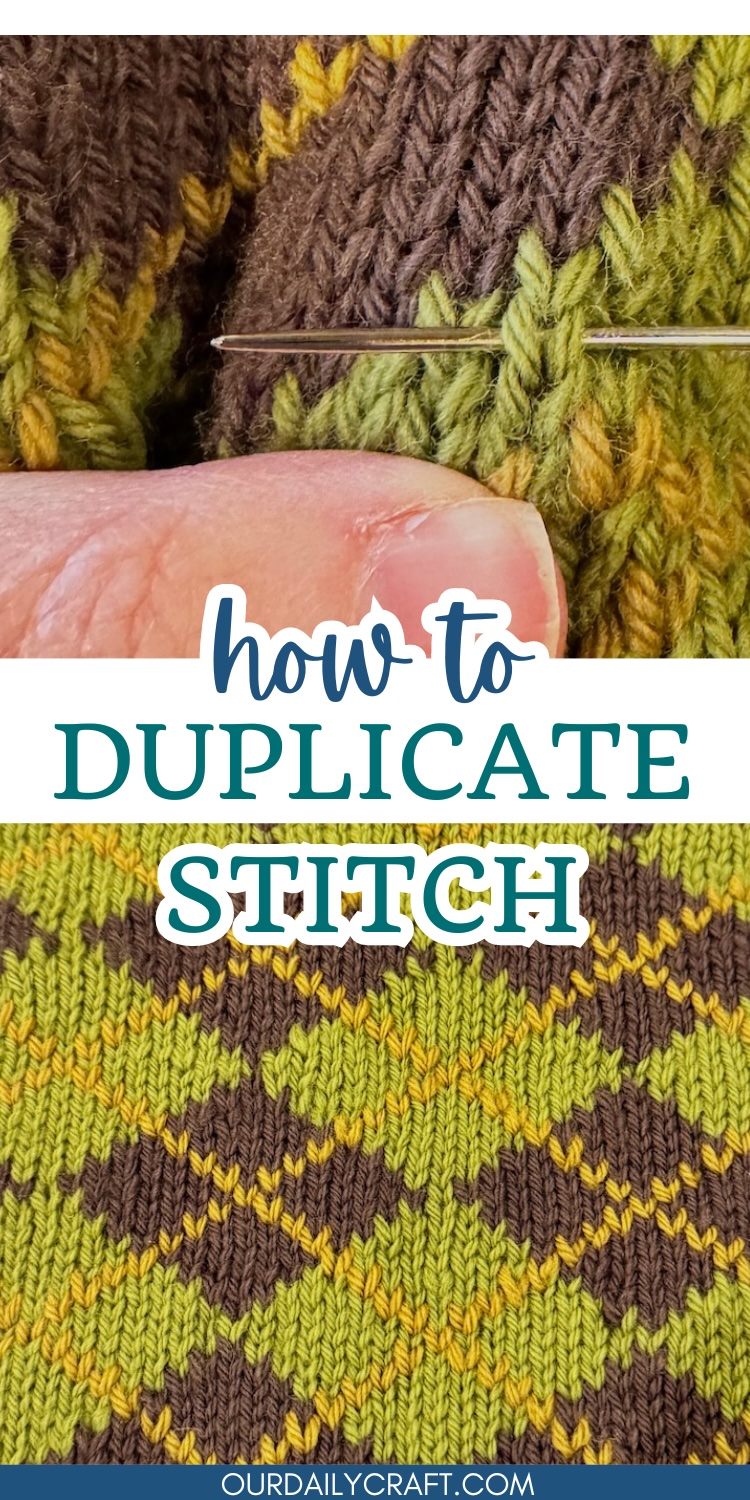
Duplicate stitch is one of those things that I don’t use that often but whenever I do I’m reminded of how much I like it. It’s an easy way to add little details to a knitting project after the knitting is done. You can also use it to stitch larger graphics so you don’t have to deal with stranded knitting or intarsia if you don’t want to.
What is Duplicate Stitch?
Duplicate stitch is a way to add color and designs to a piece of knitting after the knitting itself is completed. You do this by sewing over the knit stitches with yarn, using a yarn needle. You’re literally duplicating the shape of a knit stitch on top of a stitch, thus the name.
Because we’re making v shapes with our stitching, duplicate stitch really only works on stockinette stitch. Those smooth stitches can easily be covered with stitching. Choose yarn to stitch with that’s the same weight as the yarn you knit your project with so the stitches you make on top duplicate the stitches below as much as possible.
You can do freeform duplicate stitch like on my Halloween coffee cup cozy, which doesn’t indicated exactly how you should stitch on your jack o’lantern face. You can also follow a chart like the USA on my team USA hat knitting pattern.
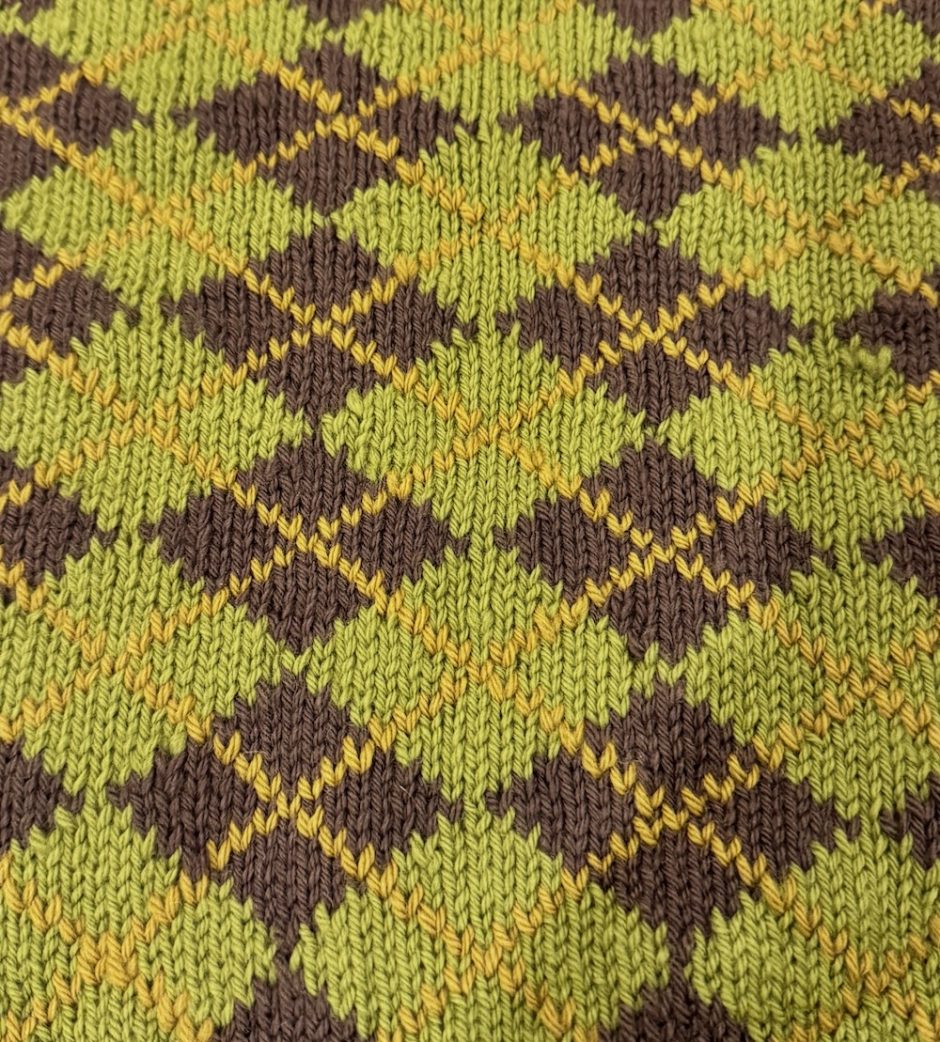
Or you can stitch lines or other basic shapes that repeat across a knit fabric. That’s what I’m showing here, as I add the diagonal lines to an argyle vest, which is just about as classic as duplicate stitch gets.
How to Stitch Duplicate Stitch
To get started with duplicate stitch, you need some knit fabric, a contrasting yarn in the same weight as your project, and a yarn needle.
I like to have about an arm’s length of yarn on the needle when I start. Longer than that is hard to work with, shorter is used up too quickly. Thread your needle and you can either weave the end into a few stitches now to anchor it or just leave a few inches of tail at the back when you start your first stitch so you can weave it in later.

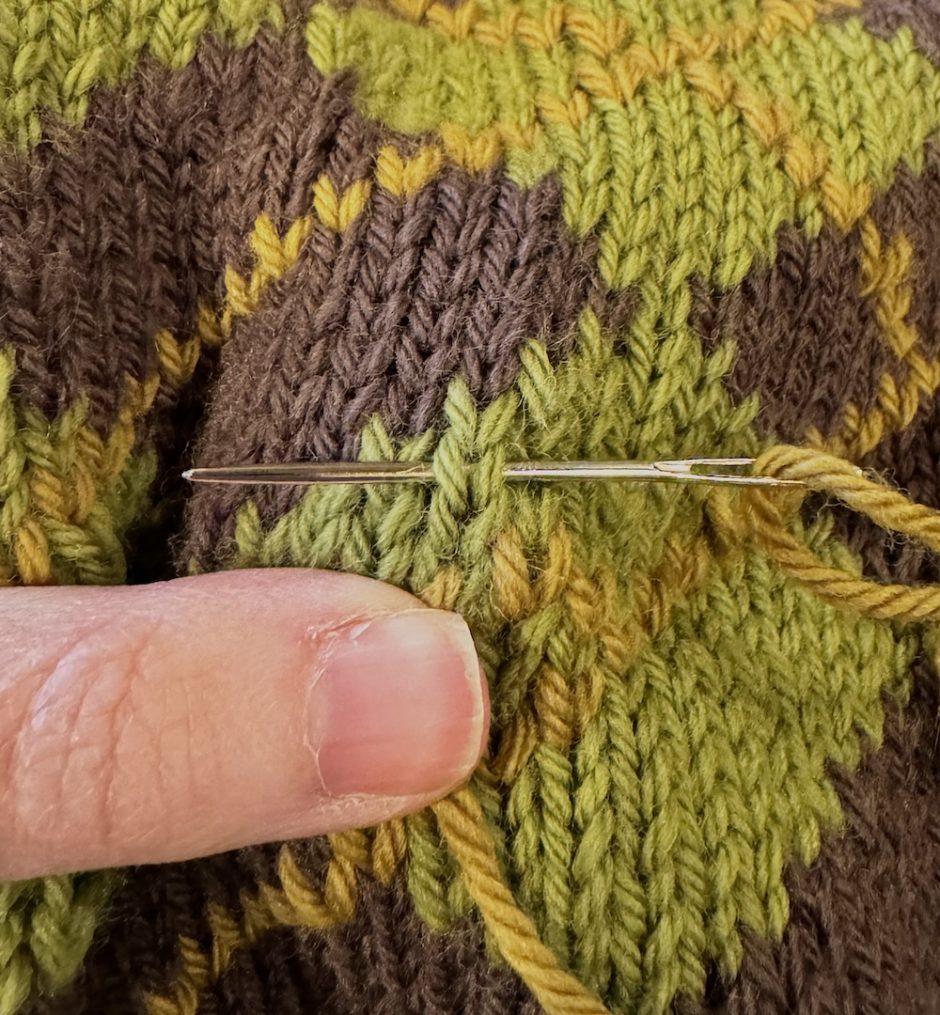
Find the first stitch that you want to cover. Bring the yarn needle up through the hole at the bottom point of the v from the back of the work through the fabric to the front of the work.

Take the needle behind the legs of the stitch above the stitch you’re duplicating, with the needle going from right to left.
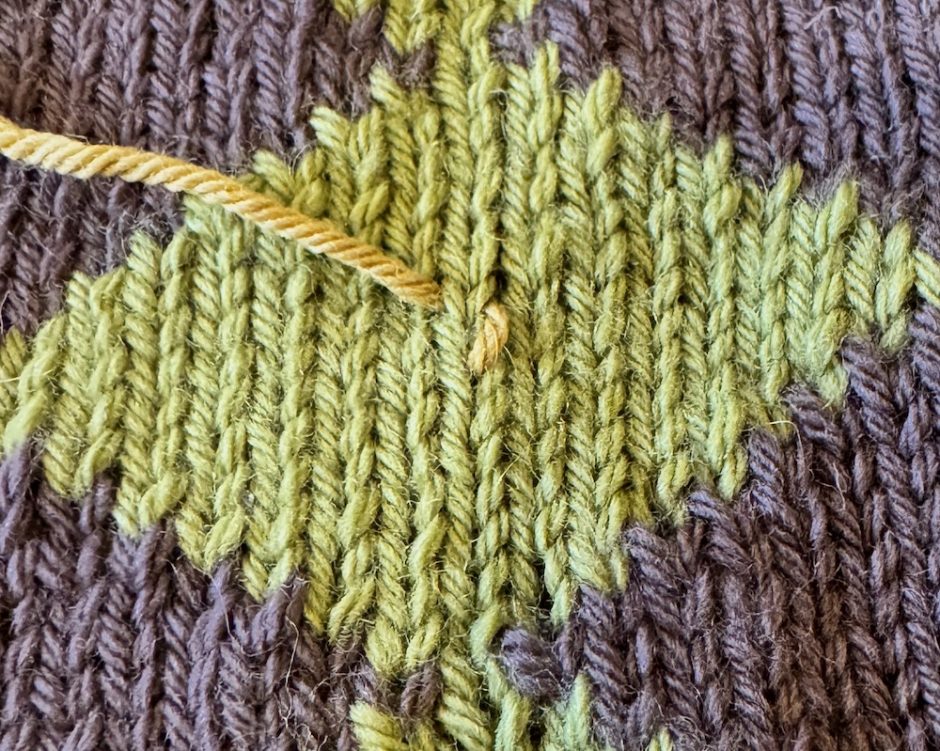
Pull the yarn through so that it covers the right leg of the stitch you’re duplicating. You want the tension to be as close to the original knit fabric as possible, not too tight or too loose (this takes practice, just do the best you can).

To cover the left leg of the stitch, take the needle back down from front to back into the hole at the bottom of the stitch you’re covering.
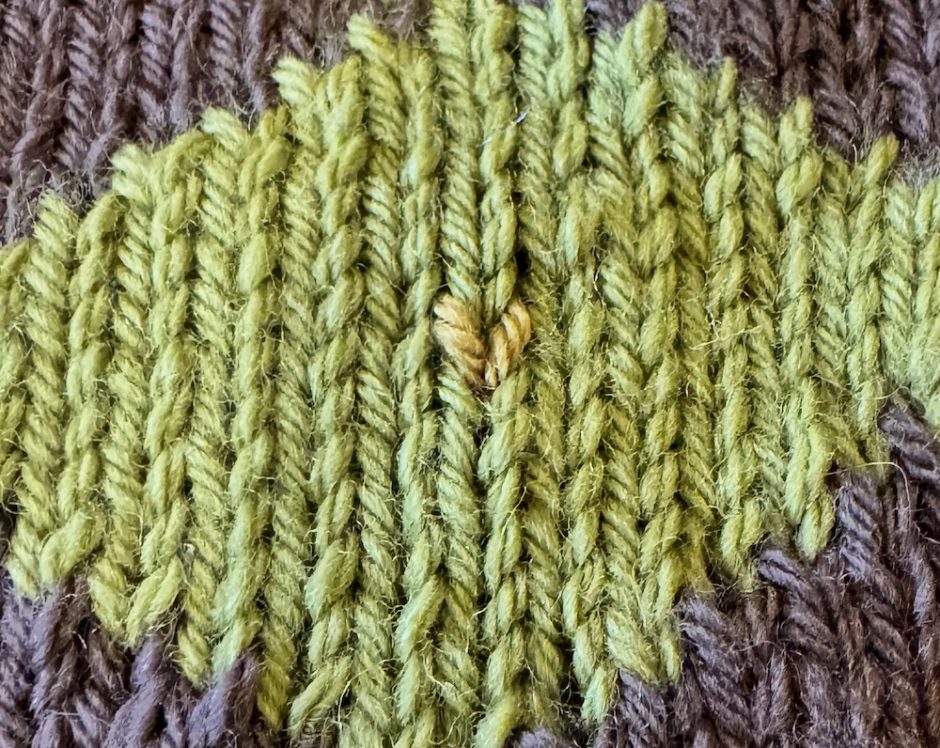
Again pull the yarn so that the stitch is covered nicely.
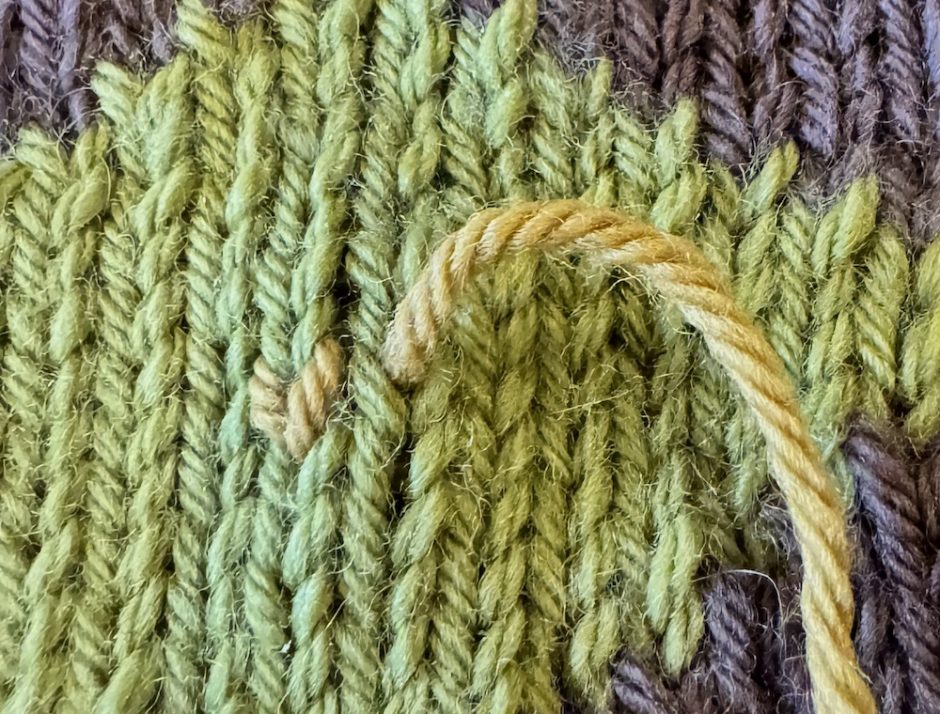
To begin the next stitch, take the needle back up through the fabric from back to front through the hole at the bottom of the v of the next stitch you want to cover.
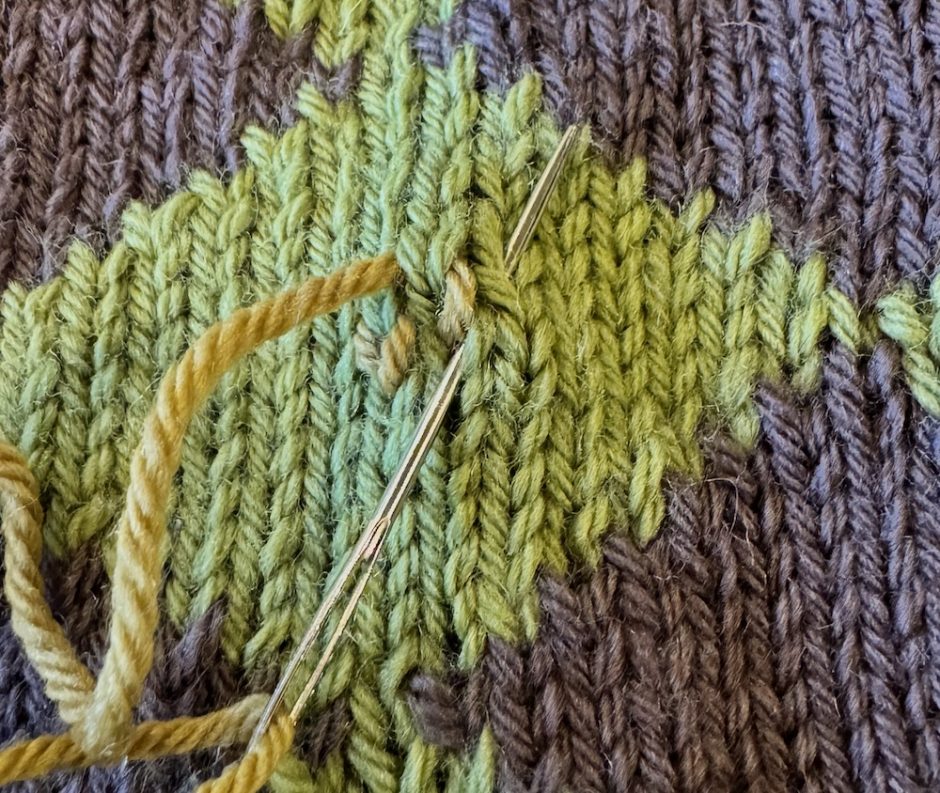
If you want to stitch a little faster, when you go back down into the bottom of the stitch when you cover the left leg, you can bring the needle back up through the bottom of the next stitch you want to cover, all in one motion, as shown here.
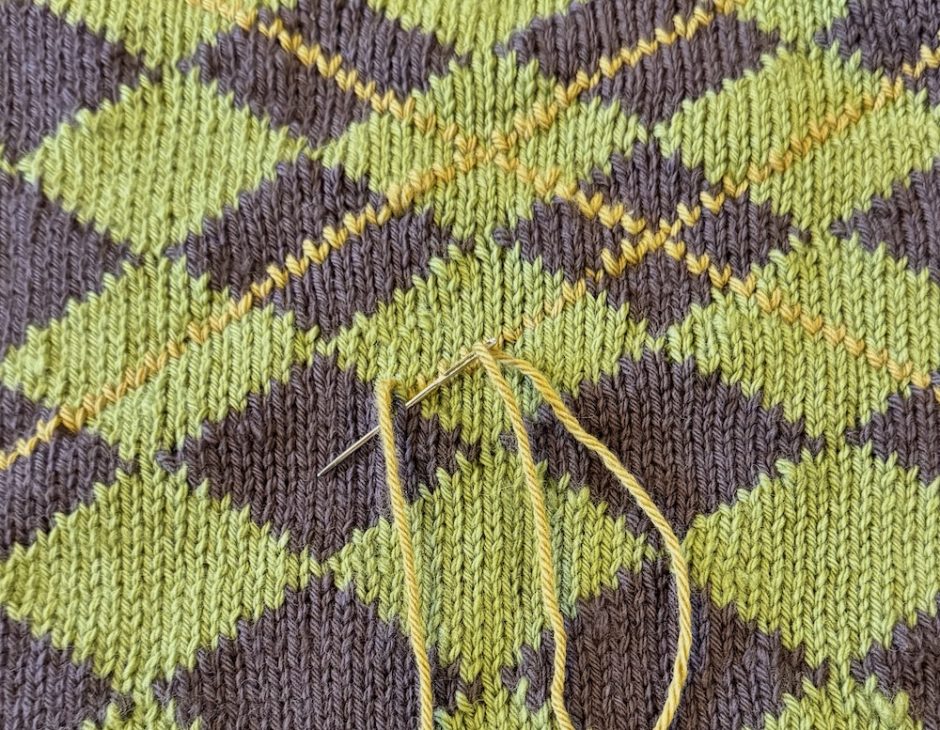
You can work in any direction, place stitches next to each other, add lettering, simple shapes or really whatever you want. You can even use it to correct mistakes in colorwork projects you might have missed while knitting.
Once you start playing with duplicate stitch I think you’ll find all sorts of ways to use use it. I’d love to know how you use it or if you have any duplicate stitch tips!