Affiliate links may be included for your convenience. View our privacy and affiliates policy for details.
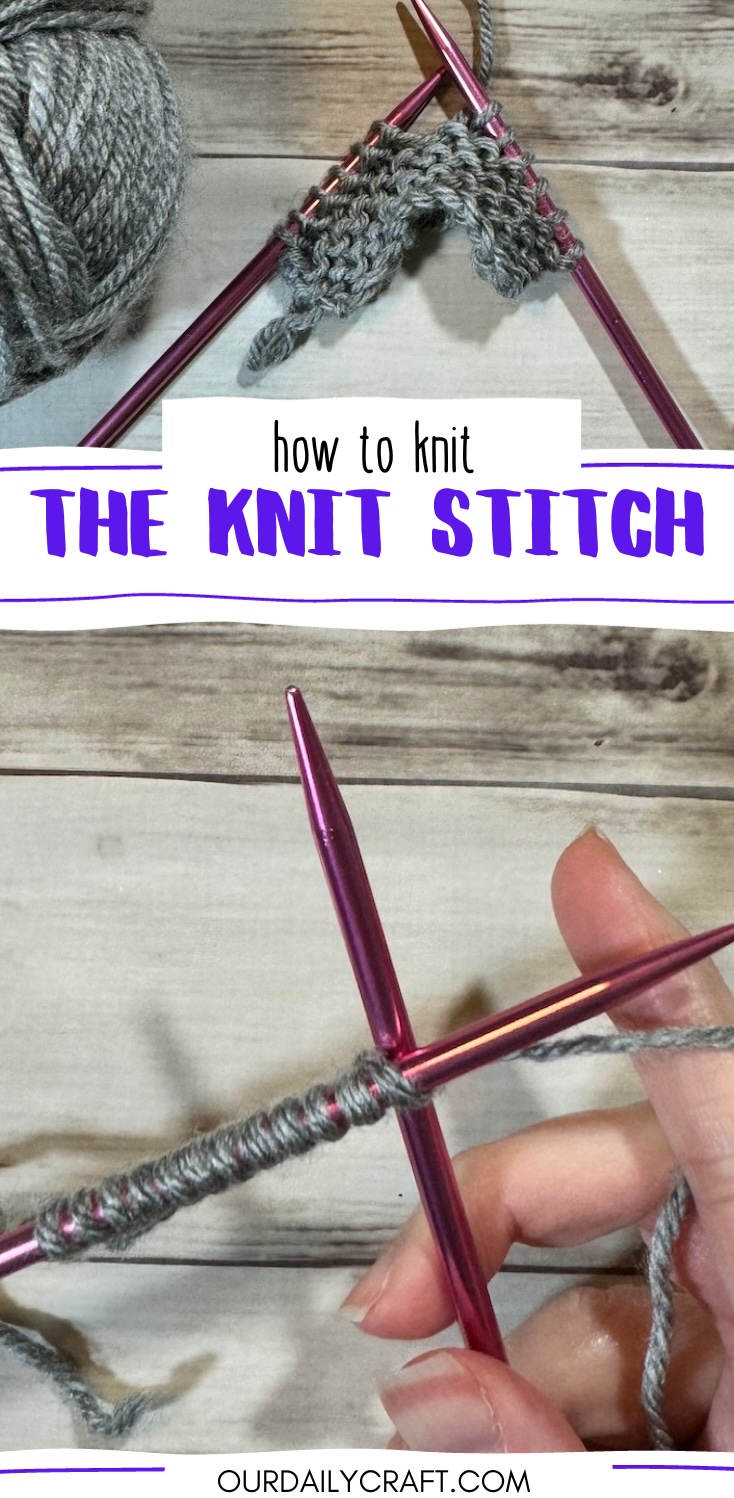
When you learn to knit, one of the first things you will learn is how to make the knit stitch. It’s the basis for everything else you learn in knitting, and you can actually make a lot of things just knowing how to knit.
Mastering the knit stitch is actually pretty easy when you have someone to walk you through it. So let’s get started.
Materials for Learning to Knit
If you’re totally new to knitting and need some basic supplies, all you need to get started is some yarn and a pair of knitting needles. Both yarn and needles come in different sizes, and you need yarn and needles that work well together to make stitches than are easy to knit and look right.
For this demonstration I’m using Lion Brand Basic Stitch yarn, which is a medium/worsted weight or number 4 (yes it would be easier if we just stuck with one name for things). I also have a pair of Susan Bates aluminum knitting needles in size 7/4.5mm. Both of these products are easy to find at your local crafts store or online, are inexpensive and of good quality. Basic Stitch comes in tons of colors so you can choose your favorite, which makes learning more fun.
Get Started Learning the Knit Stitch
Before you learn how to make the knit stitch, you’ll need some stitches on your needle to work with. You do this by casting on stitches.
Generally you’ll start with a slip knot, then work the cast on method of your choice. I love the knit cast on for beginners because you learn the basics of how to make the knit stitch right there in the cast on.
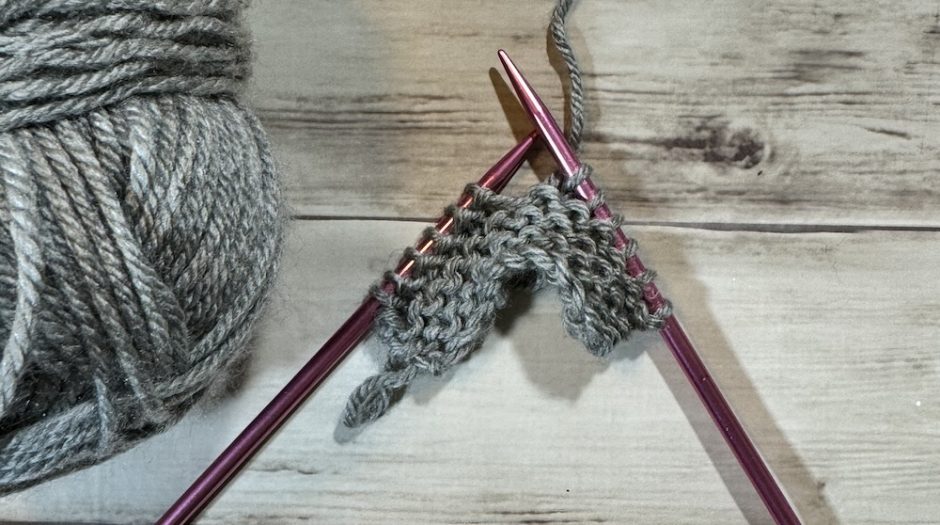
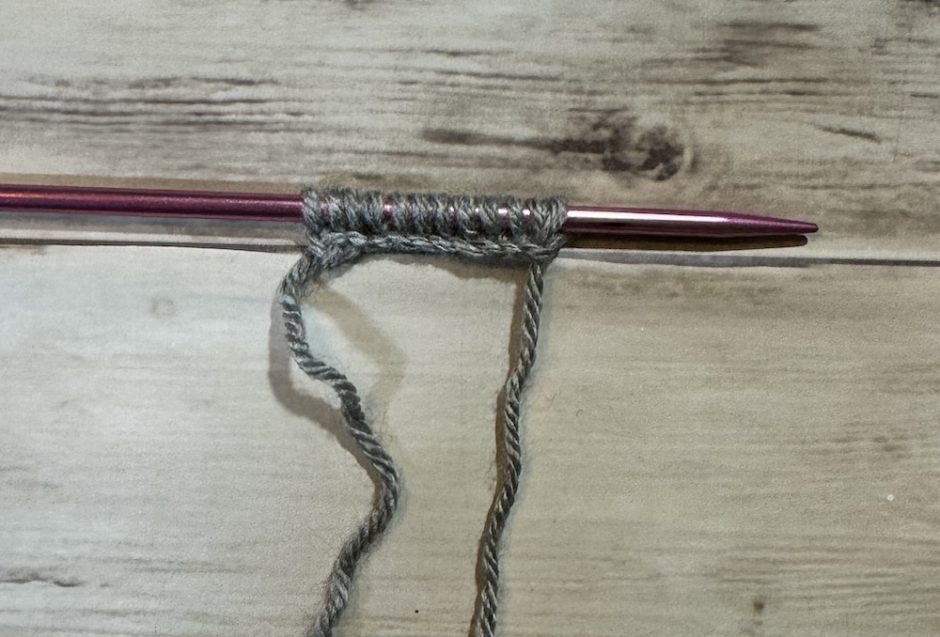
Here I used the knit cast on and cast on 12 stitches (11 plus the slip knot).
How to Make the Knit Stitch Holding Yarn in the Right Hand
There are lots of different ways to knit that go by different names, but the most common ways are most commonly called English and continental. The main difference is in how you hold the yarn when you make your stitches. Which way you do it isn’t necessarily influenced by whether you are right or left handed, and you should try both to see which feels easier for you. Both hands are involved in knitting regardless of how you hold the yarn.
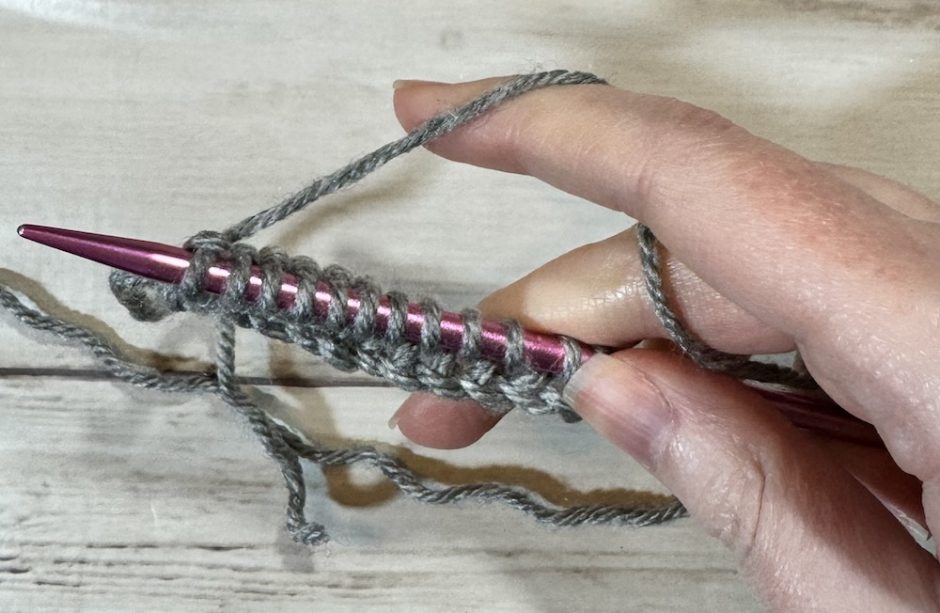
English knitting, also known and “throwing,” involves holding the yarn in your right hand. Your technique for how exactly to hold the yarn will change with practice, so just do whatever feels comfortable for how.
Hold the needle with the cast on on it in your left hand and the empty needle in your right. The working yarn (that’s the yarn attached to the ball) should be behind the needles, and you can hold it gently with your right hand or wrap it around your fingers.
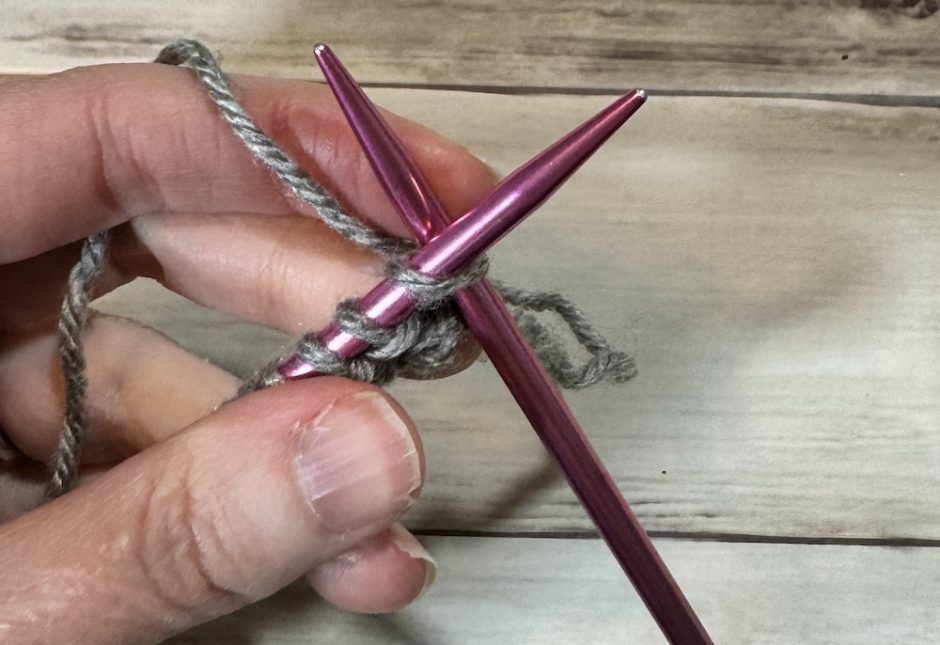
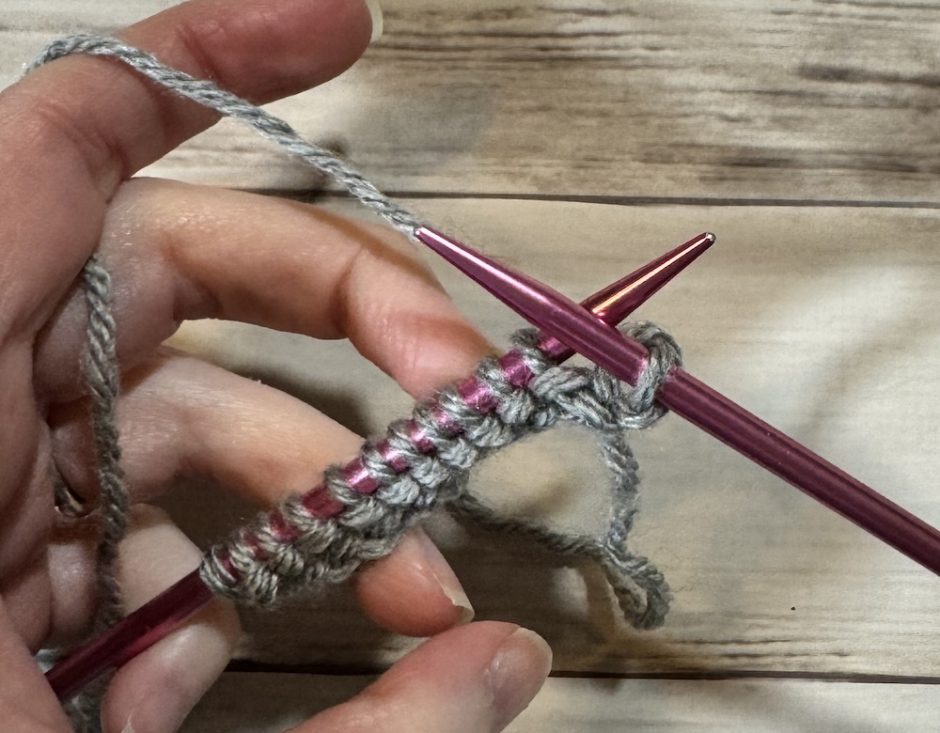
Take the tip of the right needle through the stitch at the top of the left needle from front to back.
Wrap the yarn over the right-hand needle from left to right (counterclockwise).
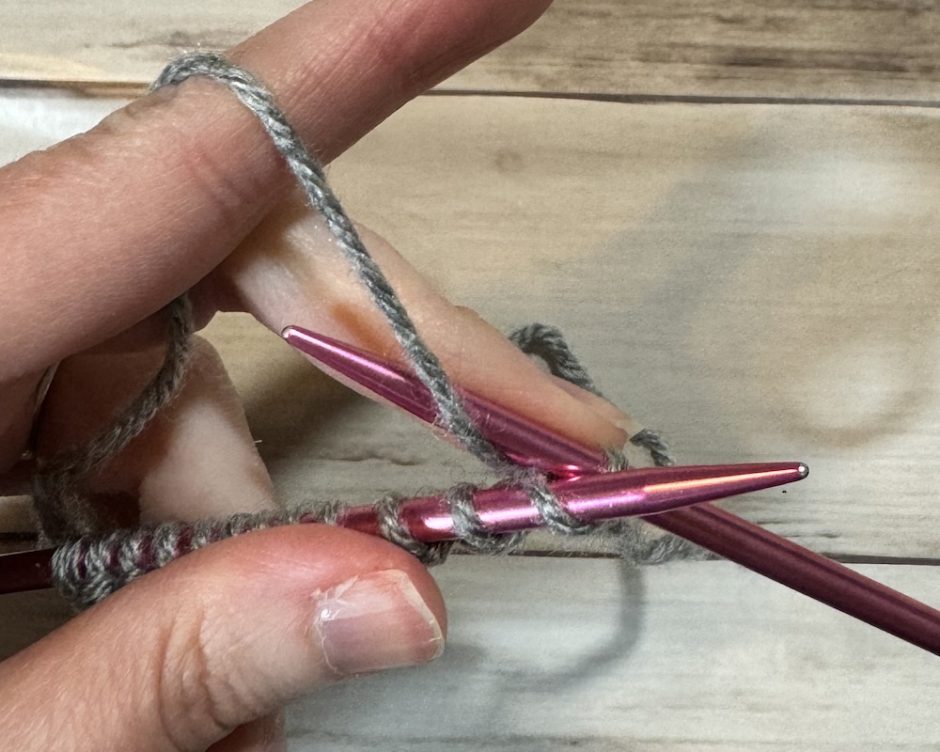
Use your finger to gently push the right-hand needle through the stitch and back to the front, keeping the yarn on the right-hand needle and the old stitch on the left-hand needle.
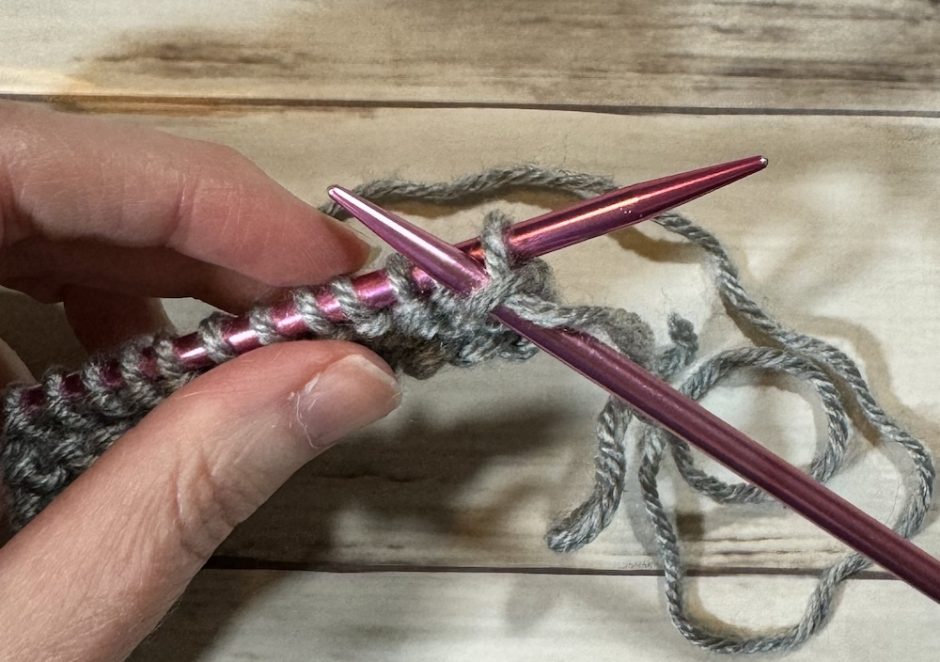
Slide the old stitch off the left-hand needle. You now have one knit stitch on the right needle and 11 cast on stitches on the left.
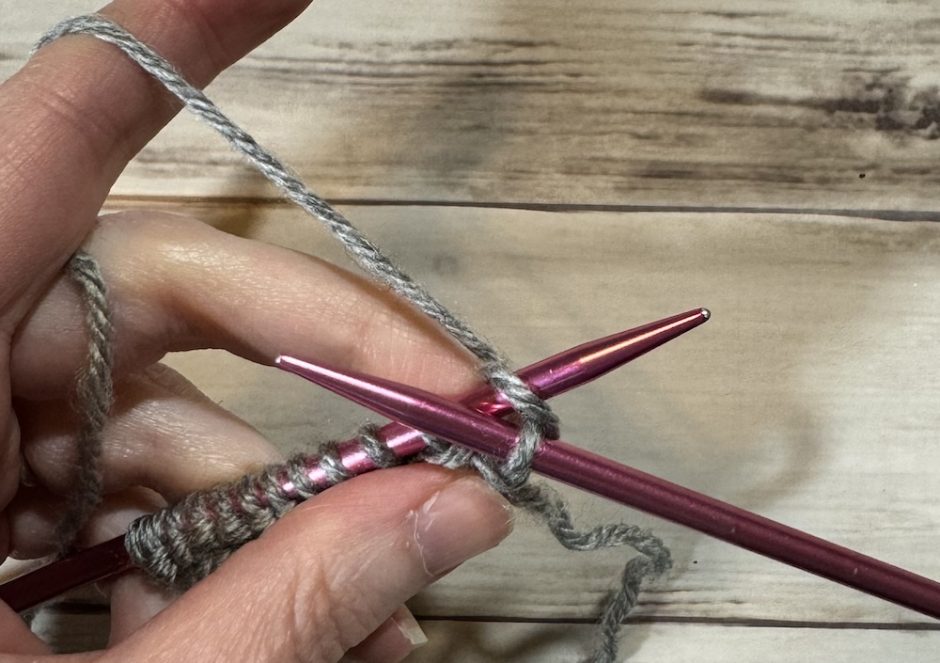
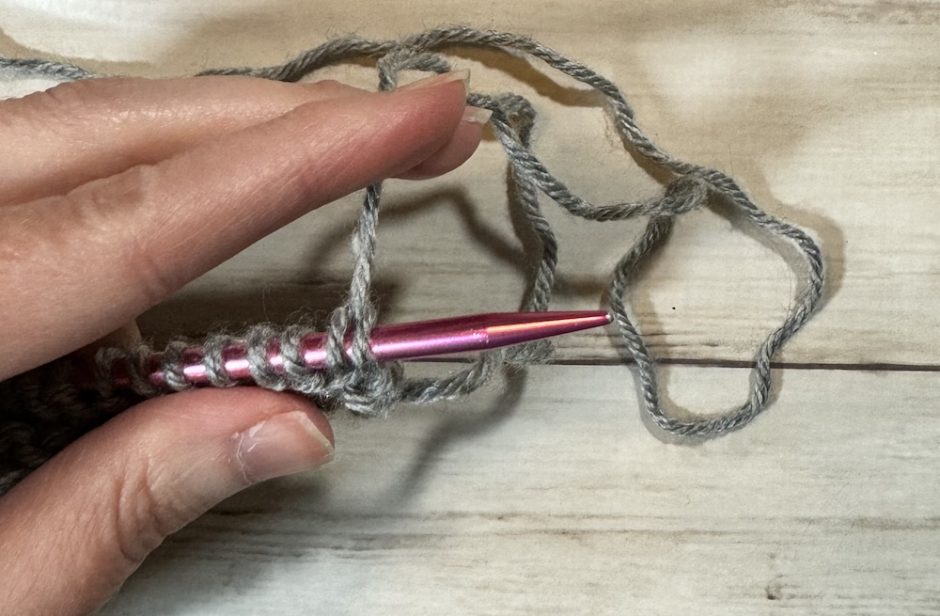
Continue in this manner across the row. When you’re done all the stitches will be on the right-hand needle and your left-hand needle will be empty.

To start the next row, flip the needle with the stitches on it over from front to back and place it in your left hand. Put the empty needle in your right hand and repeat the process.
Continental Knitting: How to Make the Knit Stitch
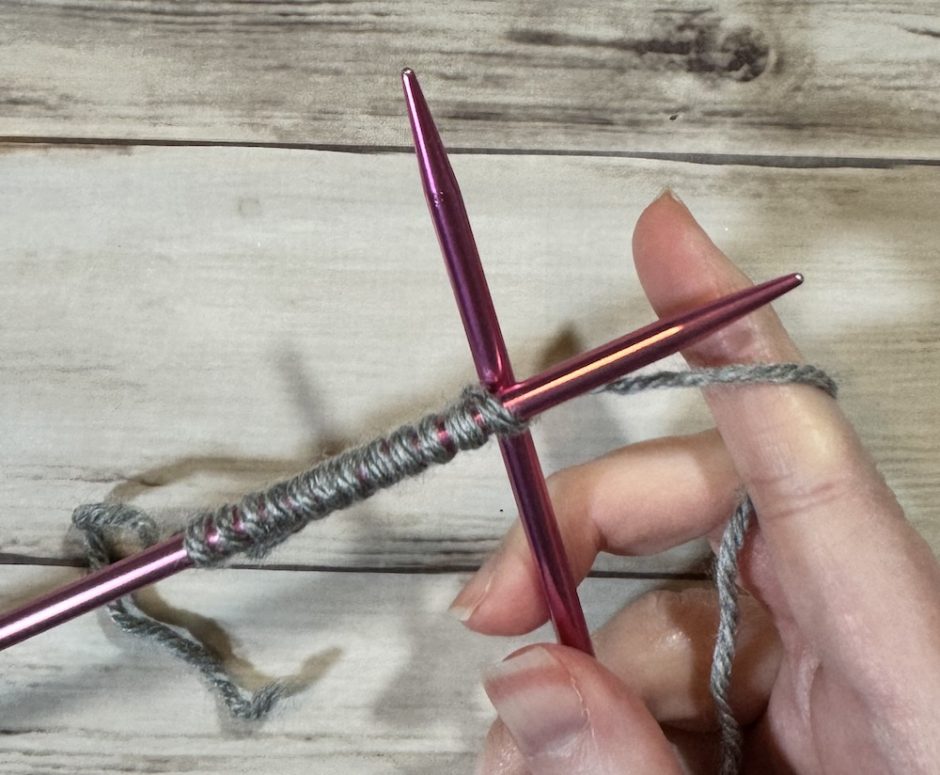
In what’s sometimes called continental knitting, picking or left-handed knitting, you start the same way, with the full needle in your left hand and the empty needle in your right. The yarn is at the back and you hold it with your left hand.
Place the right-hand needle tip into the top stitch on the left-hand needle from front to back.
Drape the yarn over the right-hand needle tip.
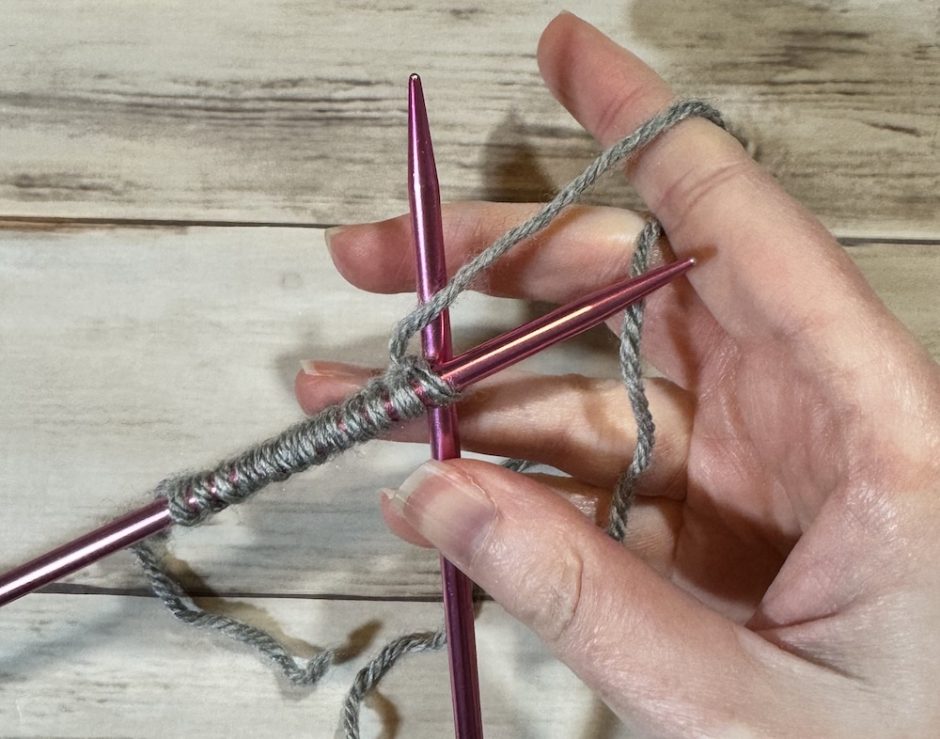
Push the right-hand needle with your finger so it goes through the old loop and back to the front, keeping the yarn on the needle.
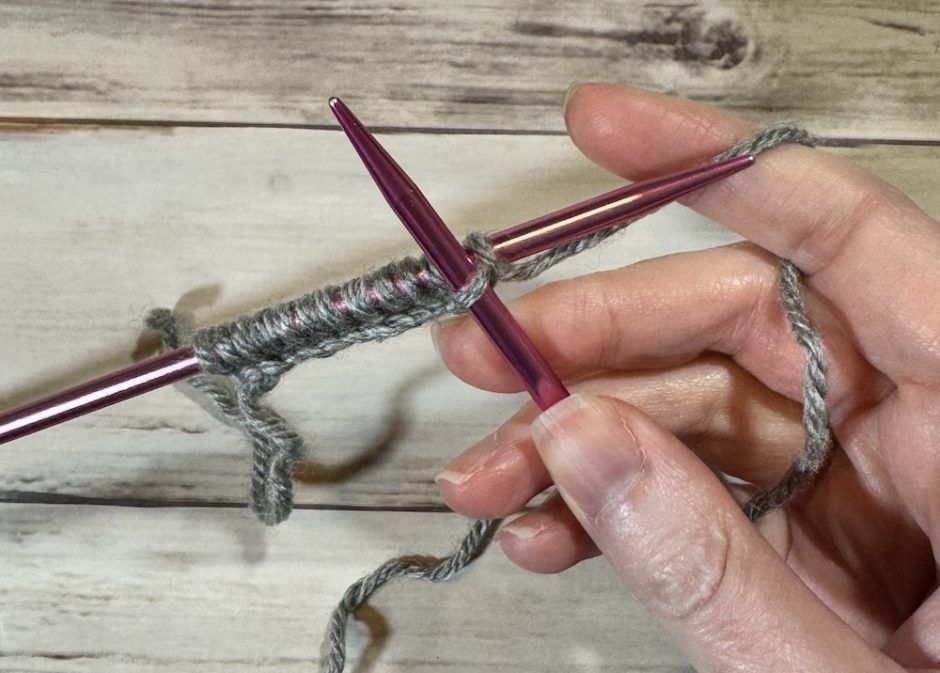
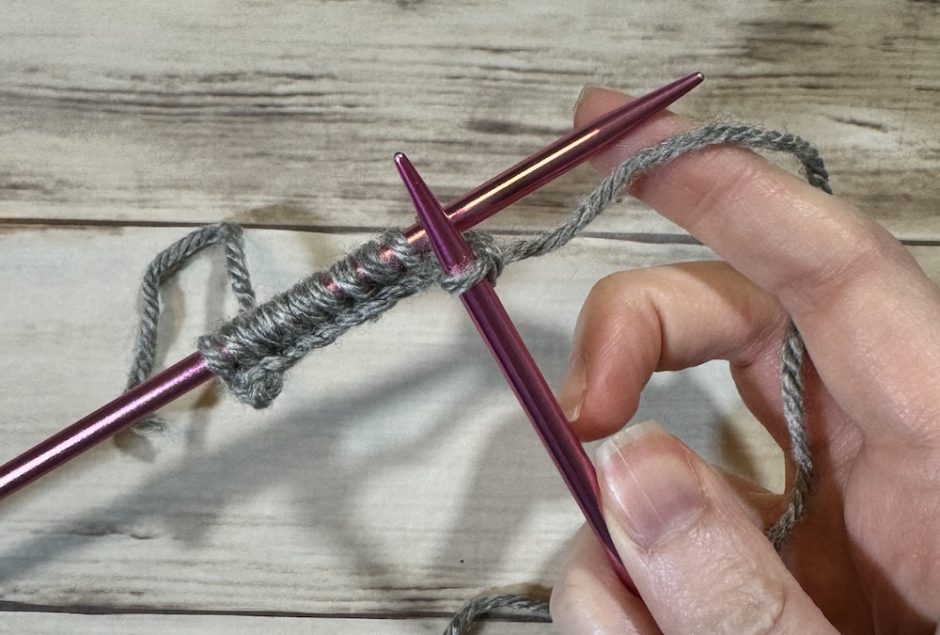
Slide the old stitch off the left-hand needle.

Continue this process across the needle until all stitches have been worked. Now the needle on the right is full of stitches and the needle on the left is empty. To keep working, switch the needle full of stitches back to your left hand and turn the work front to back. Put the empty needle in your right hand and start again.
Common Problems with Making the Knit Stitch
There are a couple of pitfalls when you learn to make the knit stitch that can potentially cause you problems. These are common mistakes that are easy to make as you start a new row of knitting.
If the stitch from the row below is loose, it’s easy to work into that stitch (shown here using the right hand needle as a pointer) instead if the stitch on the needle. If you work here instead, you’ll make an elongated stitch that might look like a hole in your knitting.
Another common problem is pulling the yarn to the back up and over the needle. This pulls the stitch from the row below up, making it look like two stitches. If you knit both of them, you’ll have added a stitch, which will alter your stitch count and keep your project from having straight sides.
Learning how to make the knit stitch takes practice but after a few attempts you should be all set to move beyond a practice swatch into knitting your first projects.
And now that you know how to knit, you can take the next step and learn how to purl! Or if you’re ready to stop for now, you can learn how to bind off knitting.