Affiliate links may be included for your convenience. View our privacy and affiliates policy for details.
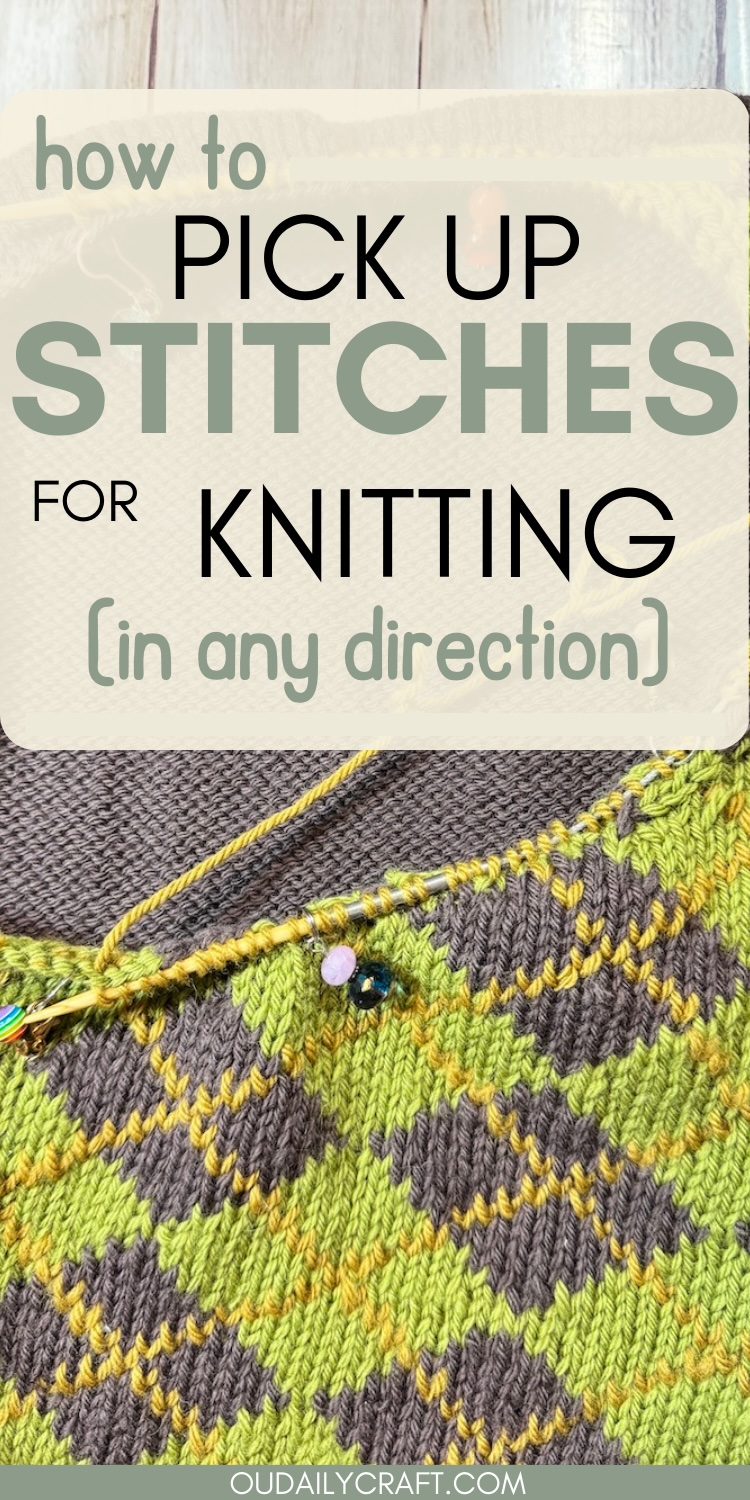
Knowing how to pick up stitches in knitting is an important step in making sure your projects are finished well. Whether you’re picking up stitches along the side of a heel flap to finish a sock or around the neck of a sweater or edge of a shawl to add finishing, this is one place where technique really matters.
Picking Up Stitches vs. Picking Up and Knitting
One thing to get out of the way straightaway is the difference between “pick up stitches” and “pick up and knit.” Most of the time patterns will say to pick up and knit x number of stitches, but sometimes it will just say pick up, and there is a difference.
Here we’re looking at how to pick up and knit stitches because that is the most common way to do it. If your pattern just says to pick up stitches you would just do the picking up part shown below and not the knitting part. The stitches would then be worked as the pattern indicates on the next row or round.
Getting Ready to Pick Up Stitches
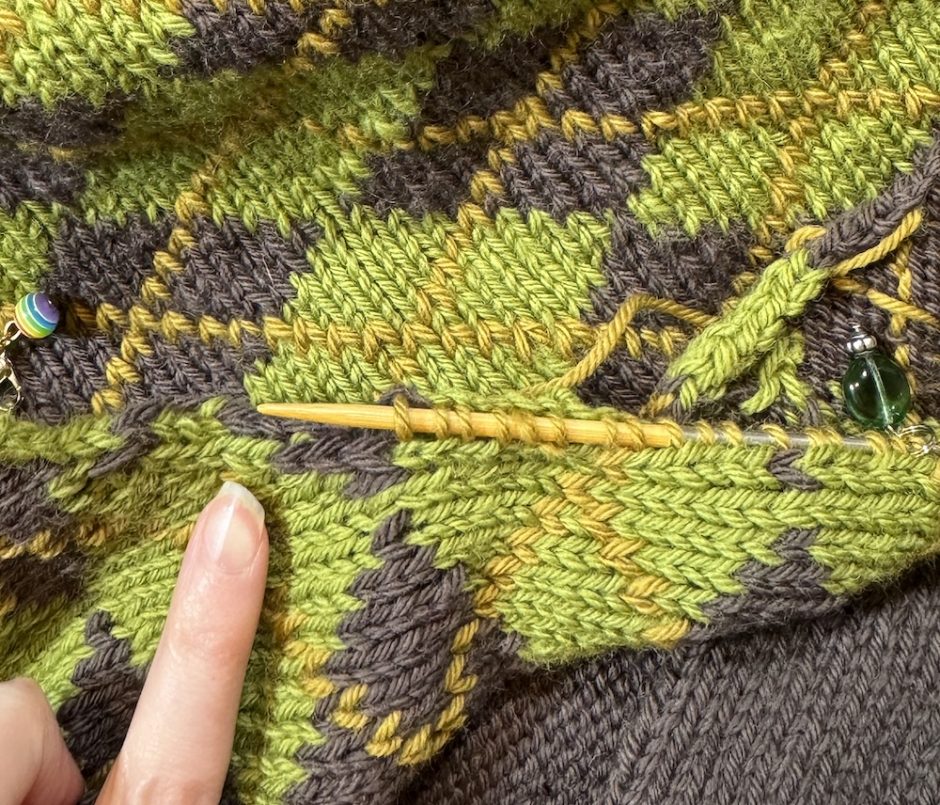
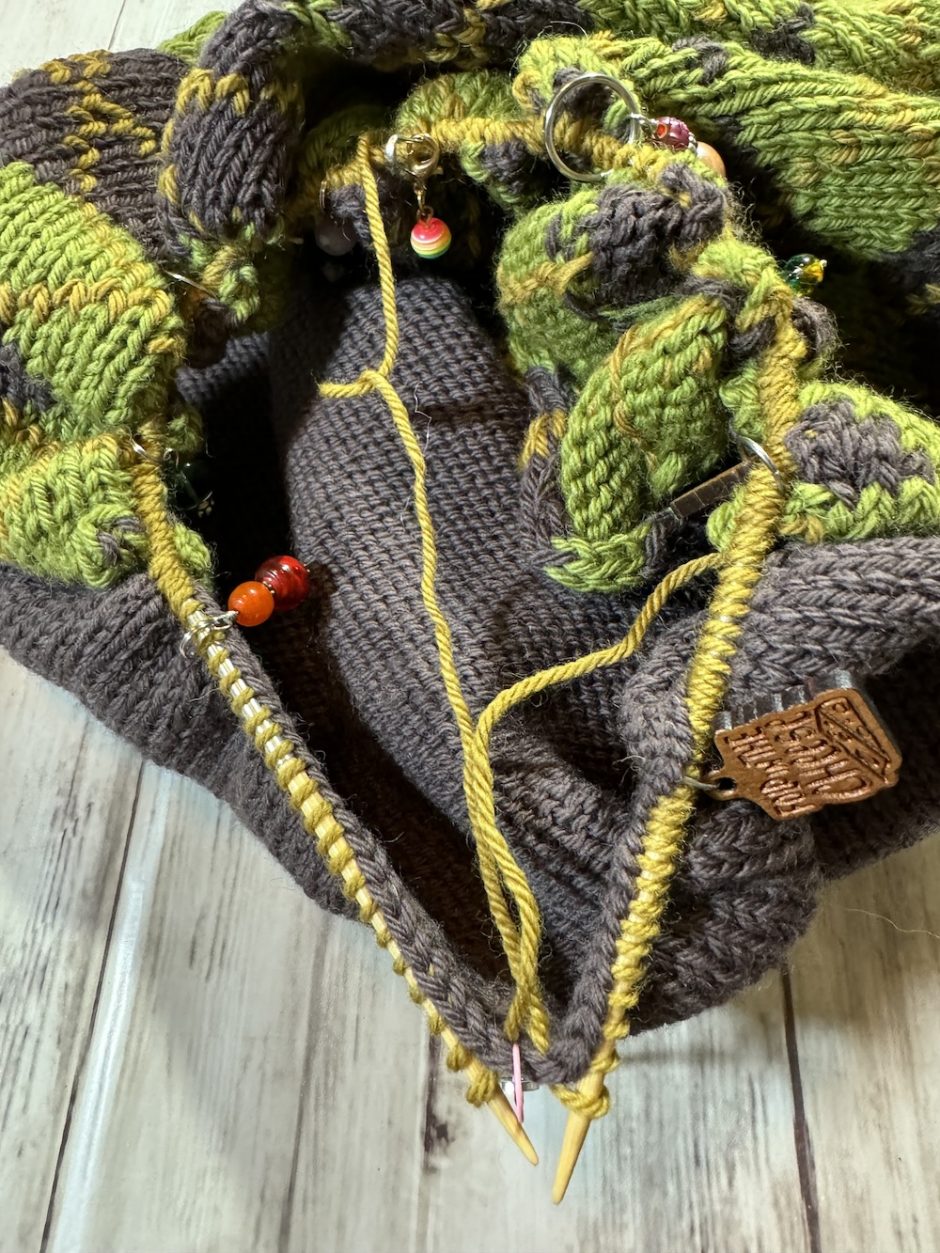
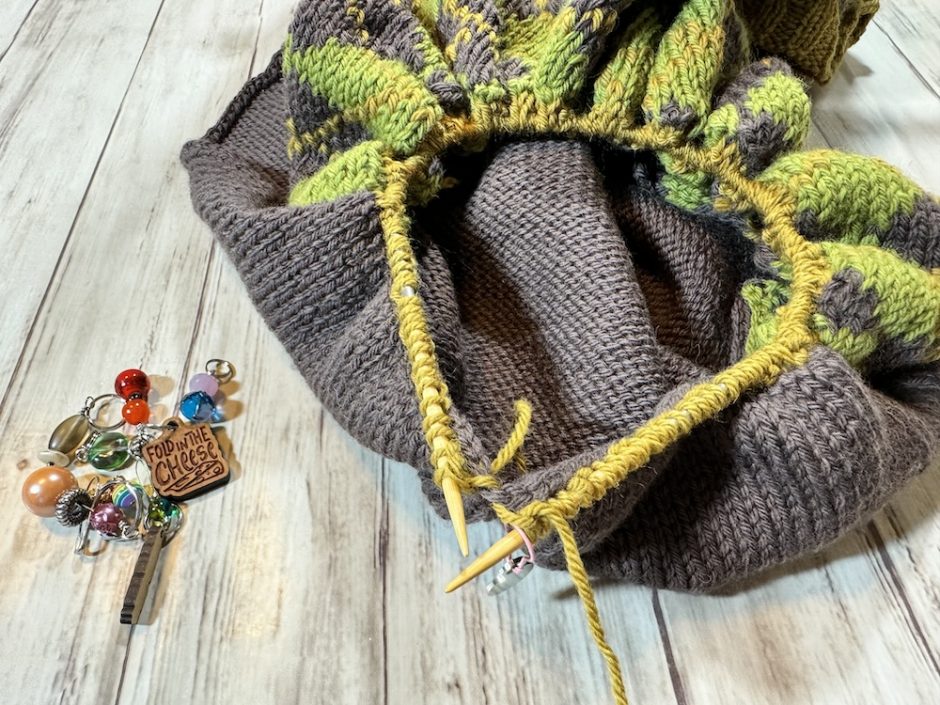
For this demonstration I’m picking up (and knitting) stitches along the neckline of a vest. (You may recognize it from the tutorial on duplicate stitch.) This will show you most of the possibilities for ways in which you might need to pick up stitches: along a straight edge horizontally, along a straight edge vertically and along a curve/diagonal.
One of the main questions people have beyond just how to pick up stitches is how to pick up stitches evenly around for, say, a neckline, where you want there to be the same number of stitches on each side.
A little bit of preparation before you start makes this easier.
You’ll need a couple of locking stitch markers, and a handful of markers you can slide onto your knitting needle as you pick up stitches also makes this easier.
Using a locking stitch marker, mark both the center front and the center back of the garment (or the middle of the long edge of a shawl, etc.).
This way when you’ve picked up stitches half way around the project, you’ll know how many stitches you need to pick up on the other side and can adjust as needed as you go.
How Many Stitches to Pick Up?
Sometimes patterns will tell you exactly how many stitches you should pick up and knit. For instance when picking up stitches on a heel flap, you should pick up a stitch in each slipped stitch on the edge. Or if you’re picking up stitches along the underarm to start a sleeve, the pattern should say how many stitches to add.
Other times the pattern might just say something like “pick up and knit stitches evenly across” or it might suggest a ratio of stitches (such as three stitches for every four rows) or tell you a stitch multiple that is needed for the finishing stitch to work out.
In the case of necklines or other long edges where lots of stitches need to be picked up and knit, I generally consider these stitch counts to be guidelines, and as long as you get pretty close to the suggested stitch count, have a good number for the stitch multiple and, most importantly, like the way the finished edge looks, then you’re doing fine.
How to Pick Up Stitches
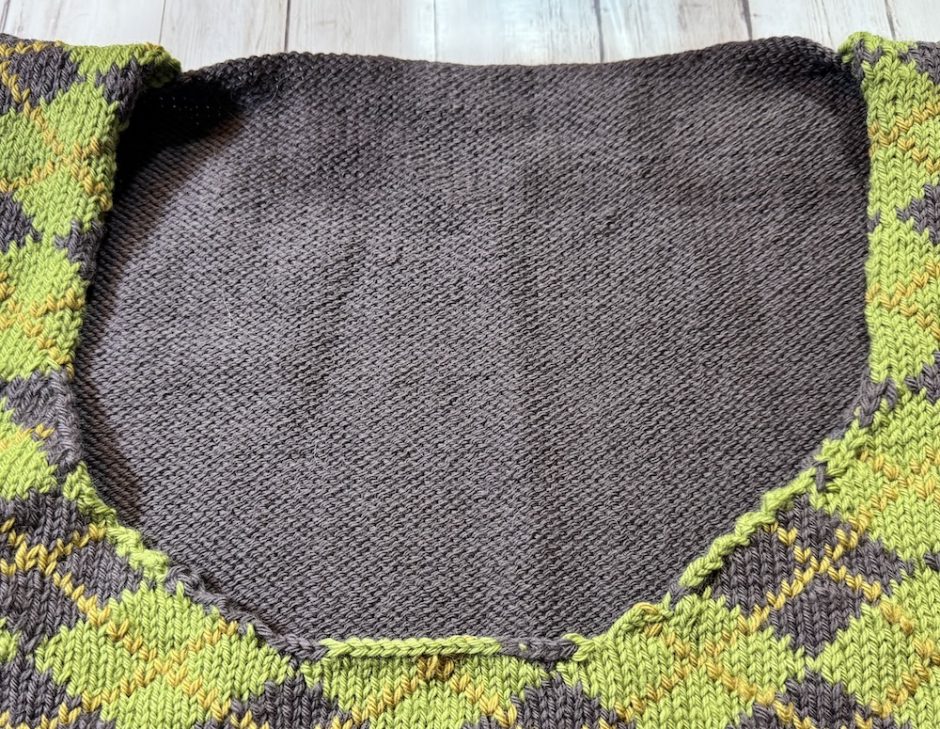
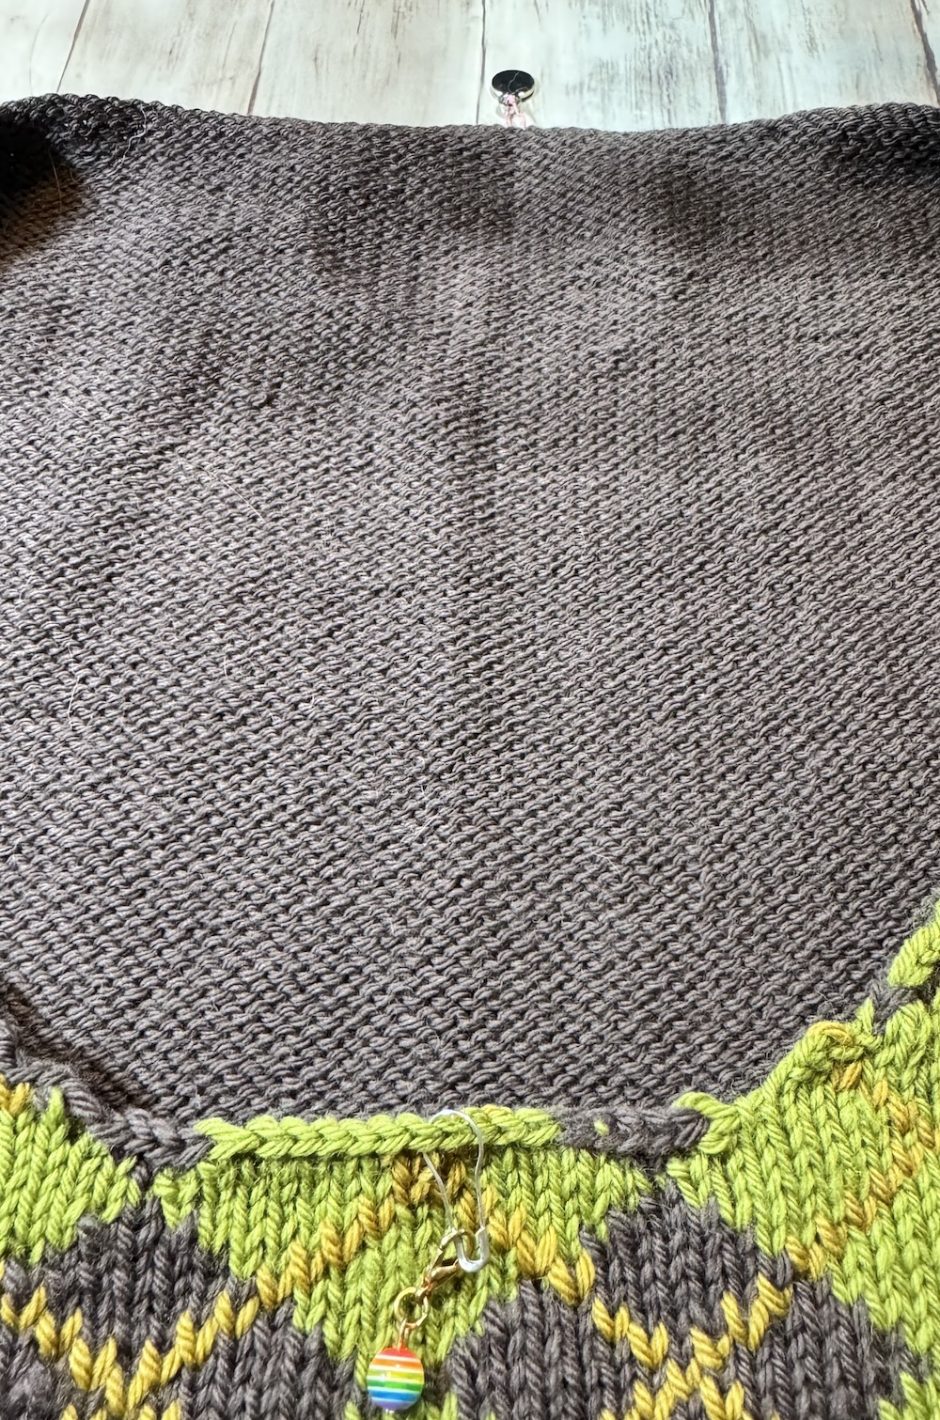
Once you have your centers marked, I like to start at the center back for a neckline (or anywhere unobtrusive) and work clockwise around the project.
Picking Up Stitches on a Cast on/Bind Off Edge
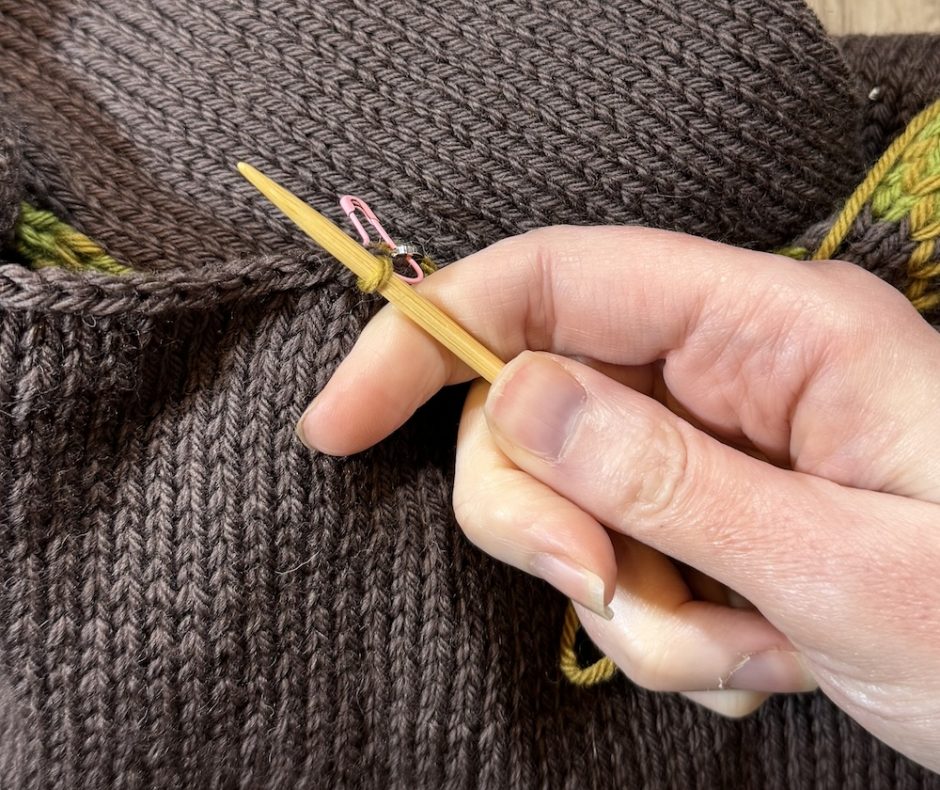
Since this is the back of the vest, it’s a bound off edge, and it happens to be straight all the way across the back, which makes it easy. If you were picking up stitches along as cast on edge it would look the same.
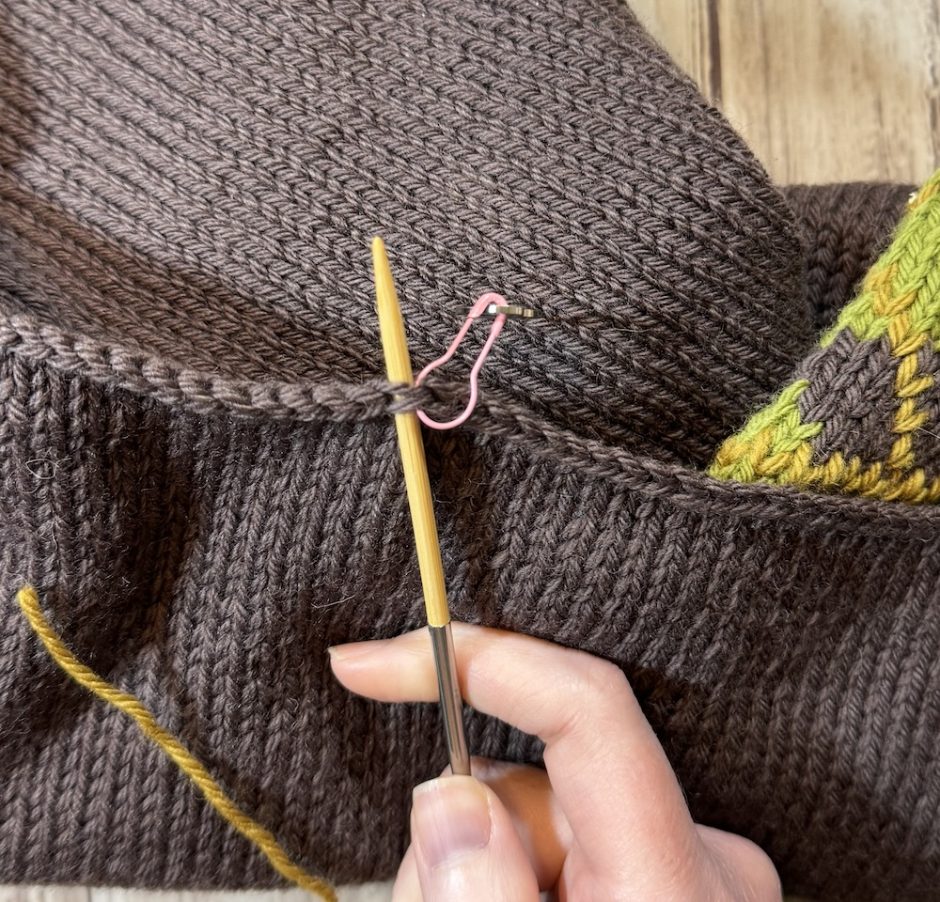
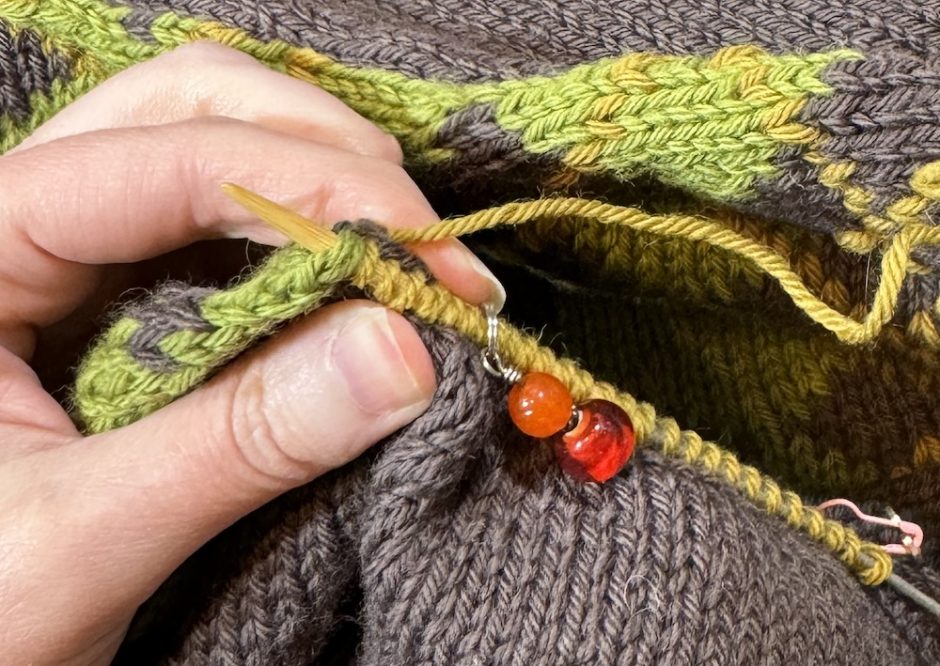
Slide your needle under both “legs” of the bound off stitch, from front to back, as if it were a stitch and you were knitting it.
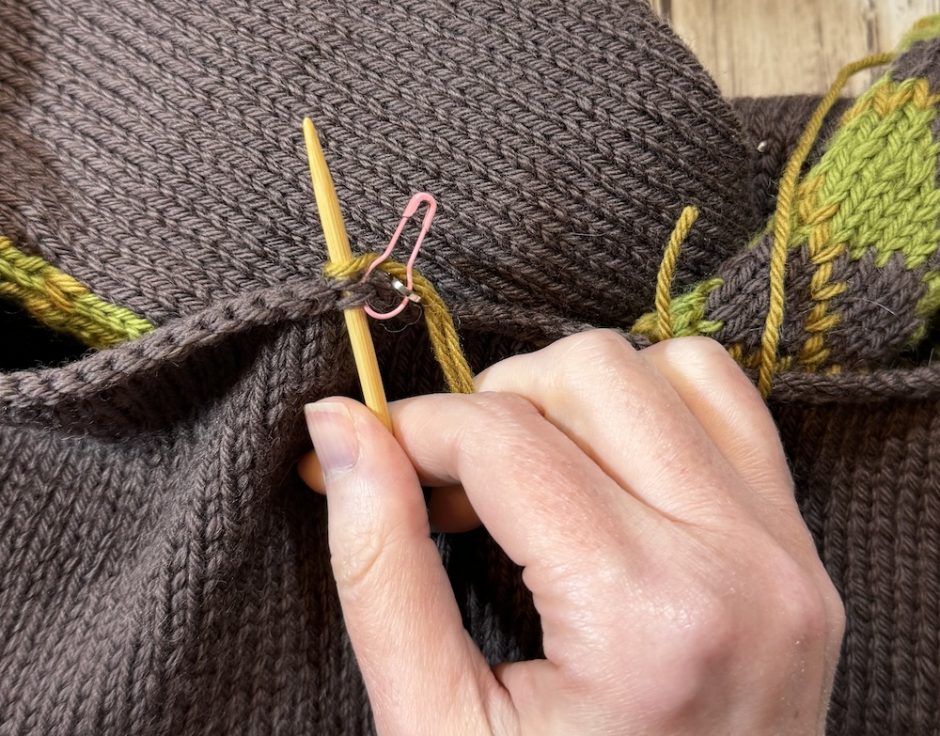
Leaving a bit of a tail for weaving in later, drape the working yarn over the needle.
Pull the yarn through the stitch as you would if you were knitting, and leave it on the needle.
The stitch is now picked up and knit.
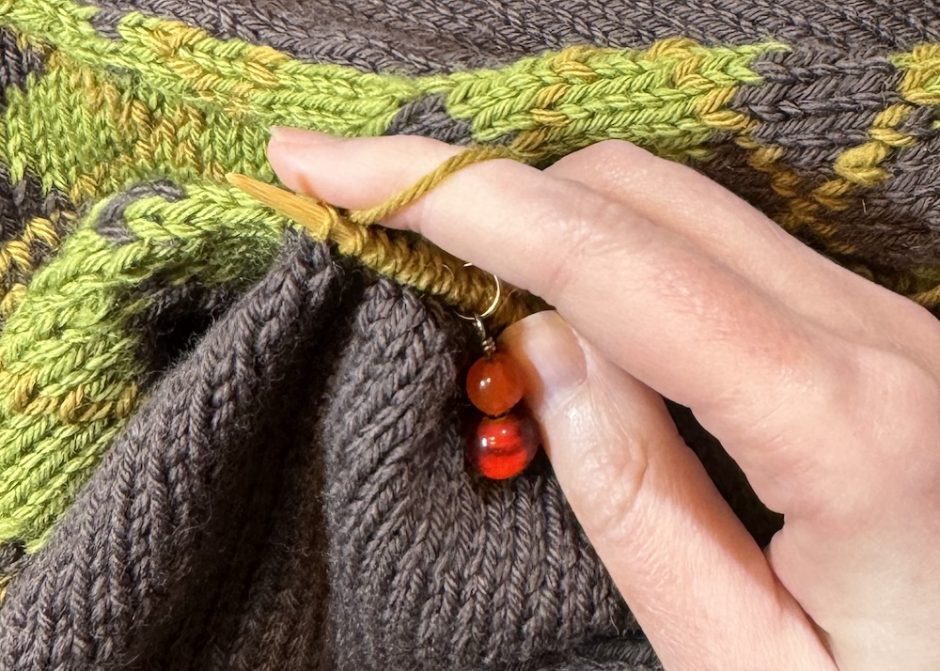
Continue in this manner, picking up one stitch for each stitch bound off (or cast on as the case may be) across.
Pro tip: make it easier to count how many stitches you’ve picked up by placing a stitch marker every 20 stitches.
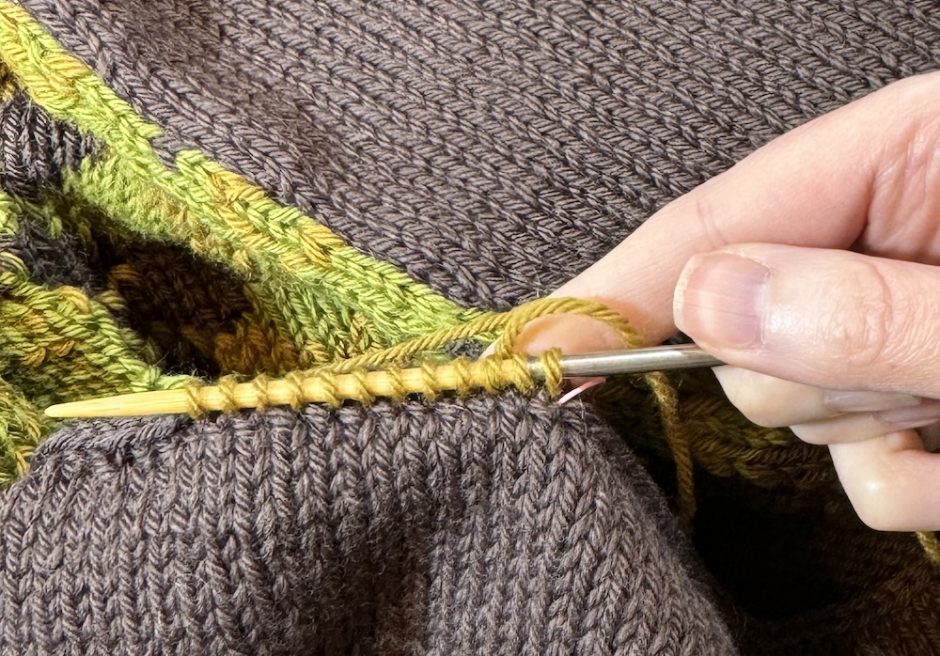
Picking Up Stitches on a Vertical Edge
If your project has a straight vertical edge, like my vest does at the top after the neckline shaping, how to pick up stitches is almost the same as picking up a horizontal edge.
Here you want to pick up the full stitch on the edge of the project and knit it as above.
The only difference is frequency: instead of picking up a stitch for every row, pick up and knit 3 stitches for every 4 rows if your project is stockinette stitch or a similar stitch pattern. (If your pattern is denser, like garter stitch, pick up a stitch in every other row.)
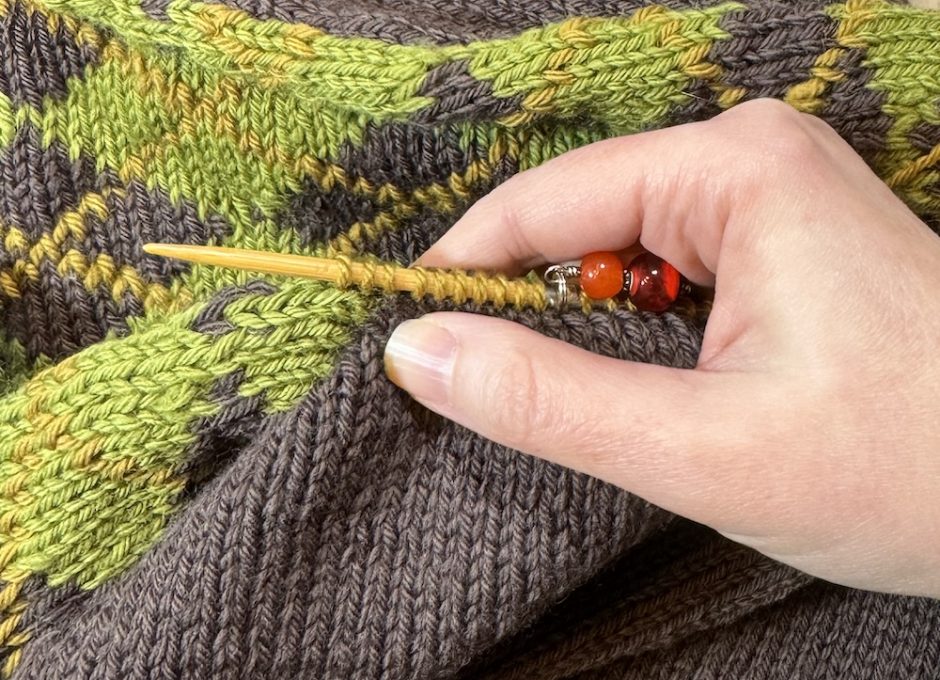
The reason for this is that knit stitches aren’t square; if you pick up a stitch in every row your edge won’t lie flat.
How to Pick Up Stitches on a Curve
So far so good, right? What about when you need to pick up and knit stitches along a curve or diagonal line? This happens in the curved part of the neckline on my vest.
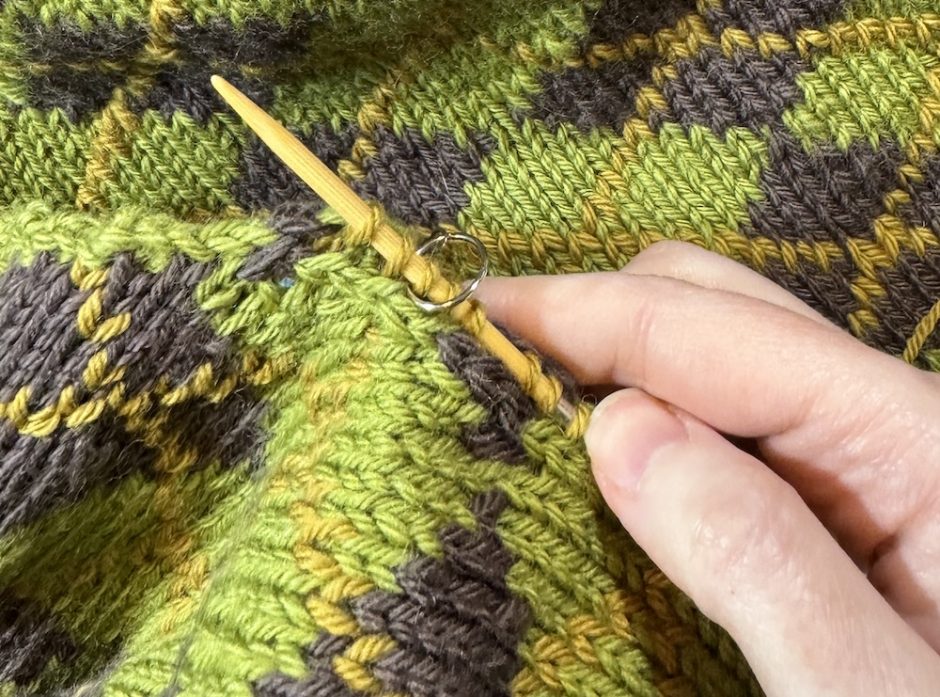
Much like the vertical edge above, for a curve you need to change your pick up a bit. The general rule for picking up stitches along a curve is to pick up and knit 4 stitches for every 5 rows.
Sometimes picking up stitches on a curve can be trickier because of the staggered nature of the edge, but if you can get close to that 4 for 5 ratio you should be in good shape.
Again, try to make sure you have the same number of stitches on each side and you should be fine.

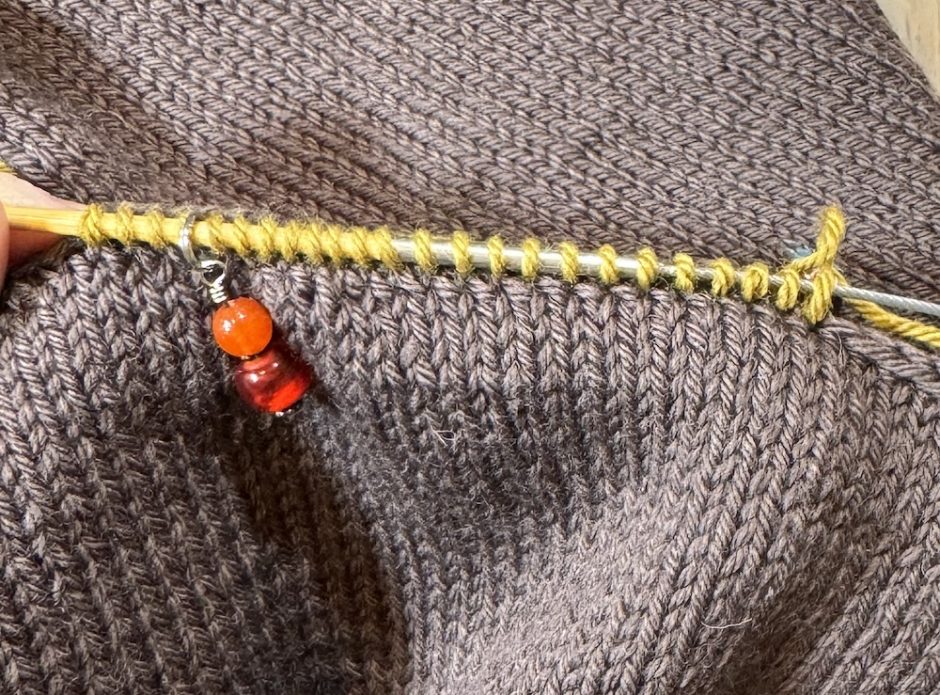
Using stitch markers to help you count your picked up stitches as you go helps when you get to the second side, because not only can you count the total number of stitches you’ve picked up easily, you know how many stitches are in each section so you can try to match them up.
Working on From Picked Up Stitches
Once you’ve worked your way back around the project, the marker that’s marking the center back can become your end of round marker.
Yes there are a lot of stitches on this needle. It’s literally the only circular in this size that I own. I only have to make it work for an inch.
Work the first round in your desired pattern for your edging, removing the stitch markers as you go.
Now that you know how to pick up stitches cleanly and evenly, you never have to be intimidated by that knitting instruction again. And it is so satisfying to take the time to do it right, I know you’ll be glad you did!


4 Comments
great resource and instructions, thank you. Can you tell me how to pick up stitches on a curve at the bottom of a hem going up the front edge? My instructions say pick up 18 stitches but I only have 12 rows going up the edge. Help!!! Its the oppisite curve to a neckline.
Thanks
I would use the same ratio of four stitches to five rows on the curve and then if it gets straight at any point the 3 for every 4 rows used on a vertical edge. Not sure why it would be asking for more stitches than you have rows; are there multiple sizes but it only gives one number? As long as it looks good to you and works with the stitch multiple you need (for ribbing for example) it doesn’t really matter if you’re not hitting the same number the pattern suggests.
Hi I found your site but accident and found it quiet usefully BUT I would like to know how many stitches to pick up for a V neck sweater for a 2 to 3 year old. Does it work the same for any size weater
Thank you
Liana Olivier
The ratio is the same but the actual number would vary depending on how many rows are in the neckline. But somewhere close to four stitches every five rows should work. Make sure you pick up a stitch right at the center of the v and follow the pattern instructions (if you’re using a pattern) for shaping. Usually it will call for a centered double decrease with the center of the v as the center stitch in the decrease.