Affiliate links may be included for your convenience. View our privacy and affiliates policy for details.
This week’s Iron Craft challenge was to make something crafty for the kitchen. Since I already did my upcycled napkin rags (which are my new favorite kitchen cleaning tool, by the way) I decided I would try making something else cuter by putting a crochet edge on a tea towel.
You might remember my last attempt to craft with a tea towel did not go so well, but I’m happy to report this went a lot better and now I want to add a crocheted edge to everything. This particular edging would be adorable on a skirt for the girl, for instance.
How to Make a Crochet Edge on a Tea Towel
I used three colors of Lion Brand Bonbons for this project, though you could do it all in one color (I think you’d run out of yarn if you did) or as many as five if you wanted to go crazy.
To start, you have to have something to work your crochet stitches into. I did a simple blanket stitch on the top and bottom edge using a somewhat sharp needle.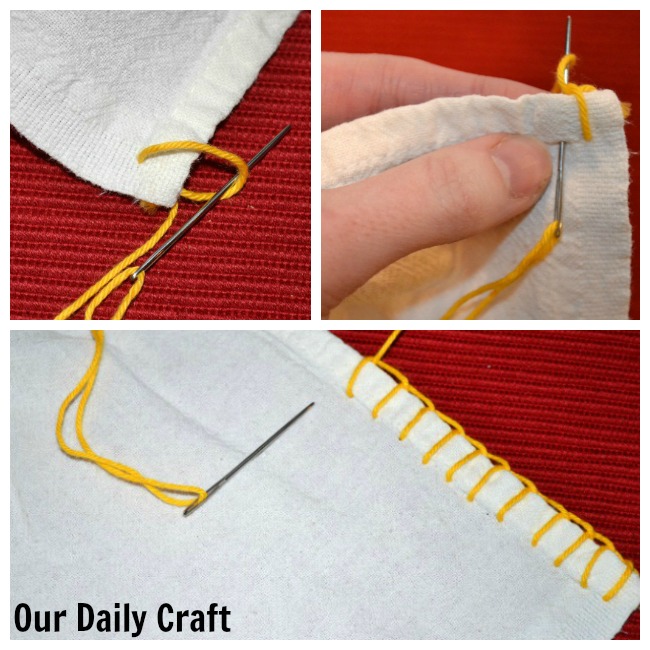
The way you form blanket stitch is by going around the edge, but making sure you thread the yarn back through the loop of the stitch before you tighten it up. That makes the little line on top that the crochet will anchor into.
I didn’t worry too much about making my stitches even, but closer together is better than farther apart. Think about the size of the crochet stitches you’re going to put on top and try to make it so one stitch would fit on top of each stitch if you can.
The edging I chose is from Crocheting on the Edge by Nicky Epstein, and it’s called the two-color loop in that book.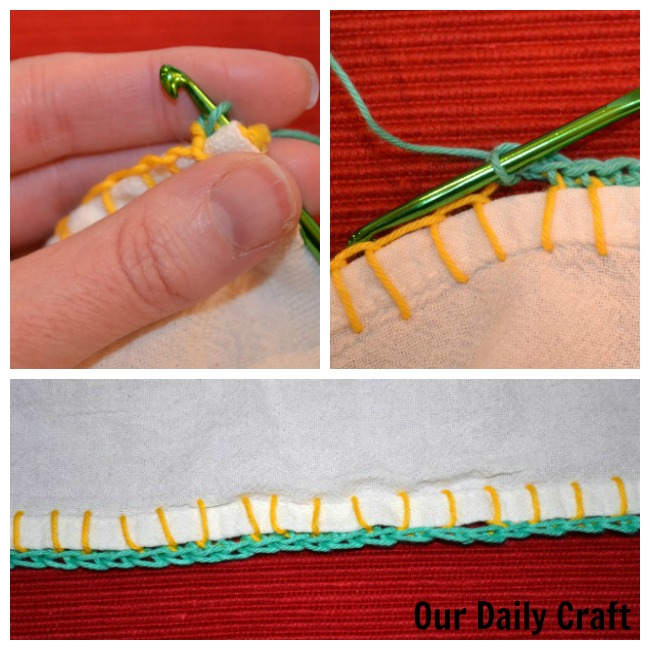
I did a row of single crochet (chain 1 at the beginning of the row to attach the new color). If you have big stitches you can work two single crochets in some of the stitches.
The ideal number of stitches for the loop pattern is a multiple of 4 plus 1, but you can cheat a little; I did.
Then I worked another row of single crochet, this time in red.
To make the loops, starting with blue or whatever color you choose, chain 1 to attach, work a single crochet in the same stitch, *chain 6, skip the next 3 stitches, work 1 single crochet in the next stitch. Repeat from * across.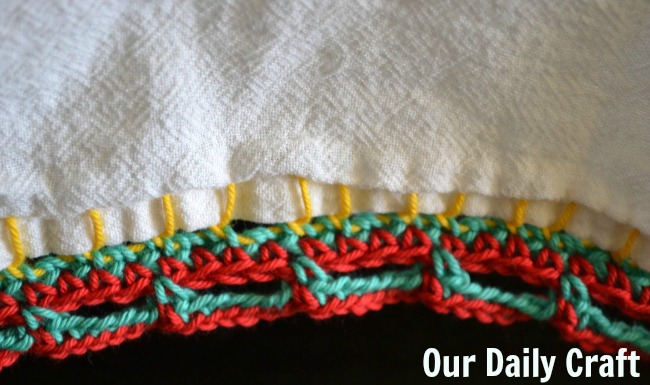
With your other color, chain 1 and single crochet in the first stitch, then *work a slip stitch in the back loop only of the 6 chain stitches, single crochet in the single crochet stitch. Repeat from * across.
It’s a lot of steps but it’s so cute I think it’s worth it. Wouldn’t it make you smile every time you used this towel?
Check out more great crafty ideas and join in the Iron Craft challenge at Just Crafty Enough.
4 Comments
Really clever idea to join a blanket stitch with crochet. Thanks for sharing with the Creatively Crafty Link Party by #CCBG
I just bought some new tea towels and this would be perfect to add a little color to them. Thanks for the great tutorial!
Duh! Use a blanket stitch for attaching the crochet stitches! I feel like I should have known that, but I’m glad you’ve demonstrated the technique. 🙂 Thanks for linking up to Creatively Crafty!
I did a variation of this when I was young (my Grandmother taught me). The first row was single crochets worked around the hem of the towel, the same distance as the blanket stitches are. Blanket stitches might be a bit easier