Affiliate links may be included for your convenience. View our privacy and affiliates policy for details.
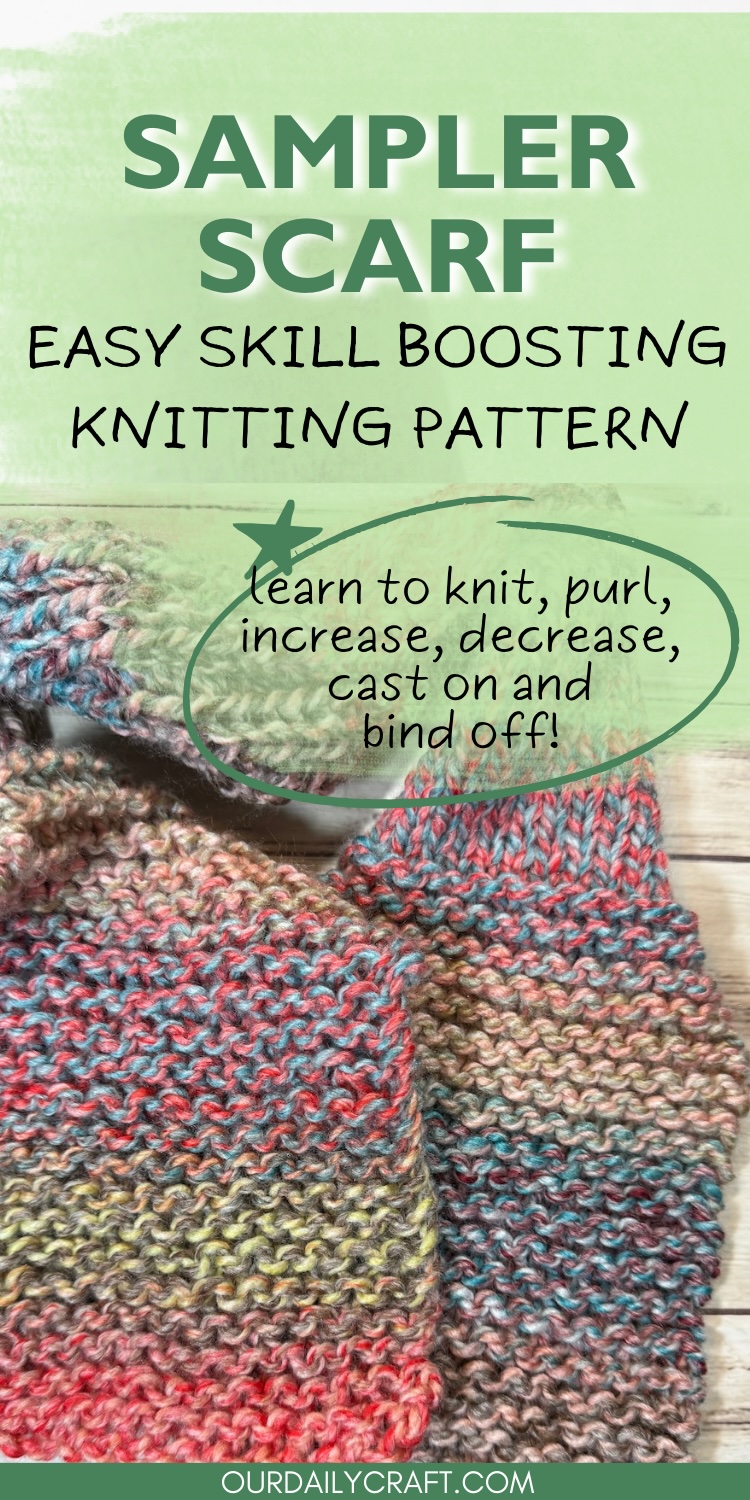
If you’re learning to knit or wanting to explore basic stitch patterns, this sampler scarf knitting pattern is for you.
I’ve long advocated for knitting a scarf as your first knitting project (specifically a bulky yarn garter stitch scarf) because it gives you a lot of time to get comfortable with making knit stitches. Also a scarf is still wearable even if the edges are a little weird or you pick up or lose stitches along the way.
But the trouble with even a bulky scarf is that you might get bored before you get done. So let’s change it up with a sampler scarf project.
Sampler Scarf Overview
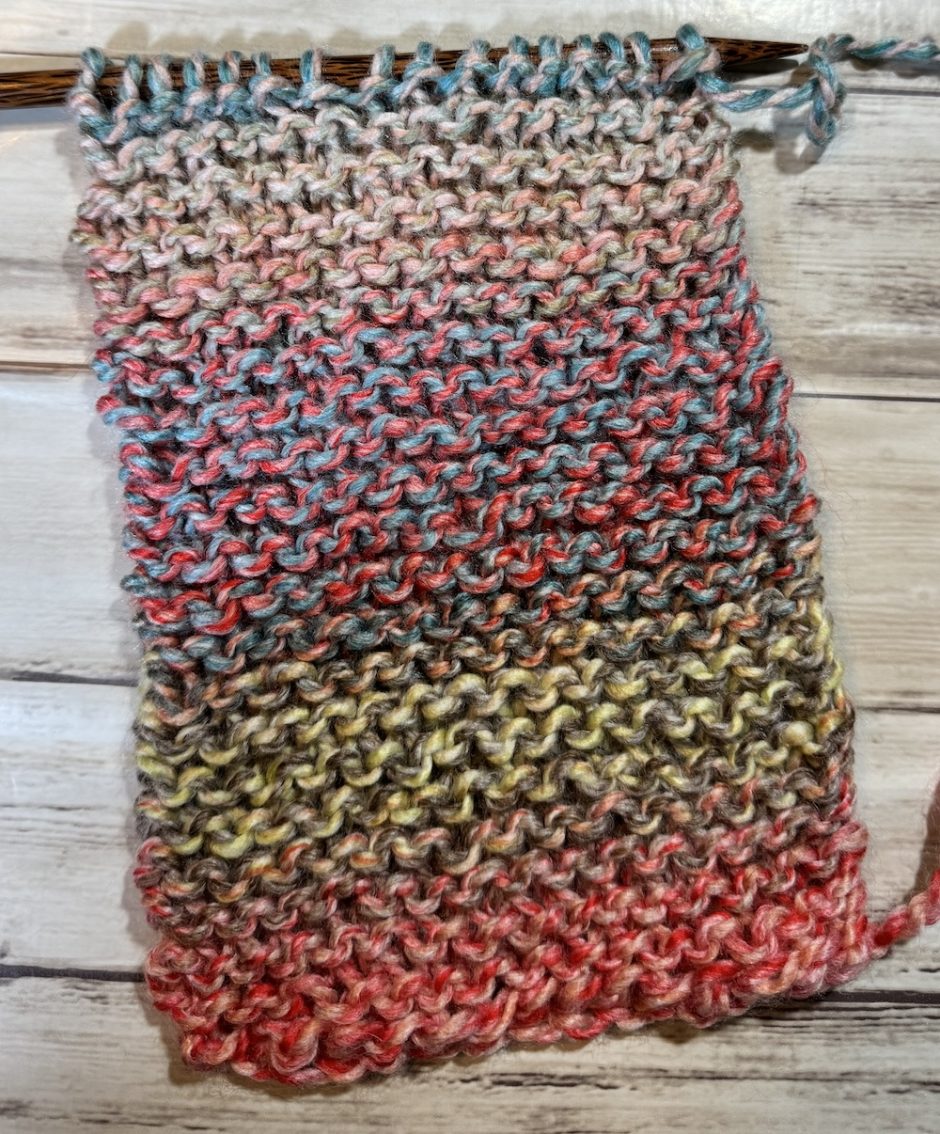
This sampler scarf knitting pattern still uses bulky yarn and big needles for quick knitting.
But instead of just being garter stitch (or knitting every stitch of every row), there are also sections of stockinette (knit a row, purl a row) and ribbing (in this case, knit 2 stitches, purl 2 stitches).
With this little scarf, then, you can learn all of the following skills:
- Casting on
- Knit stitch
- Purl stitch
- Increasing stitches
- Knitting and purling in the same row
- Decreasing stitches
- Binding off
The increases and decreases are optional but help compensate for the difference in gauge between stockinette and ribbing. (If you have no idea what that means, we’ll talk about that, too.)
We’ll also look at how to read your knitting, count rows and stitches and consider the stockinette stitch curl. When you’re done you’ll have a kid-sized scarf (or bigger!) and a lot of knitting knowledge.

Supplies
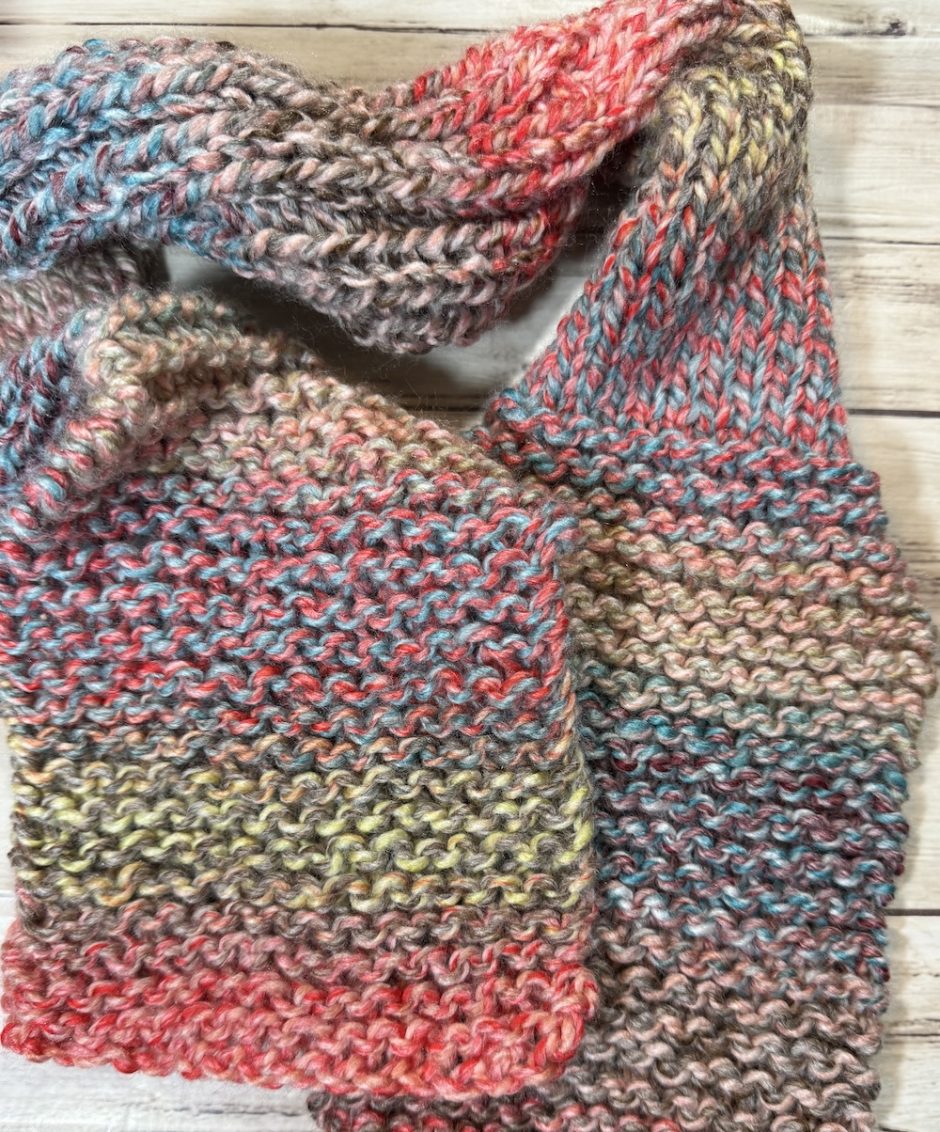
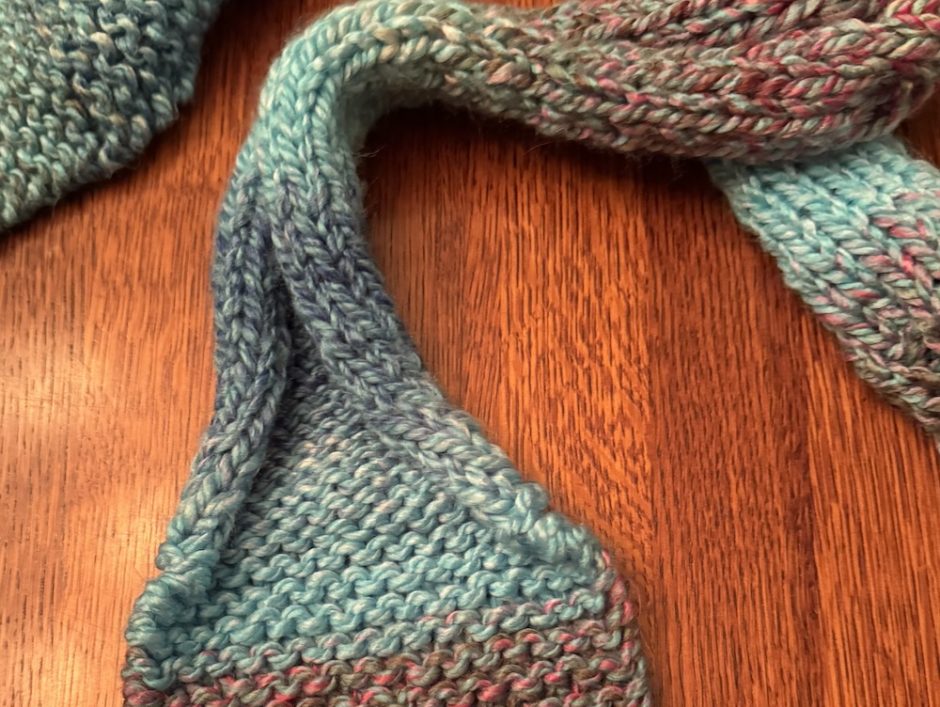
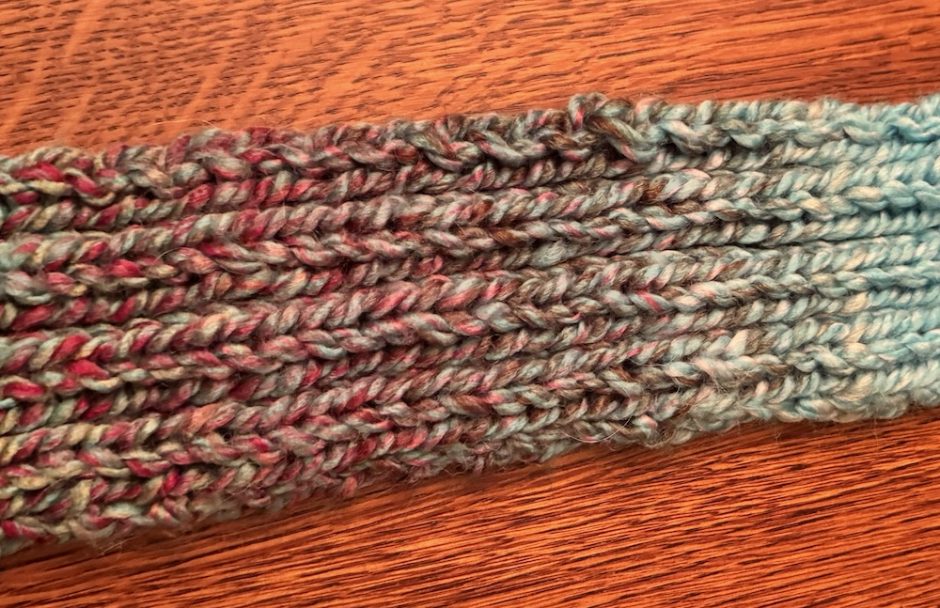
- 118 yards or more of bulky weight yarn; I used Mary Maxim Marvelous Chunky. The blue scarf shown in some of the pictures is colorway Berry Blast; I used most of a skein of yarn for that one, which is more adult sized. The smaller scarf is in the Sweet Stuff colorway and was left over from another project, which is why I had less and made a smaller scarf. You can use any bulky/weight 5 yarn you have on hand.
- one pair size 11 US/8 mm knitting needles. Mine are from Laurel Hill, which are similar to Knitter’s Pride, but Clover needles or whatever you can find locally are also great.
- pair of scissors and yarn needle for finishing your project
Size
The blue scarf is six feet/1.8 meters long and the peach scarf is 40 inches/3.3 feet/just over a meter long. Both scarves are 6 inches/15 cm wide. The larger scarf is perfect for an adult who likes to wrap their scarf around their neck. The shorter one is fine for kids or adults who just want a scarf to tuck into their coat.
If you want to alter the length, make sure you divide the desired length by 5 or 6 so you know how long to knit each section (if you divide by 6 then make the ribbing section in the middle the length of two sections).
Sampler Scarf Knitting Pattern
I want to give you the full rundown of the sampler scarf knitting pattern first, but there’s a full step by step tutorial below if there’s anything here you don’t know how to do or want to delve into deeper.
Cast on 16 stitches.
Knit every stitch of every row for 8 inches/20 cm for the small scarf or 12 inches/30.5 cm for the large scarf.
Work in stockinette stitch (knit one row, purl one row) for 8 inches/20 cm for the small scarf or 12 inches/30.5 cm for the large scarf. If desired, increase 4 stitches across on the last knit row (20 stitches total).
Work in 2×2 ribbing (knit 2, purl 2 across) for 8 inches/20 cm for the small scarf or 24 inches/61 cm for the large scarf.
Return to stockinette stitch for 8 inches/20 cm for the small scarf or 12 inches/30.5 cm for the large scarf. If you increased before the ribbing section, decrease 4 stitches on the last knit row (16 stitches total).
Knit every stitch for 8 inches for the small scarf or 12 inches for the large scarf.
Bind off. Cut any extra yarn, leaving a tail for weaving in and weave in ends.
That’s the overview but let’s dig into each piece for those who are just learning how to knit.
Casting On and Garter Stitch Section
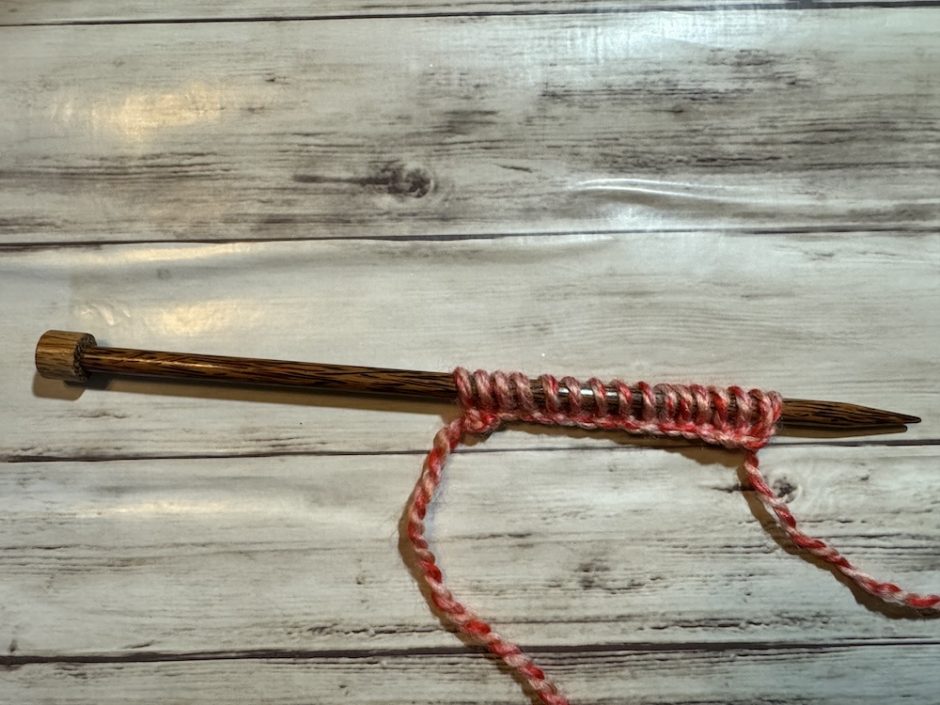
To begin you will cast on 16 stitches. Start with a slip knot, leaving a 6 inch tail to weave in later (this helps keep your scarf from unraveling).
I like to have new knitters use the knit cast on, but you can use whatever cast on method you like.
Knit every stitch of every row to make what’s known as garter stitch.

Keep knitting until your piece measures 8 inches/20 cm if you’re making a short scarf, or 12 inches/30.5 cm if you’re making a longer scarf.
Focus on Garter Stitch
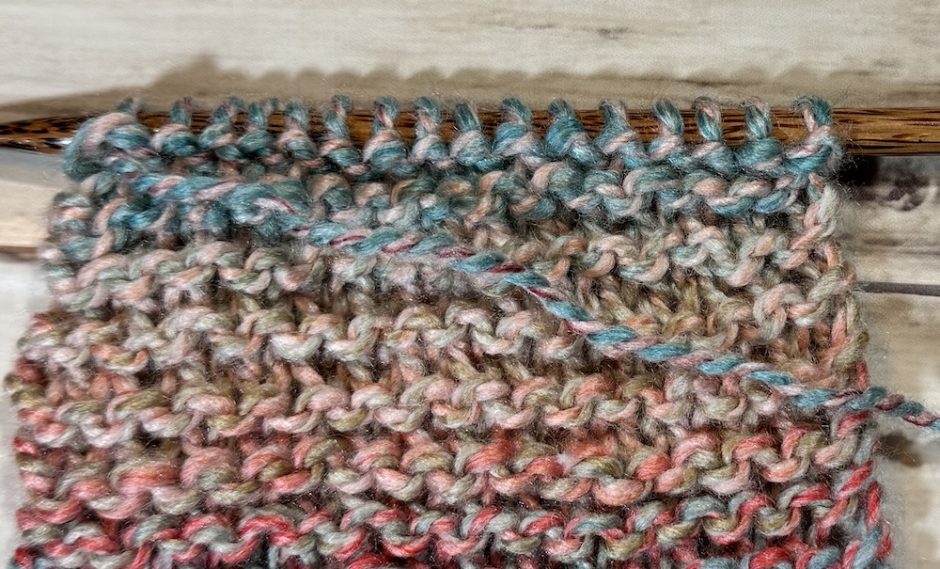
Before we move onto the next section, let’s look at what we’ve done so far. Garter stitch is bumpy and looks like waves on the surface of the knit fabric.
Each one of those waves is actually made up of two rows of knitting, so if you want to count your rows (which you do so the other end of the scarf can be knit to the same length) each ridge counts as two rows. Mine has 42 rows, or 21 ridges, on the short version.
While we’re here you can also contemplate how to count stitches in garter stitch. You know you should have 16, and each loop on the needle is a stitch, but within the fabric itself, count either the loops along the top or the bottom of a ridge, not both. See if you still have 16.
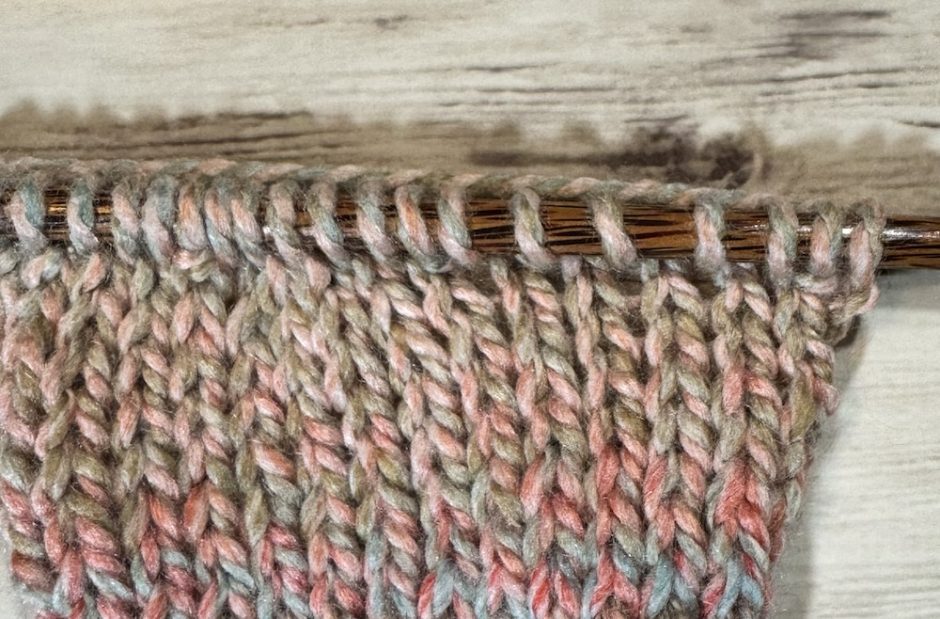
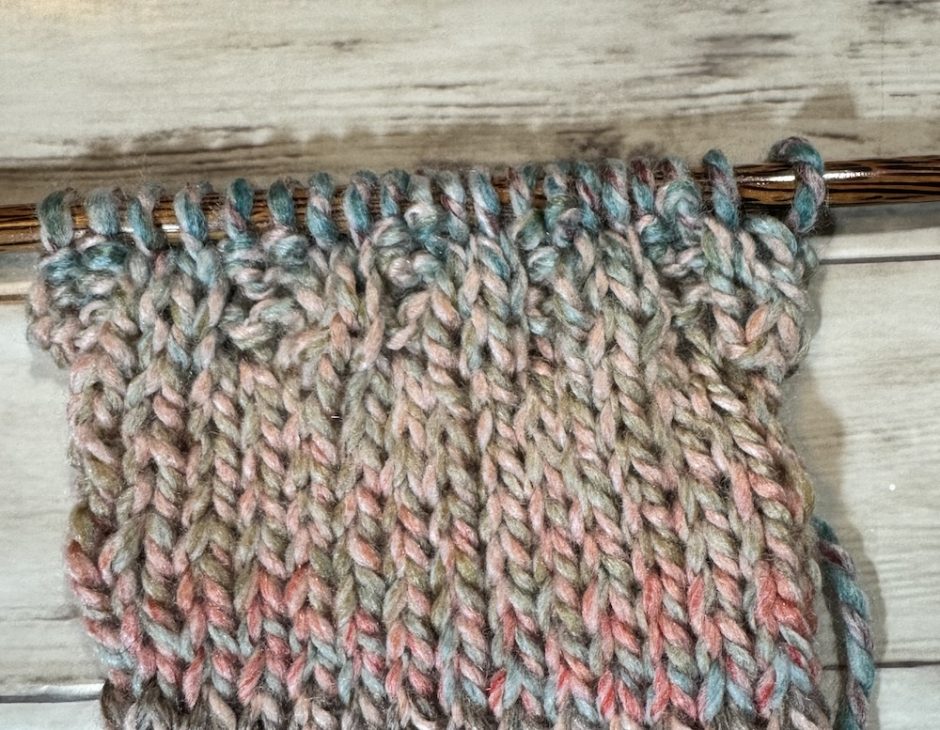
Stockinette Stitch Section
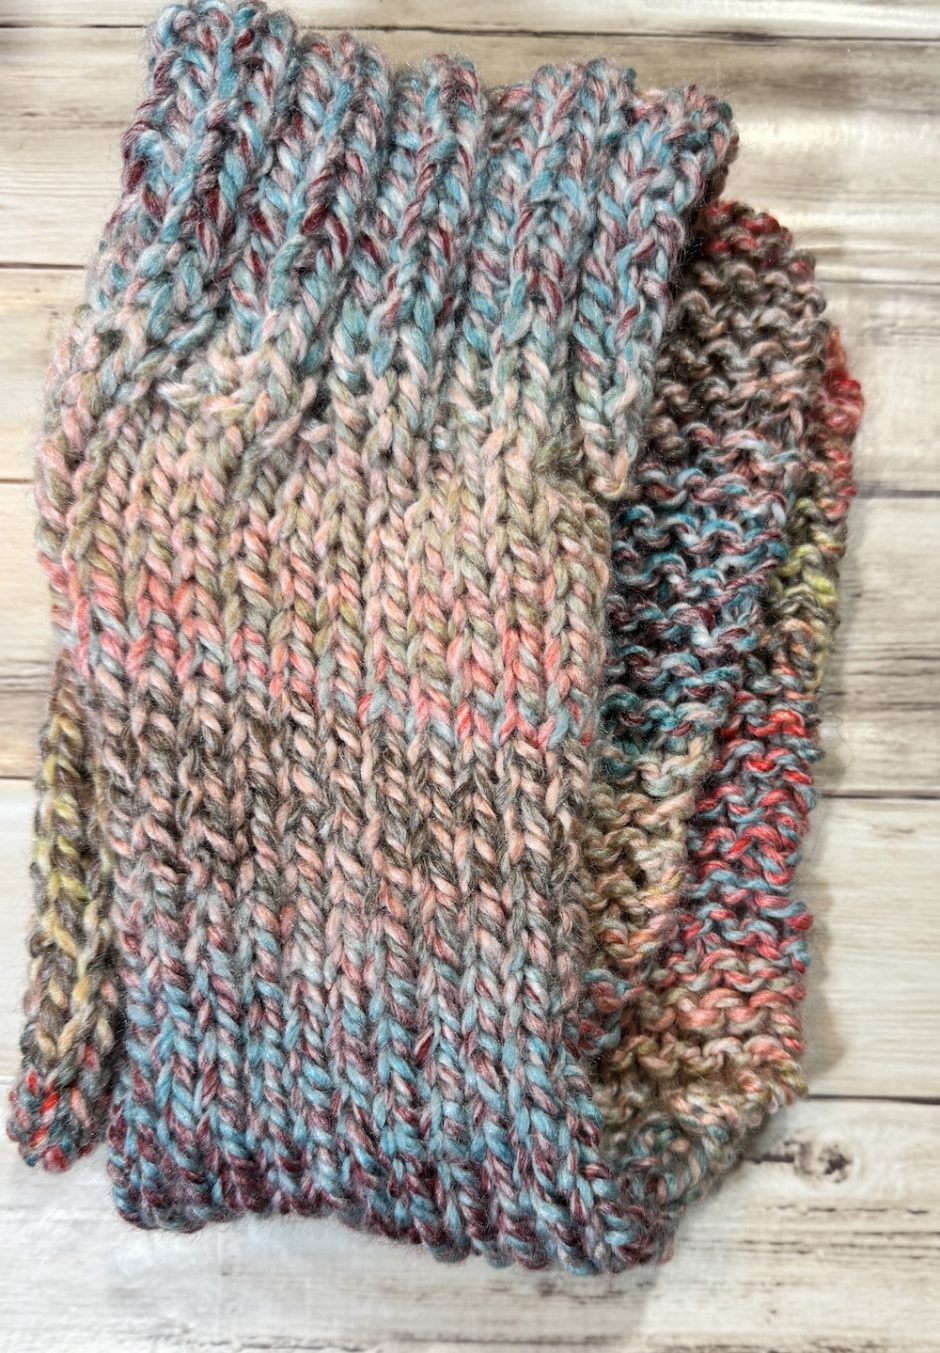
The next part of the scarf is what’s known as stockinette stitch, where you knit one row and then purl the next.
Since we’ve been knitting, once you have the correct length for your garter stitch section, purl the next row.
Knit the next row, purl the row after that and repeat. Keep working until you are just shy of 8 inches/20 cm on the short scarf or 12 inches/30.5 cm on the long scarf before you need to make a decision. You’ll want to end with a purl row.
Focus on Stockinette Stitch
You may be wondering if you’re doing something wrong because this section of the scarf is curling at the sides. Don’t worry; stockinette stitch naturally does that. I know this drives some people crazy but I don’t mind it in a scarf since it wouldn’t be sitting perfectly flat on your body anyway.
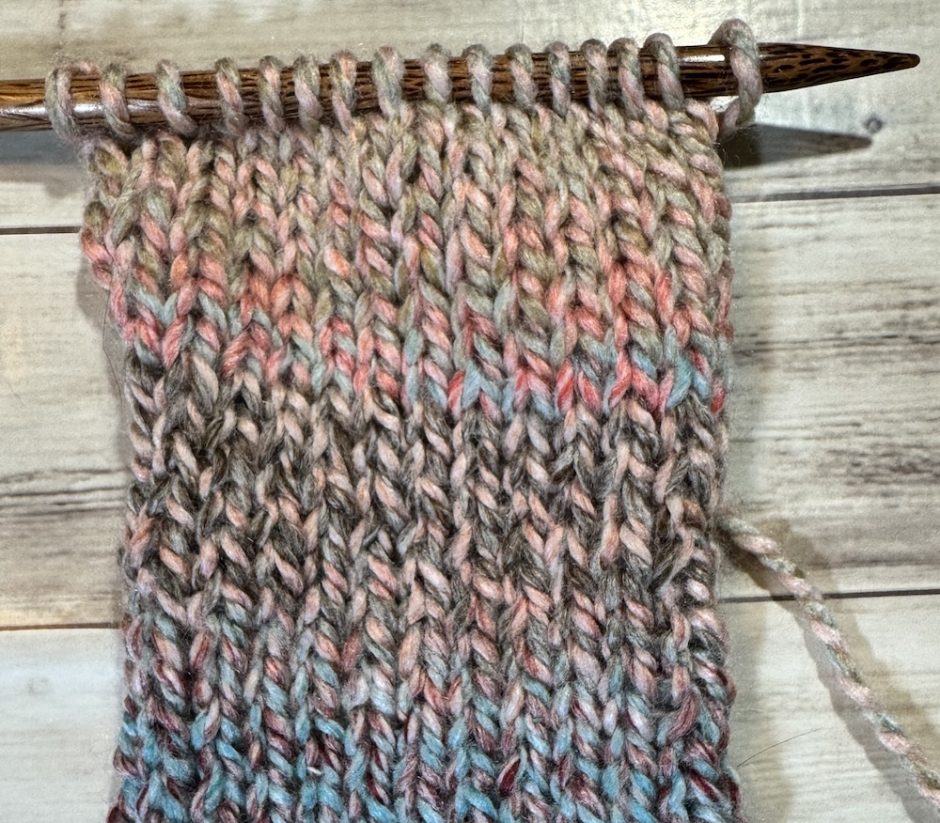
You’ve probably noticed this stitch looks a lot different from the garter stitch section, with vs on one side and bumps on the other. But if you look closely at garter stitch and stockinette stitch, you’ll see how they are related. The bumps on the purl side of stockinette are the same as the bumps on garter stitch, because the back side of a knit stitch looks like the front side of a purl stitch.
Likewise if you look between the ridges on your garter stitch section, you’ll see the little vs of your knit rows.
If you want to count rows on stockinette stitch, pick a v and count up row by row. Each v counts as a stitch, so you can count your vs horizontally to know how many stitches you have. (Again, should still be 16). Mine has 28 rows for the short version.
You’ll notice it took a lot more rows to make the same amount of knitting in garter stitch.
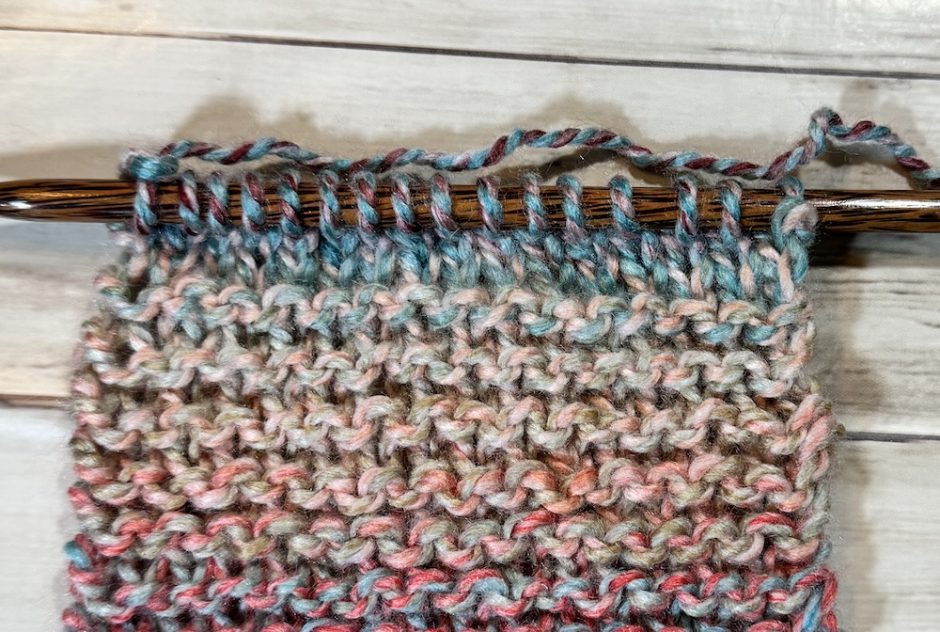
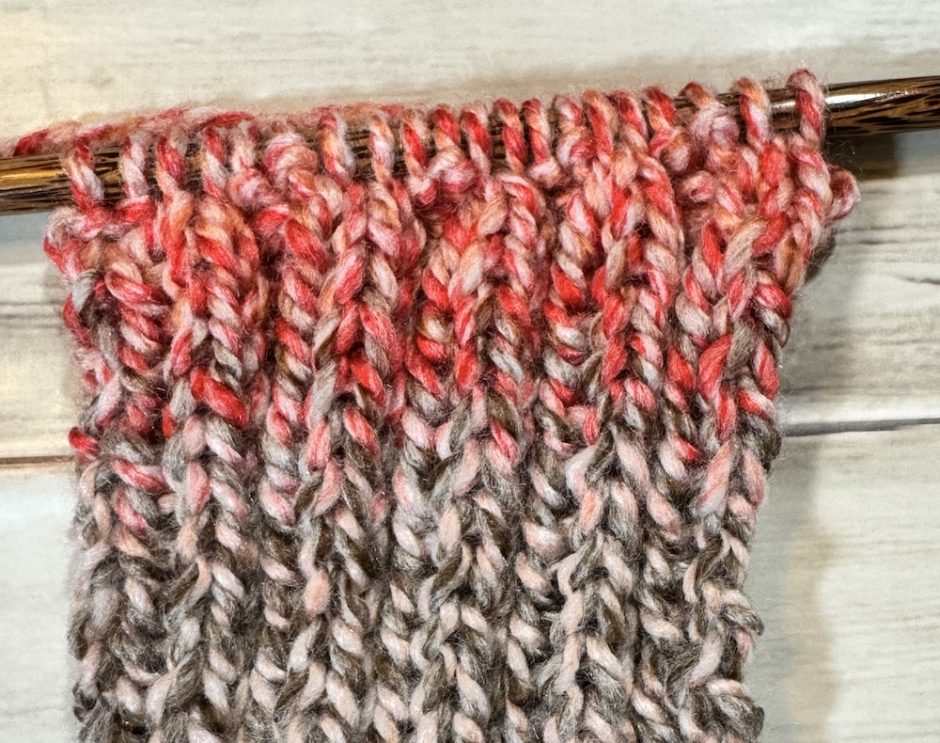
Getting Ready for Ribbing
I had you hold back a row of the stockinette stitch section because you have a choice to make here. The next section is ribbing, or alternating knit and purl stitches in the same row. Ribbing constricts the knit fabric widthwise compared to stockinette stitch.
As you can see on the blue scarf, I didn’t compensate for that, and the ribbed section is noticeably narrower than the stockinette sections around it. Since this is the middle of the scarf and will be the part behind your neck, you might not mind it, but we can add some more knitting skills to this sampler scarf knitting pattern by increasing a few stitches before we start the ribbing and decreasing again after.
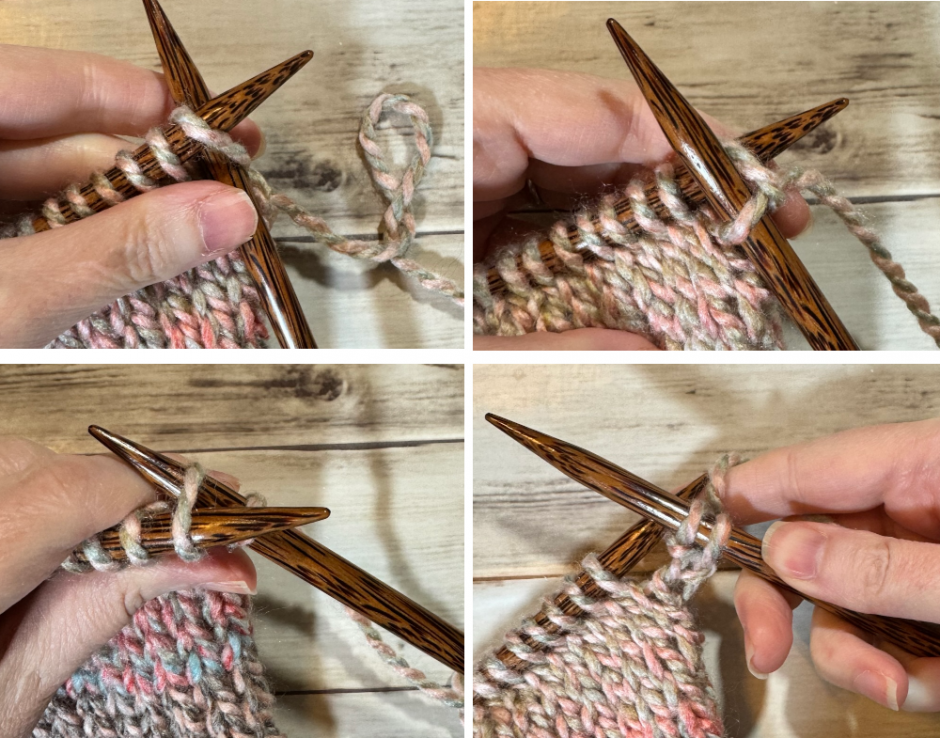
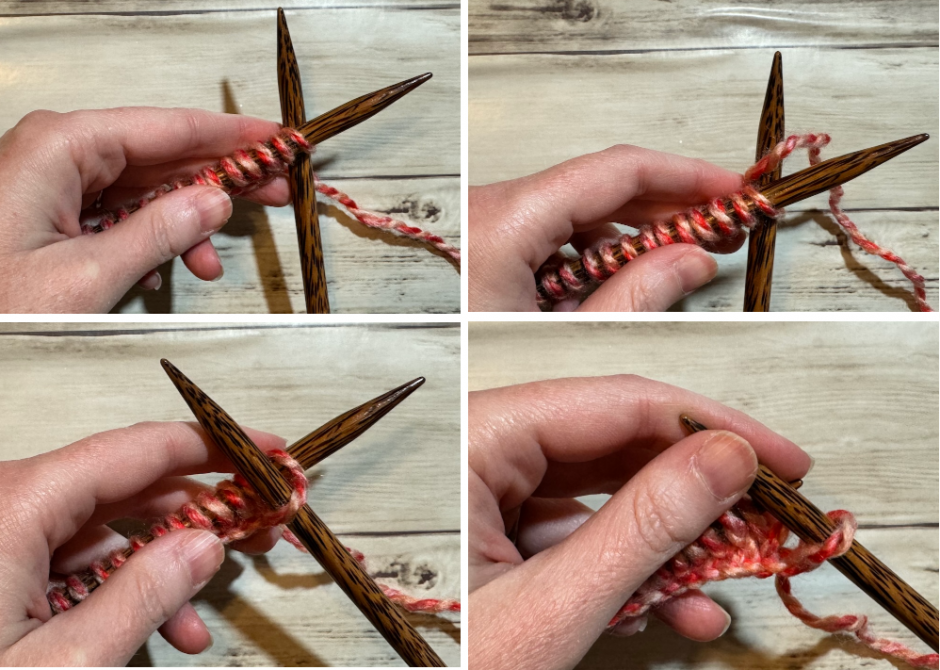
If you want to work the increases, knit in the front and back of the first stitch, then knit 4 stitches normally. Repeat this to the end of the row, then knit in the front and back of the last stitch. You’ll now have 20 stitches.
If you don’t care if the ribbing portion is narrower, just knit one more row and you’ll be ready to go.
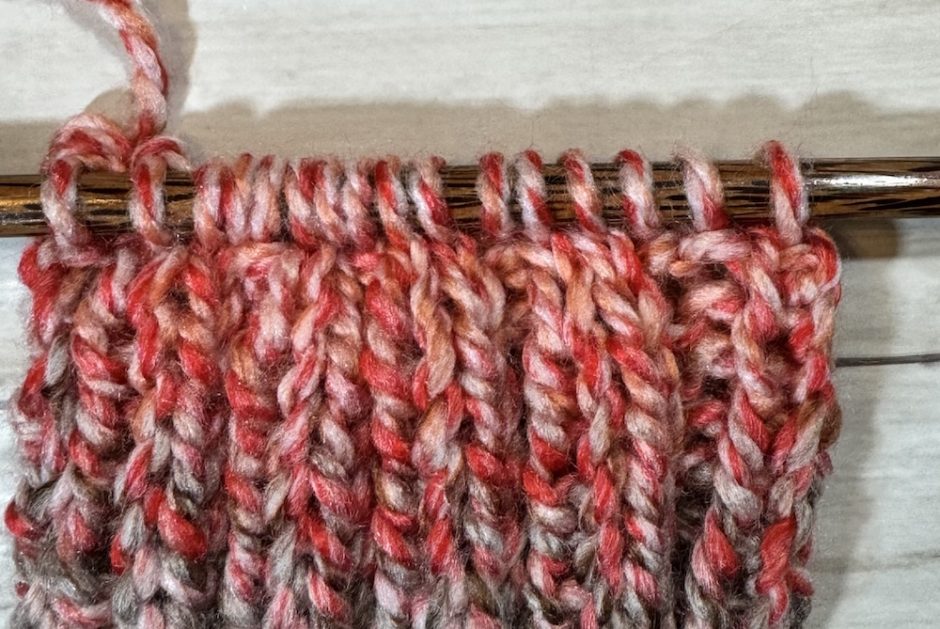
Ribbing Section
Regardless of if you increased, the pattern for the ribbing is the same.
Knit the first 2 stitches.
Purl the next 2 stitches. To switch between knitting and purling in the same row, bring your working yarn to the front in between the stitches. Make sure you’re not wrapping it around either needle.
Repeat knitting 2 stitches and purling 2 stitches across the row. You’ll end with a purl 2.
Repeat this row for 8 inches/20 cm for the short scarf, or 24 inches/61 cm for the long scarf.
Focus on Ribbing
If you didn’t add stitches at the end of the stockinette section, you’ll notice that the stitches have drawn in and the scarf is narrower in this section. This aspect of ribbing is what makes it great for the edges of projects, where we want things to stretch (like over a head at the neckline of a sweater) or cling more than other parts of a garment (like the bottom of a hat or the top of a sock).
We don’t need to for this project, but if you wanted to count rows on the ribbing you can count a column of vs just like you did in the stockinette section.
What’s more useful here is looking at the stitches as they appear on the needle. You’ll see that the knit stitches look smooth and the purl stitches have a bump. Understanding the difference makes it easier to know where you are in the pattern.
This is called reading your knitting, and it’s essential for patterns that give you instructions like “knit the knits and purl the purls” because you need to be able to look at the stitch and know what kind it is. Spend some time getting to know the difference and it will boost your knitting confidence.
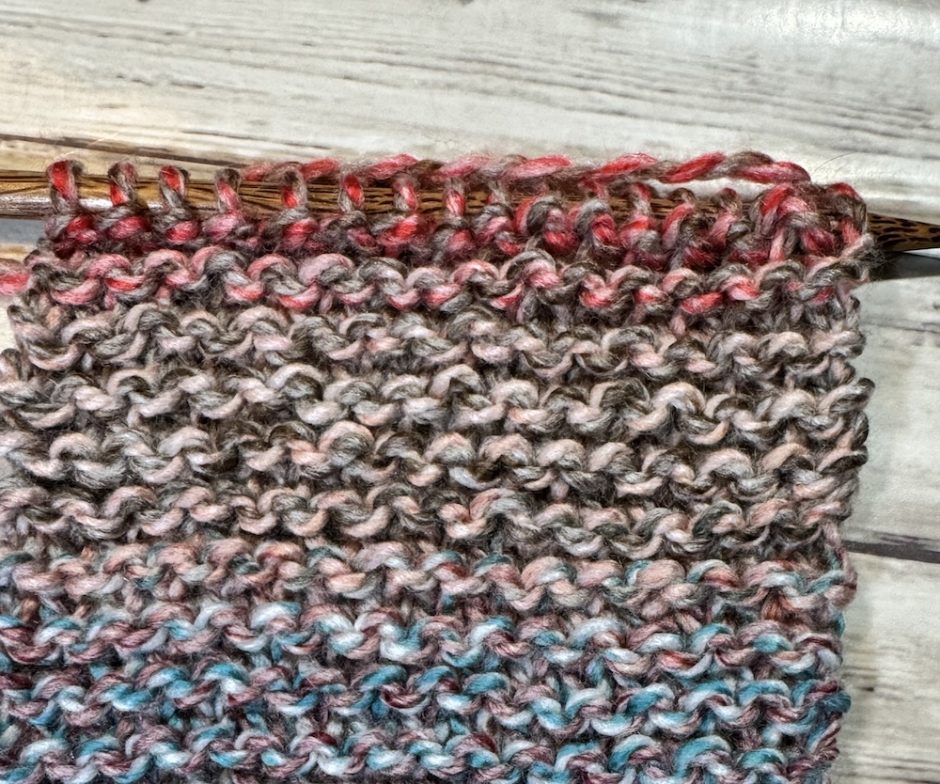
Back to Stockinette
The sampler scarf knitting pattern ends in the opposite way to how it began, with a section of stockinette stitch and a section of garter stitch.

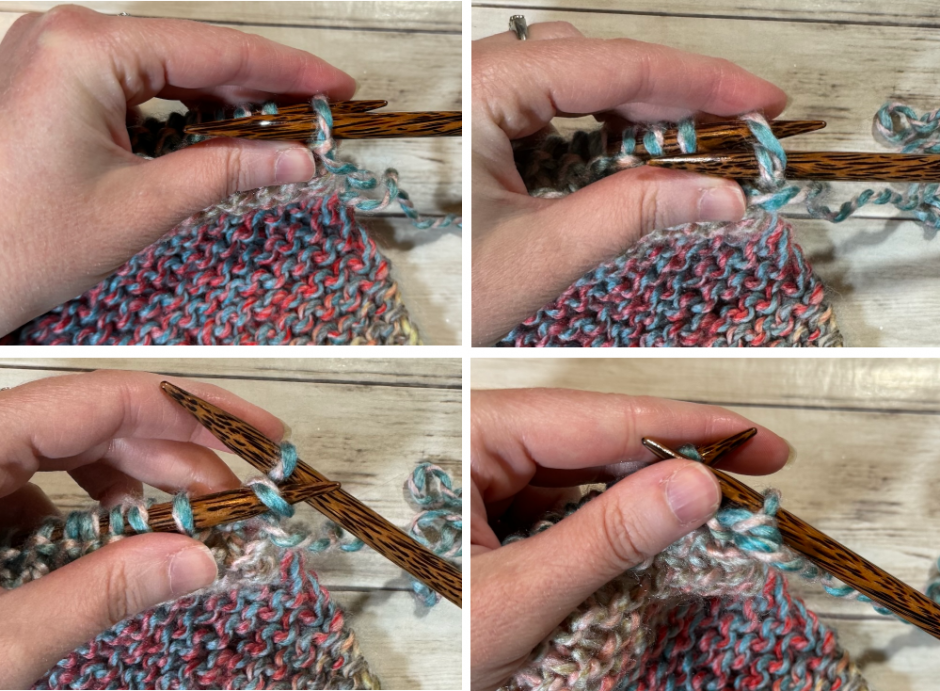
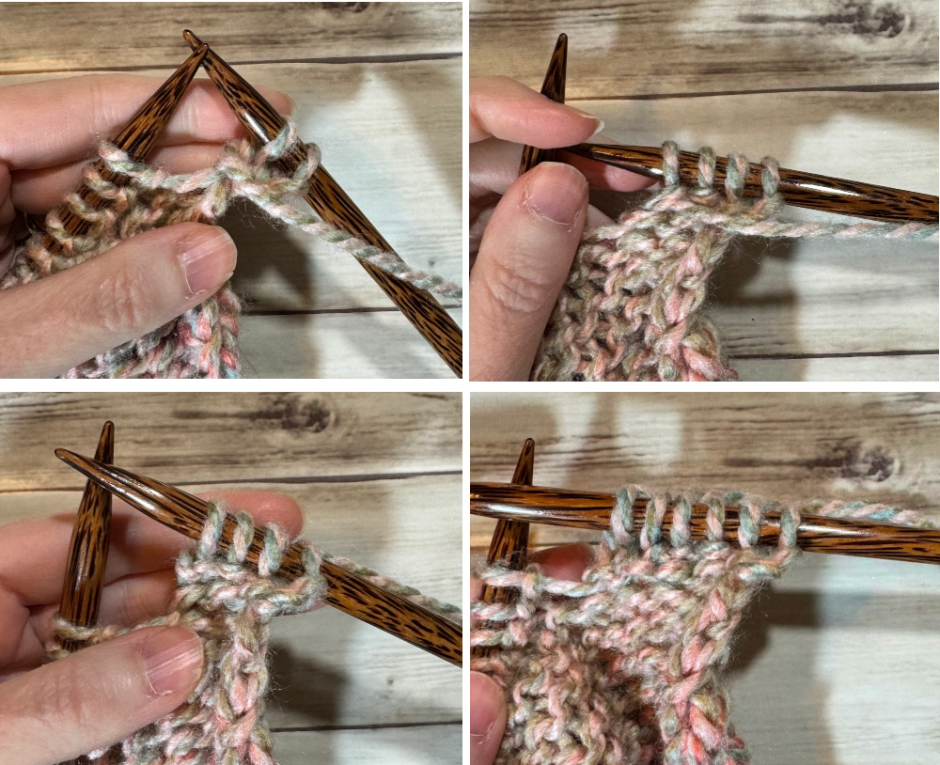
If you increased for the ribbing section, now it’s time to decrease. We’ll start our first knit row with a knit 2 together, then knit 4.
Repeat across, ending with another knit 2 together. You should be back to 16 stitches.
If you haven’t counted your rows on your stockinette stitch section already, or didn’t write it down, go count them again and knit this side to the same number of rows.
Garter Stitch and Finishing
Finally switch back to knitting every row for the same number of rows you worked the first section of the scarf.
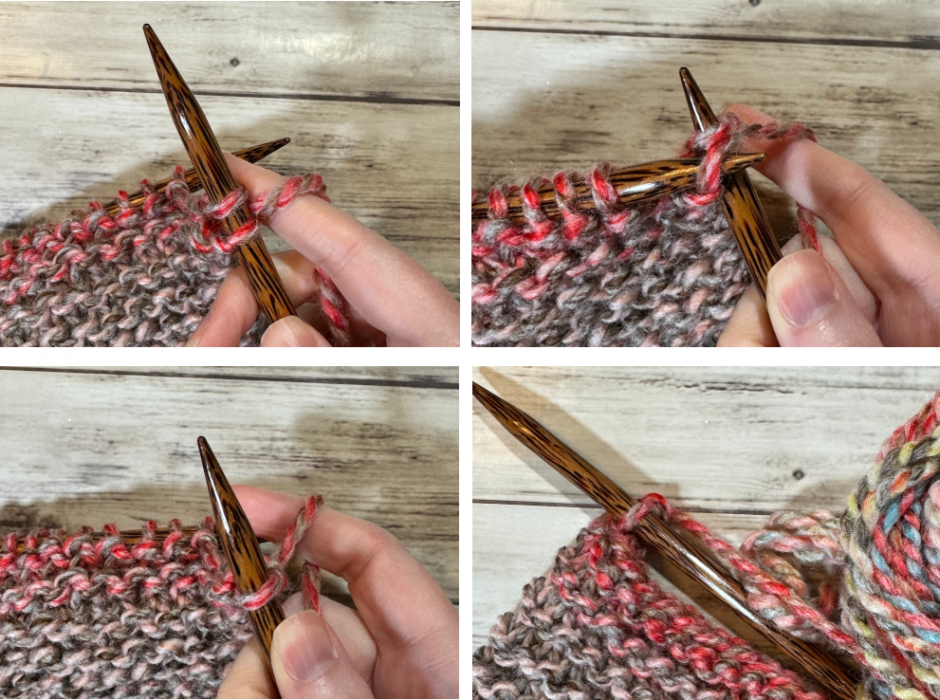
When the knitting is done, bind off your stitches.
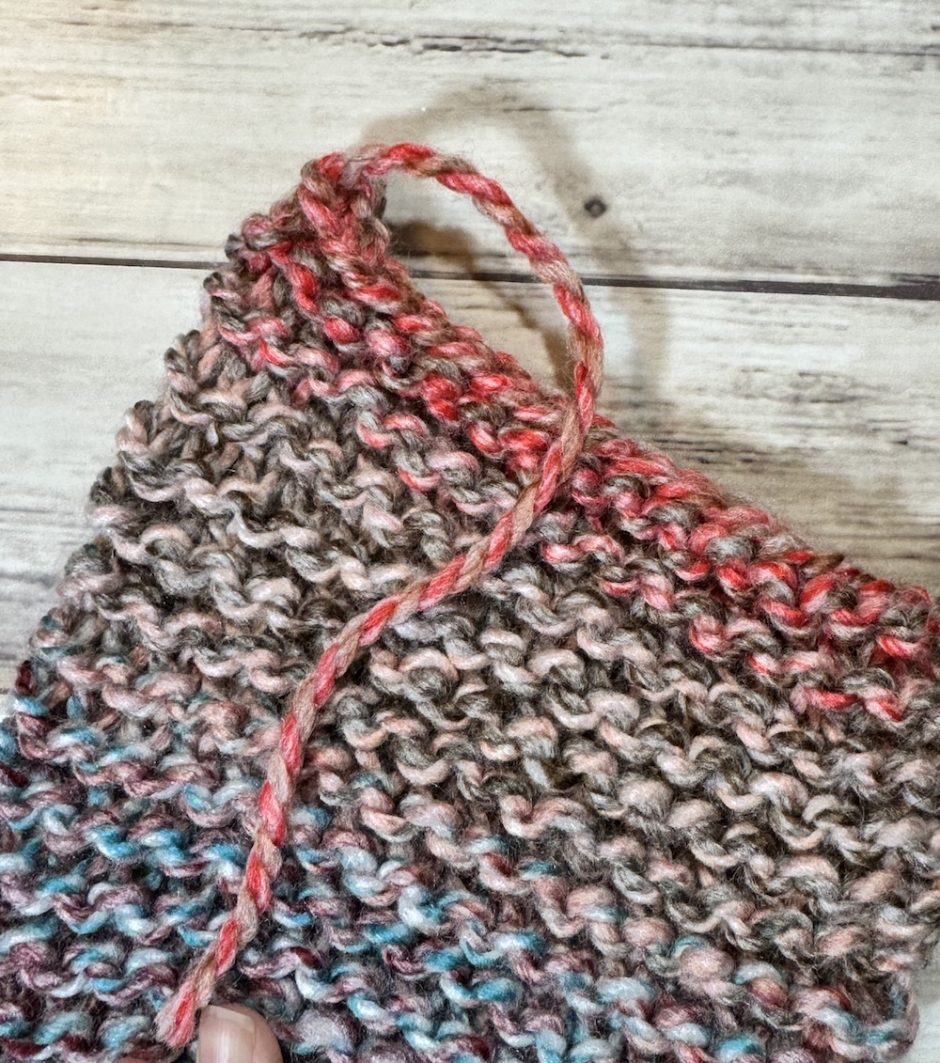
When you’ve bound off the last stitch and have one loop left on your needle, cut the yarn, leaving a tail of about 6 inches. Pull on the loop until it disappears.
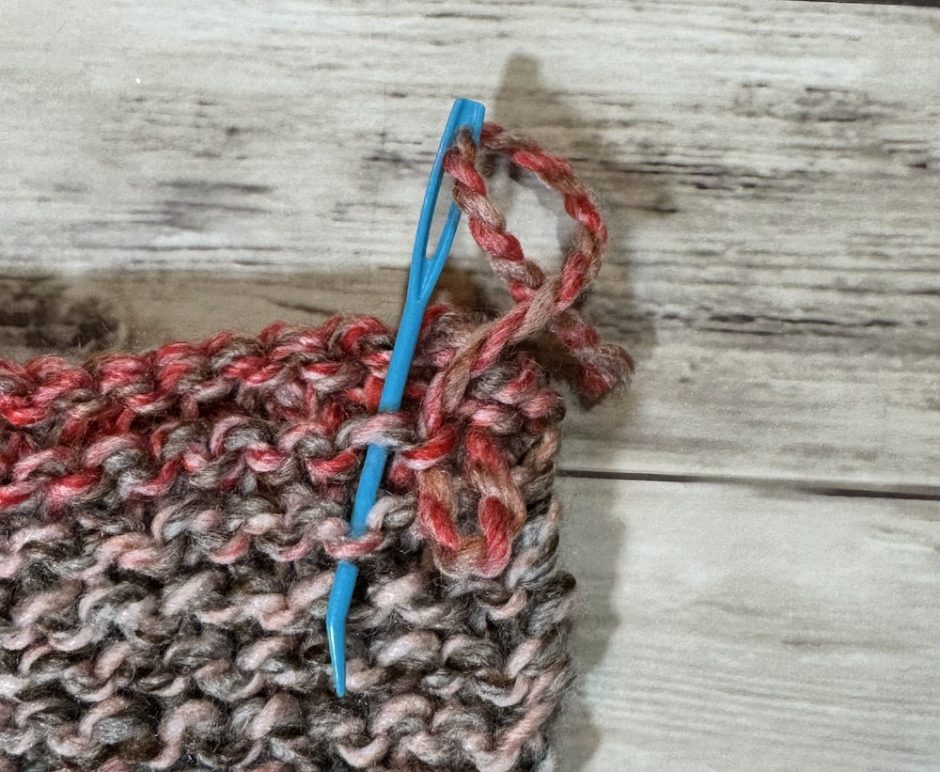
Use your yarn needle to weave the yarn end through a few stitches to secure it, and trim any excess yarn close to the knit fabric as needed (be careful not to cut the knitting). Weave in the end at the cast on edge.
And that’s it! Now you know how to cast on, knit, purl, increase, decrease, switch stitches across a row and bind off!